
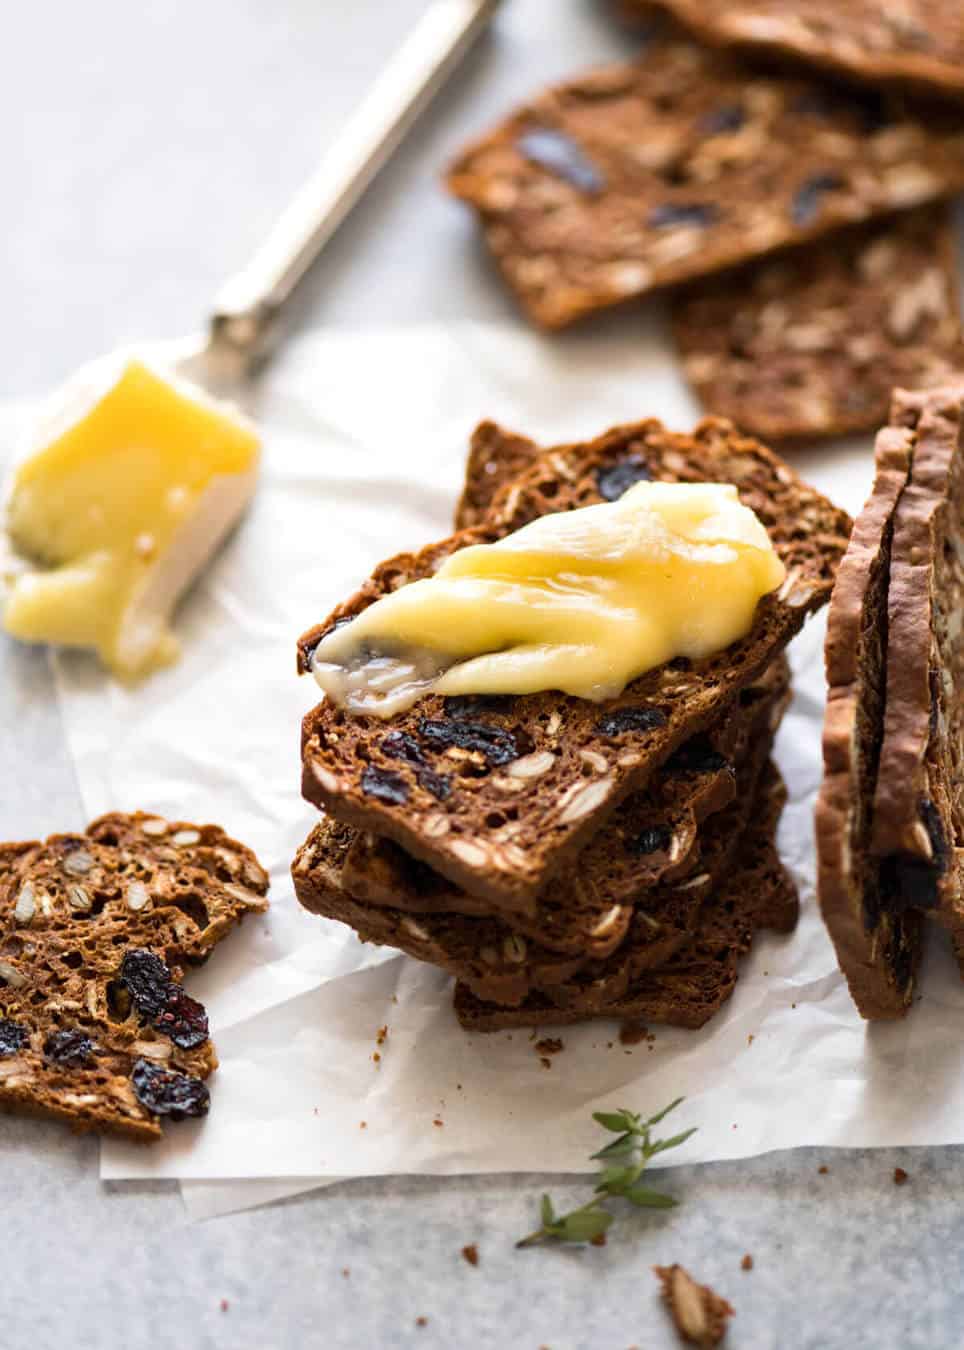
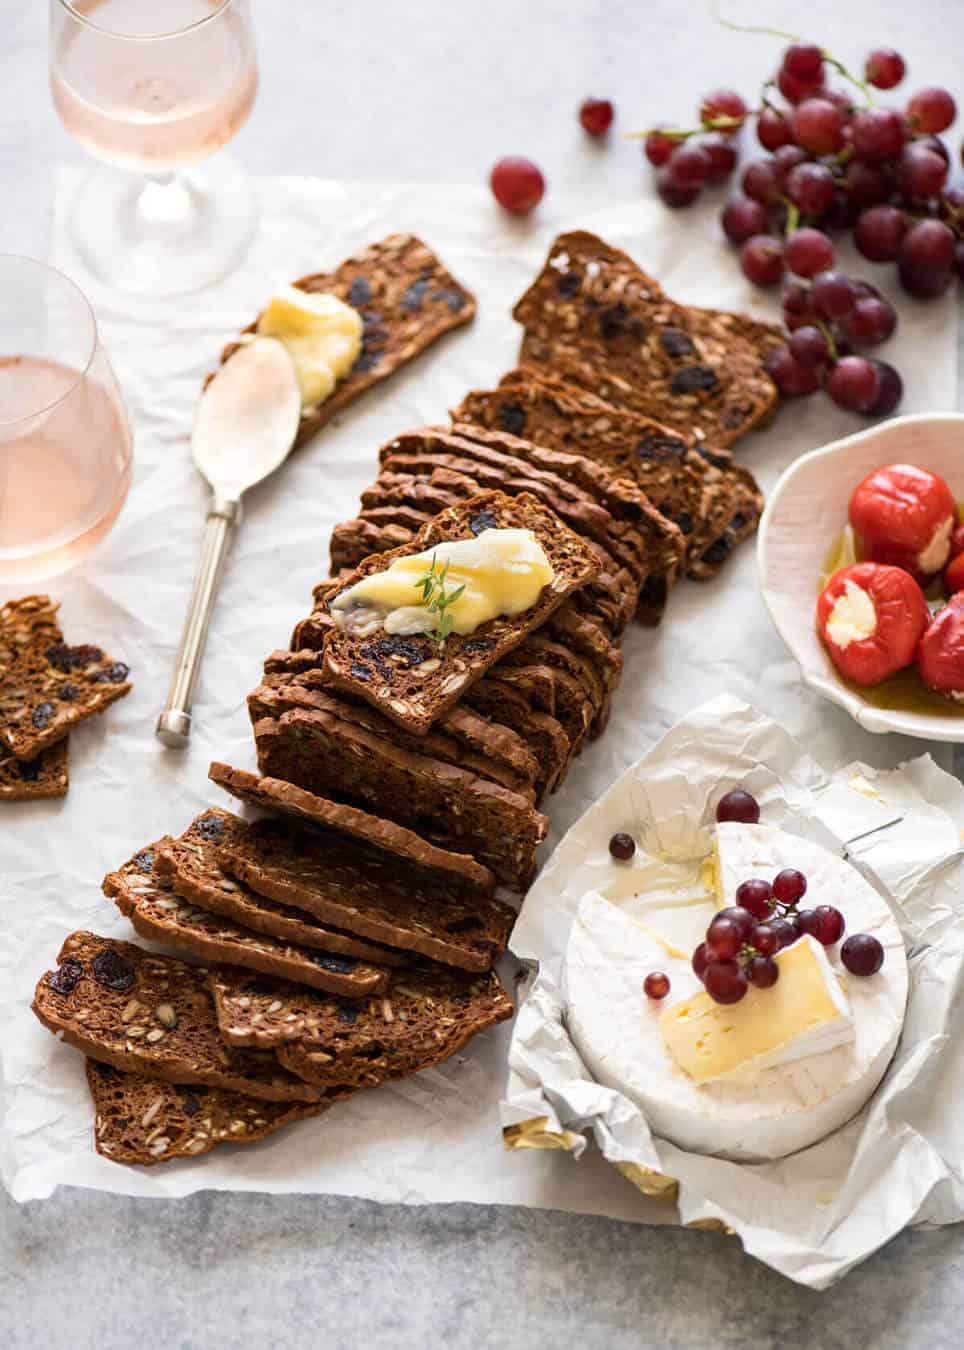
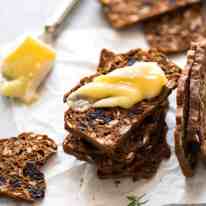
These Homemade Gourmet Crackers are a revelation. A copycat of the gourmet fruit and nut crackers sold at the stores to serve with cheese that I love but are pricey! These are simple to make, keeps for weeks, cost 80% less than store bought and taste so much better, you’ll be amazed (I was!).
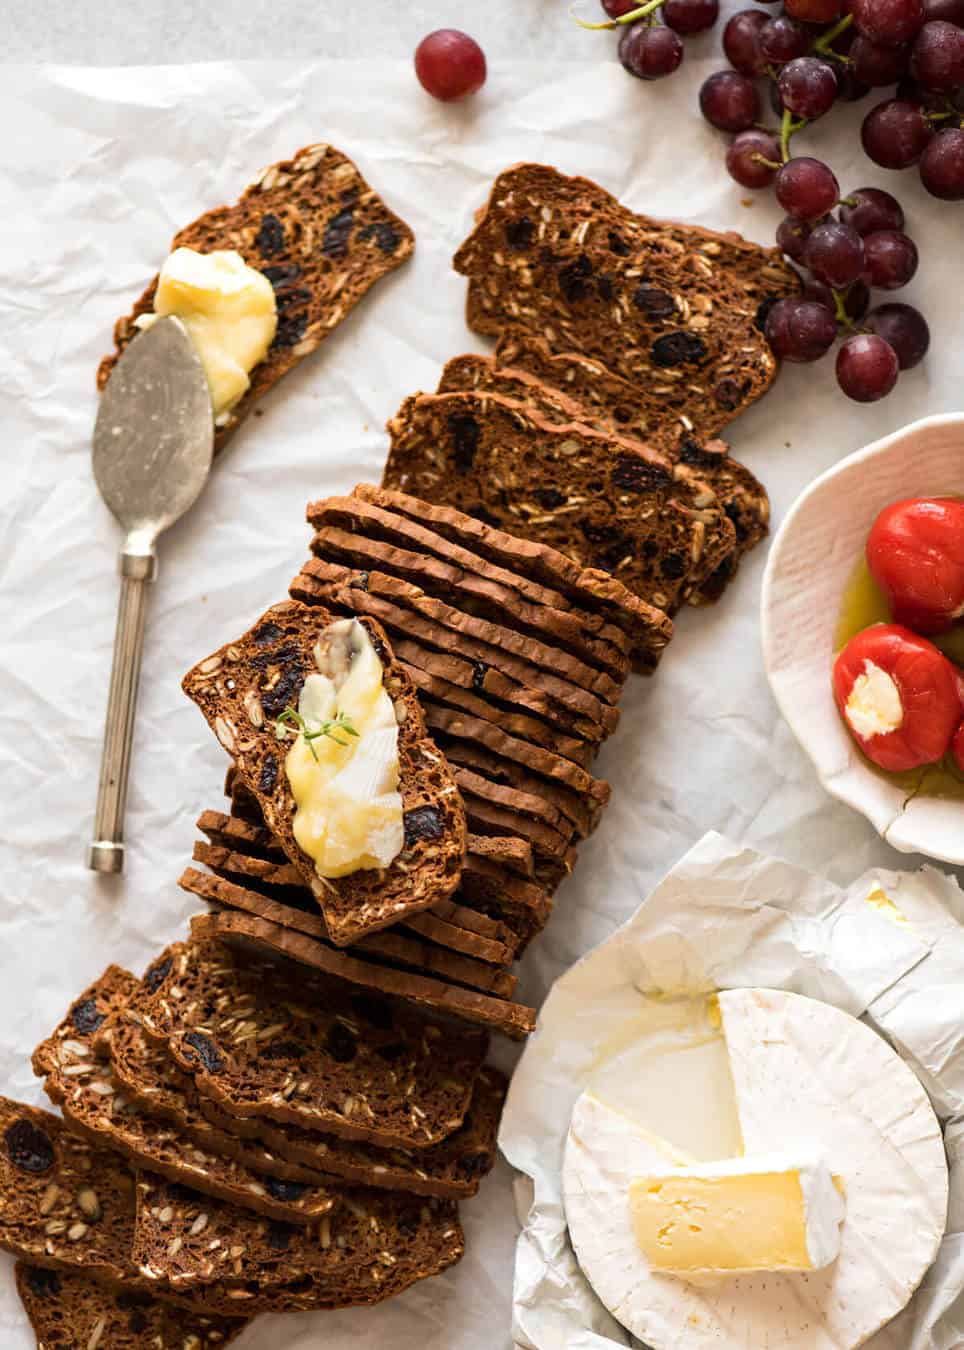
Spectacular with cheeses and spreads, and for gifting!
Stop press!!! Big news – DOZER HAS A BUTTON!!
↑↑↑ For all Dozer lovers out there who just want to skip straight to Dozer and see what cheeky antics he’s up to today, just click on the Dozer button and it will take you straight down to him, then you can come back and read the post!!!
Oh – there is a button to jump to the Recipe too, which I’ve had for a while now, and I also added a button to jump straight down to the Video.
A button for everyone – whatever you’re after! Dozer, recipe video or just the recipe!

OK, enough about the Dozer button. Onto today’s recipe – Homemade Gourmet Crackers!! I am super excited about this one because I’ve had some great feedback from my official taste testing team (aka my mother’s golf friends who descend upon the beach shack for a post-golf lunch and provide very constructive feedback on my recipes).
These crackers are so great, I really wish I had a fantastic story to go with them. But actually, I don’t. Quite simply, gourmet crackers are all the rage nowadays but I just can’t bring myself to pay the rather obscene prices for them. Fellow Aussies may have noticed a certain brand of gourmet crackers prominently placed near the cheese and spreads section of supermarkets like Woolworths and Coles. Crackers that look just like these homemade ones – except they are round – and they cost $6 for 15 pieces. $6!!!!!!!!!!!!!!
I have been known to drop a small fortune on designer shoes a handful of times in my life. However, I cannot bring myself to pay $6 for one packet of gourmet crackers, especially when 1 packet would never suffice for my gatherings, I’d have to get 3 or 4. Can you imagine paying $24 just for the crackers for a cheese board??
Oh wait, I just realised I totally lied. I did buy one packet – for taste testing purposes, to copy them. 😉 I’d been eyeing them off for months, wanting to do a huge cheese board with these gourmet crackers. Then finally the penny dropped – get a packet and copy them.
So that’s what I did.
These are very simple to make. It’s just like mixing up a muffin batter, except it’s baked in a loaf tin. Freeze (to make it super easy to slice thinly), slice, then bake again. It’s like making biscotti (ooooh, haven’t done that yet!!). It’s highly customisable, and brilliant for making ahead because the baked crackers stay crisp for at least 1 month OR you can keep the loaf in the freezer for weeks and weeks, then bake when you want them.

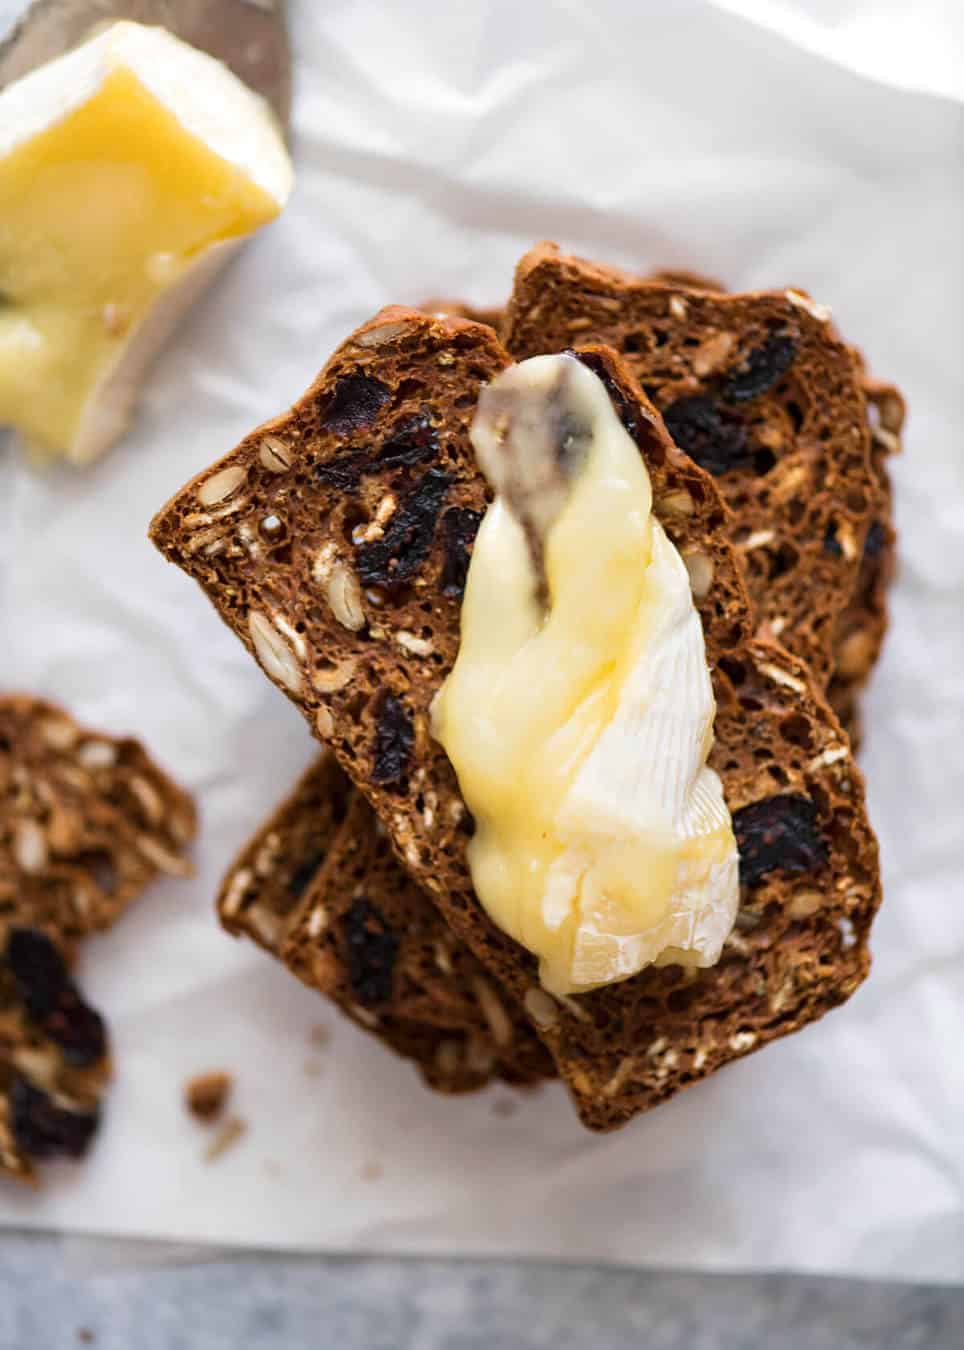
My taste testers agreed 100% that there is no contest when comparing these Homemade Gourmet Crackers to the store bought ones. With homemade, you can actually truly taste the ingredients – the spices, the cranberries, the sunflower seeds. The store bought one has far less flavour. When you taste them one after the other, which we all did, the difference is so “in your face”, it’s quite extraordinary.
If you’re planning a cheeseboard these upcoming holidays, I truly hope you consider these. Your family and friends will be blown away. They really are so simple, customisable, and make ahead – my taste testers were eating crackers I’d made 4 weeks earlier!
Oh – and they cost about 20% of the gourmet crackers that I copied. 🙂 I have a little gathering with friends this weekend, and I’m wondering how many times I will point to the crackers on the cheese board and proudly say “I made those”. I’ll ask my friends to keep count! – Nagi x
More cookie / cracker copycats
Other recipes I’ve created in the past for the same reason as these Byron Bay cookie copycat recipe (ie because I love ’em but they’re expensive!)
-
Byron Bay Cookies Copycat White Chocolate Macadamia Nut Cookies – big, thick, buttery cookies loaded with white chocolate and macadamia nuts. Crisp with a tender melt-in-your-mouth texture, just like Byron Bay Cookies!
-
Muesli Cookies (Breakfast Cookies / Granola Cookies) – copycat of the thick, chunky, chewy muesli cookies sold in cafes across Australia. A healthy breakfast option because it’s like a bowl of oatmeal in cookie form – refined sugar free, low fat, gluten free, keeps you full for ages but it tastes like a sweet cookie!
Hungry for more? Subscribe to my newsletter and follow along on Facebook, Pinterest and Instagram for all of the latest updates.
Homemade Gourmet Crackers
Ingredients
- 1 cup / 250 ml milk (any fat % cow's milk)
- ¼ cup / 50g brown sugar , packed
- ¼ cup plain unsweetened yoghurt (I used Greek)
- ½ cup / 75g plain flour (all purpose)
- ½ cup / 75g whole wheat / wholemeal flour
- ½ cup dried cranberries (or other dried fruit of choice)
- 1 tsp baking soda / bi-carb (or 3 tsp baking powder)
- ½ cup rolled oats (or 1/3 cup more nuts of choice)
- ¼ cup sunflower seeds (or other seeds or nuts of choice)
Spices:
- ½ tsp ground turmeric (can omit)
- ½ tsp cinnamon
- ¼ tsp nutmeg (or All Spice or 1/8 tsp cloves)
- ¼ tsp dried thyme
- 1 tsp dried rosemary (or ½ tsp more thyme)
- ¼ tsp salt
- 1/8 tsp black pepper
Instructions
- Preheat oven to 180C/350F (all oven types). Grease and line a small loaf tin with baking paper (mine is 21 x 11 x 7 cm / 8.5 x 4.5 x 3”) (Note 1).
- Whisk the milk, sugar and yoghurt in a bowl.
- In a separate bowl, add plain flour, wholemeal flour and cranberries. Stir – use fingers to break up cranberries if required.
- Add remaining ingredients, including Spices, plus the milk mixture. It should be a thick batter, like muffin batter (note: batter in video looks slightly thicker because it was standing for a couple of minutes, doesn't affect outcome).
- Scrape/pour into tin. Bake for 25 minutes or until a skewer inserted into the middle comes out clean.
- Cool on rack, then wrap in cling wrap and freeze for at least 2 hours, up to 3 months. (Note 2)
- Unwrap loaf and allow to thaw partially so the outside is not rock hard frozen (around 20 minutes).
- Preheat oven to 120C/250F (all oven types). Place one shelf in the middle, and another shelf beneath it.
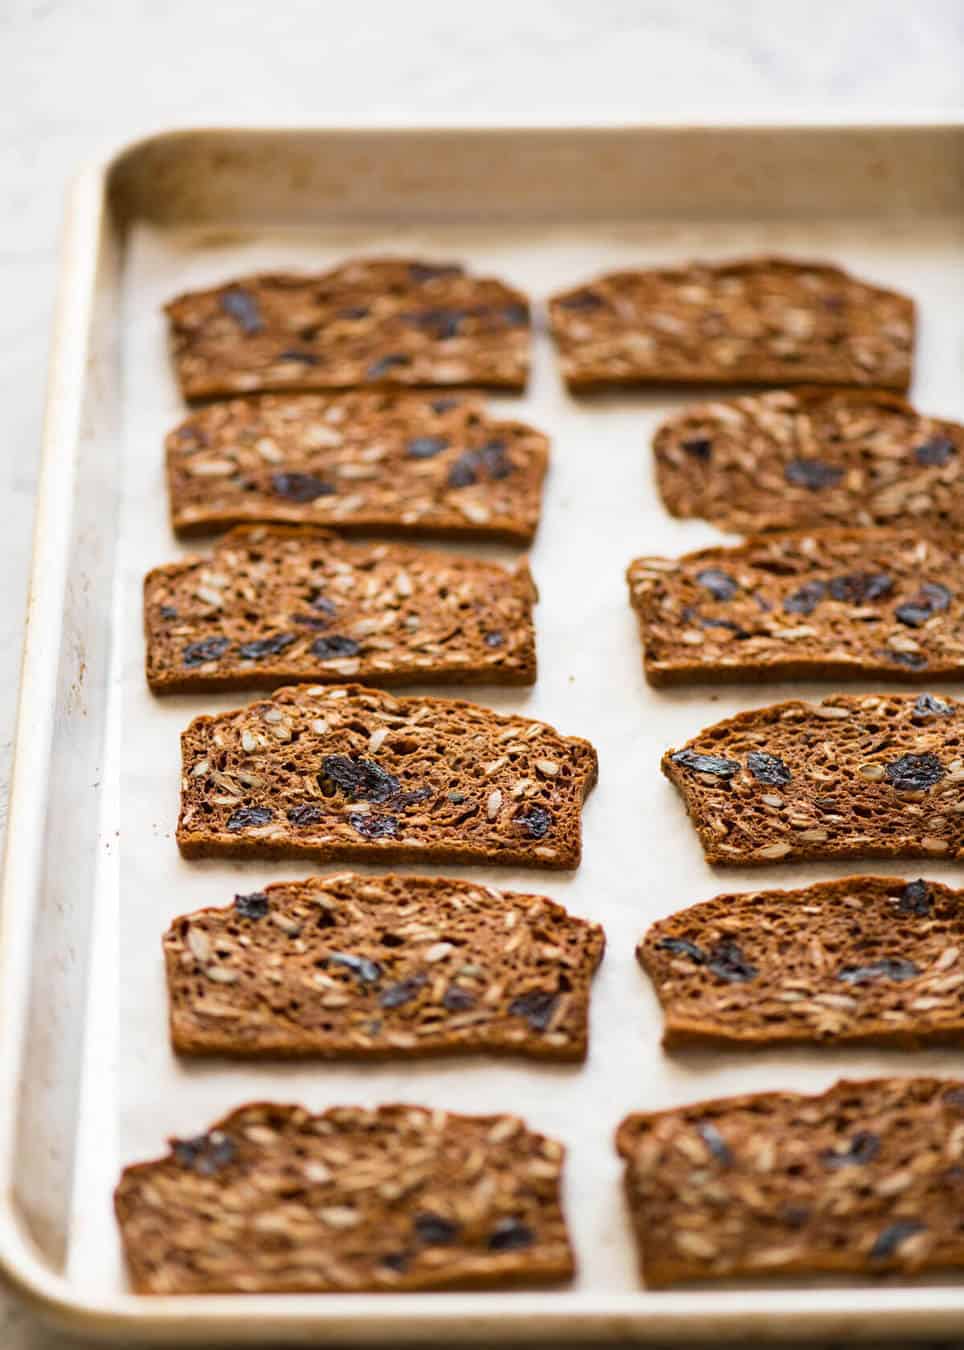
- Use a serrated bread knife to slice thinly – around 2 mm / 1/12” thick (see video). Place biscuits on 2 large baking trays, you can squeeze them in as they won’t expand or stick.
- Bake for 50 minutes or until they are a light brown, swapping trays halfway.
- Leave biscuits on tray to cool – they will harden so they snap when you break them. (Note 3)
- Store in an airtight container for 4 weeks (probably ok for longer, I’ve only done 4 weeks). Brilliant served with creamy cheeses like brie, camembert, but soft, creamy blue cheeses is the ultimate pairing!
Recipe Notes:
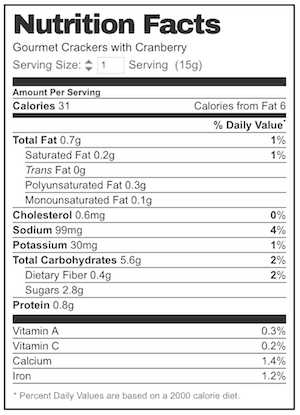
Nutrition Information:
WATCH HOW TO MAKE IT
LIFE OF DOZER
Dozer smacking his lips over MY lunch today – a very spicy Asian Noodle Salad. No spicy salad for you Dozer! Too painful for you!

These are easy and absolutely delicious. Nagi, I’m thinking of making a selection for school teachers’ Christmas gifts. In addition to the original, we’ll try a chocolate version (with cocoa and macadamia), and a Christmas version (gingerbread spices). What else would you suggest in those mixes? I had a dream of the chocolate version and thought I’d try it 😀
You are actually slicing them much thicker than stated! If you really sliced them 1/12th inch… you’d get 96 crackers! Not 40! So you are actually slicing these at 1/5 inch… which is a more reasonable thickness! This would be 5mm… NOT 2mm! I have made this recipe but have not sliced and rebaked yet. I used half buttermilk for the milk… just my cook’s instinct!
I wondered about that too but could hear Nagi’s giggle … the idea is to keep the slices thin! Thin as you can without resulting in burnt crackers Too thick and you’d break your teeth.
Wonderful just as written. Make them the day before your get together. They are even better the second day. I made mine in two mini loaf pans. Used one right away and froze the other one for later. Makes a 2.75 x 1.75 cracker. Perfect!
Just making these crackers for the fourth time- and we love them in our household. Thanks Nagi! (I always make a double batch and leave one loaf in the freezer for a rainy day) 👍🏻
I have made these many times and love them,thank you for the recipe I’m addicted to these healthy little crackers.
I substituted 1/4 cup apple sauce for the yoghurt (mostly because I didn’t have any yoghurt or pumpkin puree), and they turned out beautifully!
I tried using a silicone mini loaf pan (6 small loaf shapes) from KMart. I adjusted the first bake time by 20 to 25 minutes until the skewer came out clean.
The smaller loaves cut into slices that were well sized for what I wanted.
That’s a great suggestion! I have a similar pan I use for sticky date puddings but this is another great use. I will be able to defend my need for excessive cookware!! Lol
Made these today with some modifications because my Amazon order didn’t come in yet.. I used all white KAF all purpose flour and they were amazing. I also added chia seeds and doubled the rosemary using fresh instead of dried.. I added pepitas on top. They look exactly like the photo. The Greek yogurt is much more convenient than buttermilk. The spices add a savory note that veer the taste toward cracker and away from breakfast loaf. TY for this recipe.
Super yummy and easy. I had put this recipe in the “too hard” basket for almost a year. The funny thing is it’s not hard at all and they are 10 x better than the store bought crackers. I didn’t have greek yogurt so used pumpkin purée (baked pumpkin and then mashed it) per the original recipe. Will make again and again
These were great. My husband almost didn’t believe that they weren’t store bought. Thanks for another great recipe. PS. I didn’t bother freezing before cutting. I just waited until it was cool enough to slice and I didn’t have any issues.
Hi Nagi!
I’ve been searching for a recipe for these delish artisan crackers but gluten & sugar free. Since I have yet to find one I converted the pancakes I’ve been making with buckwheat flour & almond meal, chia seeds & craisins. I took notes from your recipe & the flavours I love, I added chopped Pistachios & cracked pepper & put the mix in a small rectangle tin & am hoping I can do a second bake into something better than the expensive bought version with more flavours & less additives without the sugar….. fingers crossed🤞😅
I make these all the time and change the nut, dried fruit and seed combinations. I use a mini loaf pan to bake them. The recipe makes five loaves and the crackers are the same size as what you buy in the grocery store. These have gone over really well every single time I’ve put them on a charcuterie board. Some prefer these to the grocery store crackers!
These crackers are super delicious, however when I slice and bake them they seem to warp and go wavy on the edges when cooking so don’t turn out to be a flat cracker. Any ideas why this might be happening?
Likely you’ve sliced them too thin. These are actually sliced at 5 to the inch… NOT 12 as stated in the recipe. Thus 40 slices from an 8” loaf.
I made these crackers for a women’s luncheon. They were amazed at how good these crackers were. I got rave reviews for this recipe.
Thank you!
This is an amazing cracker. I needed something to go with my cheese <3 and have been eyeing this recipe for a while.
I've gone out on a limb and made it with a GF/paleo flour mix made with sesame flour, tapioca starch and psyllium flour. Turned out wonderful. Totally a keeper! Thank you Nagi!
ps: the slicing part was quite a workout though! Next time I'll just try chilling the loaf, not freezing it…
Thanks for that feedback Sara – very helpful for the g/f folks out there!! N x
I really love the flavors in these crackers but I’m wondering if I cooked them for too long as they seem very dry.I cooked them at 120 C, fan bake, for 50 mins. Amy tips for knowing when to take them out please?
That’s the correct timing Jo. Maybe your oven runs a bit hotter than mine. I would try taking them out 5 mins earlier or reducing the temp by 10 degrees and see if that makes a difference! N x
Hello Nagi!
This cracker recipe is THE BEST! I have made these gourmet crackers twice. The first batch was made using pecans, coconut, dates and fennel seeds. The second time I used pumpkin seeds, chopped apricots and fennel seeds. The second time I used criss-cross strips of buttered parchment paper in 5 well buttered jam jars (250 ml straight side).
I am going to use this recipe to make small cookies. The flavour is out of this world!
Thank you so very much!
Thanks for that feedback Laura and I am glad you like them so much! N x
Have not made the recipe, but it gave me the idea to make crackers using a dense store bought cranberry nut bread. Turned out great! I will try the recipe someday….
That is a brilliant idea. Not entirely home made, and that is ok. Love it!
I’ve made many batches of this recipe and love them. Lately though I have been having trouble with large air bubbles in the loaf. Do you have any suggestions. Thanks
Try banging the loaf pan on the benchtop a few times before you bake them Jen! N x
Hi again Nagi, I tried banging the tin but that didn’t help so recently I reduced the amount of Baking Soda and it solved the problem, no more giant holes. Maybe it’s something to do with NZ flour.
Great recipe, and I’ve made it with gluten free flour and a bit less liquid. Love them.
Yay! I was hoping someone had tried them gluten free and had success!
That’s good to know, Jill! N x