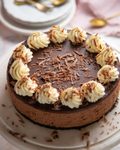
Rich Chocolate Cheesecake
Recipe video above. A decadent chocolate cheesecake with a chocolate Oreo base, a dreamy creamy chocolate filling, a layer of chocolate ganache and finished with whipped cream and chocolate shavings. And if that all sounds amazing to you, wait for it... it's NO BAKE and NO GELATINE! Chocolate sets the filling for us, how good is that!It's intensely chocolatey and almost indecently luxurious but has just enough cheesecake tang to balance the richness. Slices beautifully yet melts in your mouth! IMPORTANT: Has to be made with 70% cocoa chocolate in order to set properly. Anything less and it will set softer. Gluten-free - See Note 9.
Servings: 12 - 16
Calories: 540cal
Ingredients
Base:
- 140g / 4.9oz Oreo cookies (14 oreos, 1 standard Australian sleeve, Note 1)
- 50g / 3 tbsp unsalted butter , melted
Chocolate cheesecake filling:
- 200g / 6.5 oz 70% cocoa chocolate , pretty finely chopped (Note 2)
- 2 tbsp cocoa powder , no need to sift
- 2 1/2 tbsp boiling hot water , for blooming cocoa
- 1 cup thickened cream / heavy cream or a full-fat whipping cream, fridge cold
- 500g / 1 lb cream cheese , softened (block form, Note 3)
- 1 cup caster sugar / superfine sugar (Note 4)
- 1 tsp vanilla extract
Ganache layer
- 1/2 cup thickened cream / heavy cream , or pure cream 35 - 40% fat (Note 5)
- 75 g / 2.7 oz 70% cocoa chocolate finely chopped even if using buttons, callets or chips (Note 2)
Whipped cream piping
- 1 cup thickened cream / heavy cream , fridge cold (for whipping)
- 1 tbsp caster sugar / superfine sugar
- 1/4 tsp vanilla extract
Chocolate shavings (optional)
- Any milk chocolate bar , or leftover 70% or dark chocolate, shaved using a vegetable peeler (Note 2)
Instructions
- Inverted pan base - Flip the base of a 20cm / 8" springform pan upside down – this makes it easier to remove the finished cheesecake without the lip in the way. Very lightly butter the pan base, then press on a square sheet of baking paper. Clip the pan sides onto the base, letting the excess paper stick out the sides (for easy removal later).
- Line with high sides - Butter and line the pan sides with more baking paper, making them about 1cm / 0.4" higher than the rim. (Note 6)
Oreo biscuit base:
- Blitz cookies - Roughly break up Oreos with hands and place in food processor. Blitz until they become fine crumbs. Add melted butter, then blitz again until combined.
- Press into pan - Transfer crumbs into prepared pan, pressing evenly and firmly on to the base only (I use the underside of a straight-sided, flat-bottomed cup measure to do this).
Cheesecake filling preparation:
- Melt chocolate - Put the chopped chocolate into a heatproof bowl and microwave in 20 second increments, stirring in between, until melted and smooth. Set aside to cool for 5 minutes so it is lukewarm but still fluid. If it's hot, it will melt the whipped cream and deflate the filling.
- Bloom cocoa - Whisk the cocoa and the hot water until smooth. This makes the flavour of the cocoa bloom! Set aside.
Make the cheesecake filling:
- Whip the cream until stiff peaks form (2 - 3 minutes on high). Goal: upright Santa hats, not floppy elf hats!
- Whip cream cheese - In a separate large bowl (no need to clean the beaters), beat the cream cheese and sugar for 2 minutes on high until fluffy and smooth.
- Add vanilla and beat just to mix it through.
- Make it chocolate! Add melted chocolate and bloomed cocoa, beat until it is mixed through, stopping to scrape down the sides of the bowl as needed.
- Fold/beat in cream - Add one third of the whipped cream to the cream cheese mixture and beat it through just until combined. Then add the rest of the cream and use the beater to mix it in until you can no longer see streaks of cream.
- Pour into cake pan - Pour the mixture onto the Oreo crust base and smooth the surface.
- Fridge 6 hours & ganache - Transfer to the fridge for at least 2 hours. Then pour over the ganache (directions below) and spread evenly over the surface (rotate pan to spread). Then refrigerate for another 6 hours+ to let the cheesecake fully set. (Note 7)
Decorating
- Remove cheesecake - Release the sides of the springform pan. Use the paper to slide the cheesecake off the base onto a serving platter. Peel the paper off the sides, then slide the paper out from under the cake.
- Whip cream - Place the cream, sugar and vanilla in a bowl. Beat on high for 2 minutes until softly whipped. (See here for make-ahead stabilised whipped cream option - Note 8). Then pipe swirls around the border and sprinkle all over with shaved chocolate, if using.
- Serve - Cut the cheesecake into slices and serve, fridge cold! An extra dollop of whipped cream on the side would never go astray.
Ganache
- Heat cream until hot but not boiling. Pour over finely chopped chocolate, leave 5 min, stir until smooth. Bang to remove bubbles. Pour over cheesecake.
Notes
1. Oreo cookies – You can also use plain chocolate biscuits instead, such as Arnott's Chocolate Ripple, but add 1 tbsp / 15g of butter. This is because Oreo cookies have a filling which is partly what helps bond the crust.
2. Chocolate - The cheesecake filling needs 70% cocoa chocolate to set firmly enough for neat slices. Regular dark chocolate (US: semi-sweet, typically 40 - 45%) sets softer, almost like chocolate mousse. You can use it, but it'll only just hold its shape when sliced. The texture is creamy though - almost like chocolate mousse!
Ganache layer - 70% chocolate gives a richer flavour, and you'll have enough from the 2 blocks needed for the filling (Australian blocks are typically 160 - 180g). But regular dark/semi-sweet chocolate works too, though I'd increase to 100g/3.5 oz (2/3 cup, chopped). Even if using callets, chips or melts, finely chop them so they melt properly in the hot cream.
Shavings - Easiest to do with milk chocolate because it's softer so shaves easier, but feel free to use any chocolate!
3. Cream cheese – You must use BLOCK cream cheese which is firmer than the tub form, which is designed to be spreadable and won't set properly. Low fat cream cheese also will not work here.
Tub cream cheese - If you can only get cream cheese in tubs, that's fine, but alter the recipe as follows: leave out the cream. Beat the cream cheese for an extra 1 1/2 minutes on high to make it extra fluffy. Proceed with recipe as written (but without the whipped cream folding part). The cheesecake will be slightly darker, a bit lower in height and the filling is a bit more chocolate-decadent. It slices perfectly. In fact, it was so good, I almost flipped to this as the base recipe. :)
4. Caster sugar (superfine sugar) is best as it dissolves more easily. Regular sugar (granulated sugar) works too, but rub a little mixture between your fingers after beating with the cream cheese. If gritty, keep beating until dissolved.
5. Cream for ganache - The cream needs to be 30 - 40% fat in order for the ganache to thicken and set to the right consistency. Low fat cream won't work (the ganache stays runny), and double cream (45%+ fat) will set too thick.
6. Lining cake pan - Make the side lining about 1cm/0.4" higher than the rim to contain the ganache as the cheesecake will come right up to the top of the rim, because inverting the base raises it by about 1cm/0.4". My pan is 20cm/8" wide and 6.5cm/2.6" deep.
7. Fridge time - The cheesecake needs a total of 8 hours and the ganache needs 1 hour in the fridge to set before cutting So you can pour the ganache on anytime after the cheesecake has been in the fridge for 2 hours (to let the surface set sufficiently) and 1 hour prior to serving.
8. Stabilised whipped cream holds its form and doesn't deflate or weep like regular cream, so you can decorate up to 2 days ahead. See here for how to stabilise whipped cream, easiest is to buy McKenzie's whipped cream stabiliser, it's a powder, just add to cream and whip.
9. Gluten-free - Use gluten free chocolate biscuits, and make sure the chocolate you use is gluten-free (chocolate is naturally gluten-free but commercial chocolate may include gluten-containing ingredients or may have cross-contact with gluten during manufacturing).
Leftovers will keep for 5 days though the base is not as crisp on day 3 and beyond. Also see note above about stabilised whipped cream for making ahead. Not suitable for freezing.
Nutrition per serving, assuming 12 slices and including the cream.

Nutrition
Calories: 540cal | Carbohydrates: 37g | Protein: 6g | Fat: 43g | Saturated Fat: 25g | Polyunsaturated Fat: 2g | Monounsaturated Fat: 12g | Trans Fat: 0.2g | Cholesterol: 103mg | Sodium: 210mg | Potassium: 139mg | Fiber: 2g | Sugar: 29g | Vitamin A: 1341IU | Vitamin C: 0.3mg | Calcium: 75mg | Iron: 2mg