
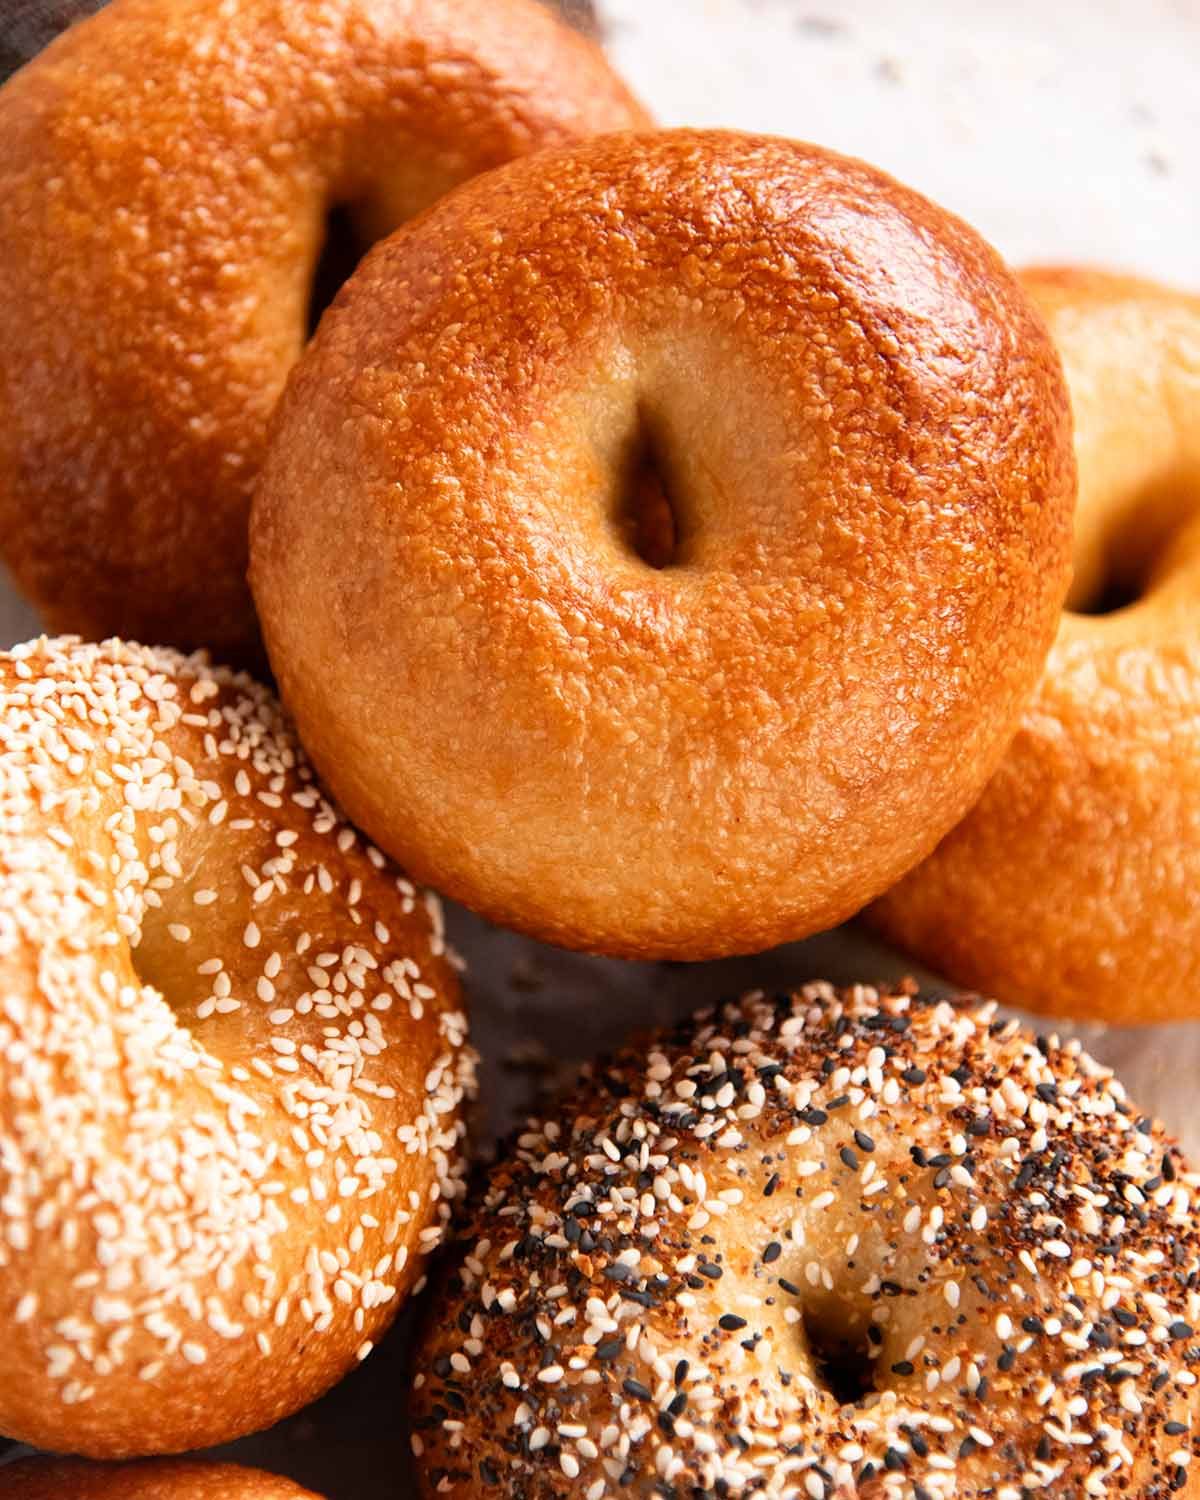
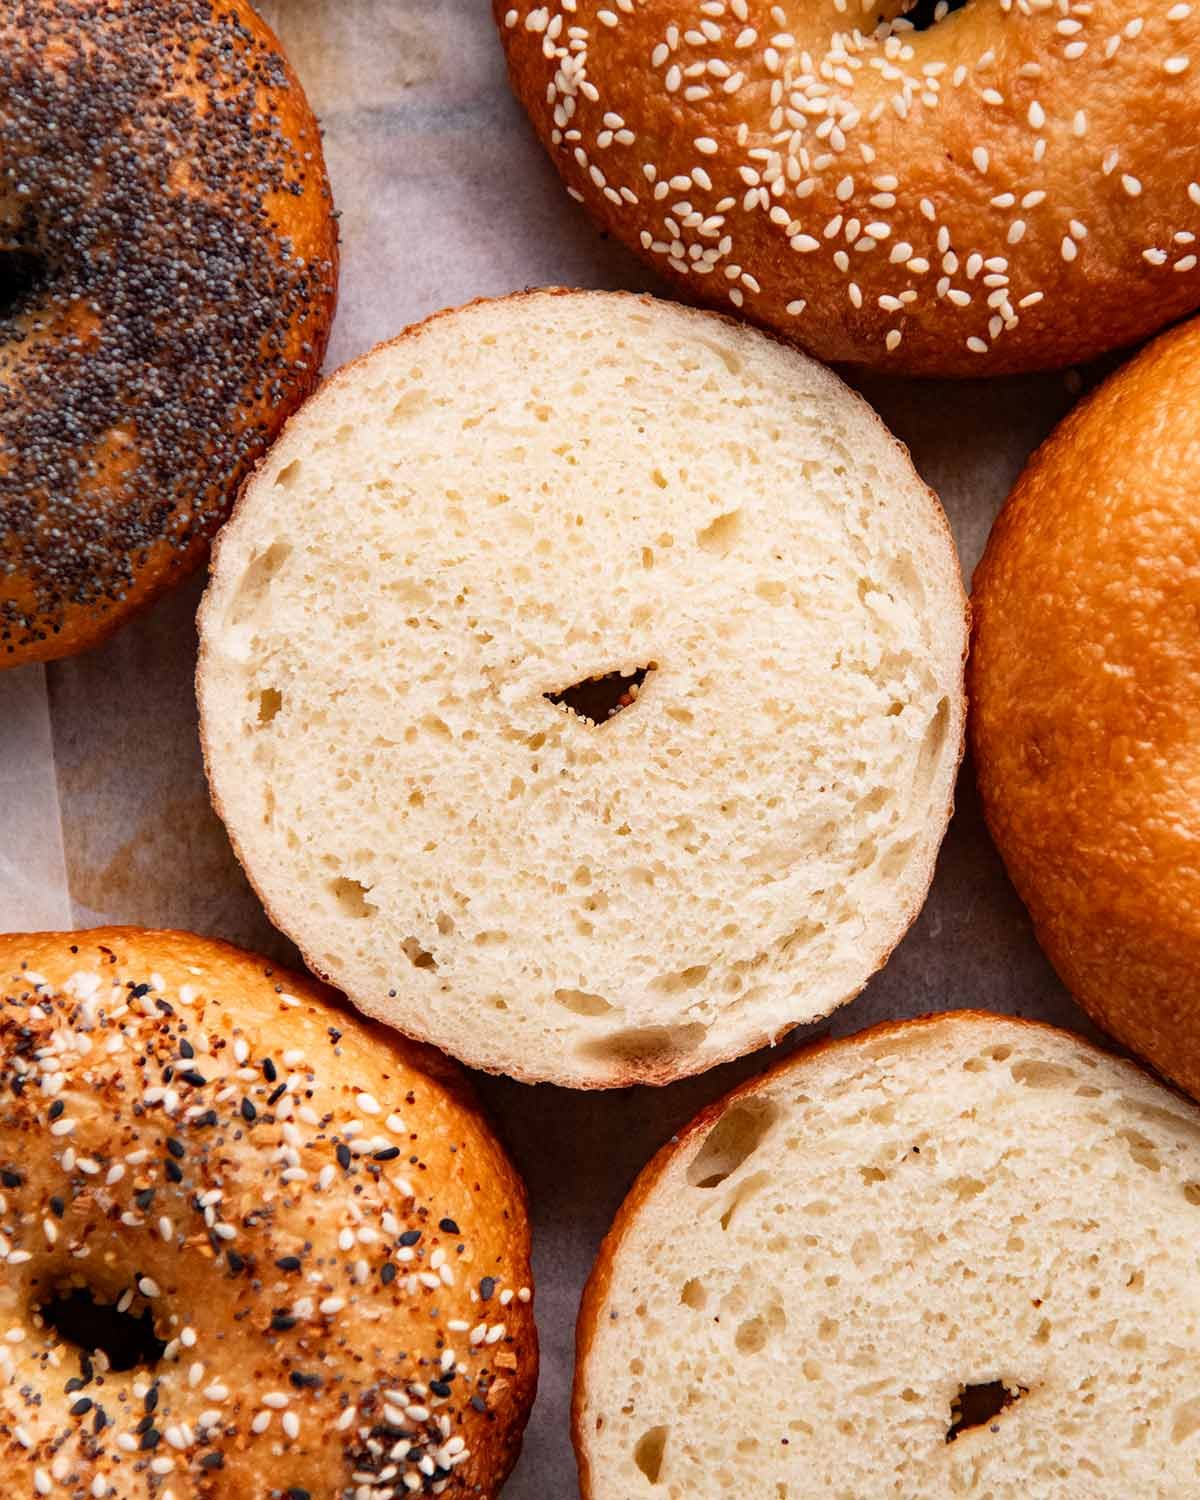
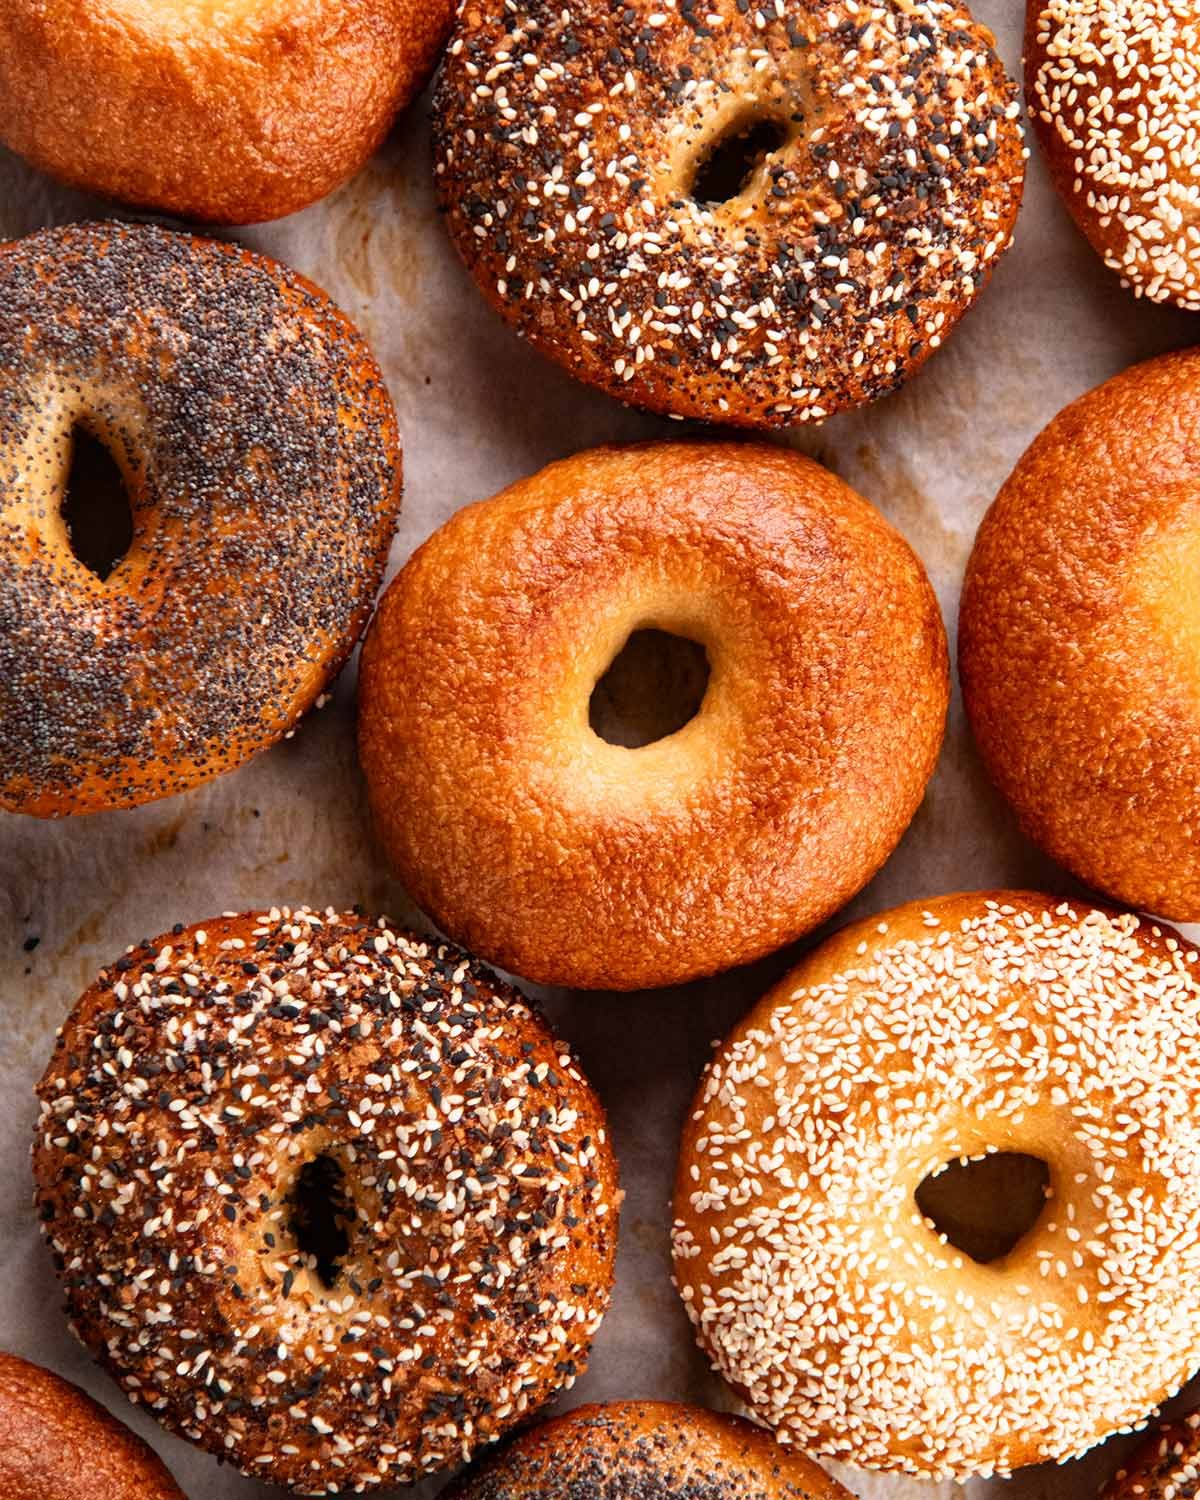
We finally nailed New York-style bagels! Great not just by homemade standards, but by any standards – incredible chew, thin crisp blistered crust, deeply bronzed and shiny, with that signature dense-but-never-dry crumb. Leaves store-bought bagels in the dust. Why are they always so dry and doughy?!
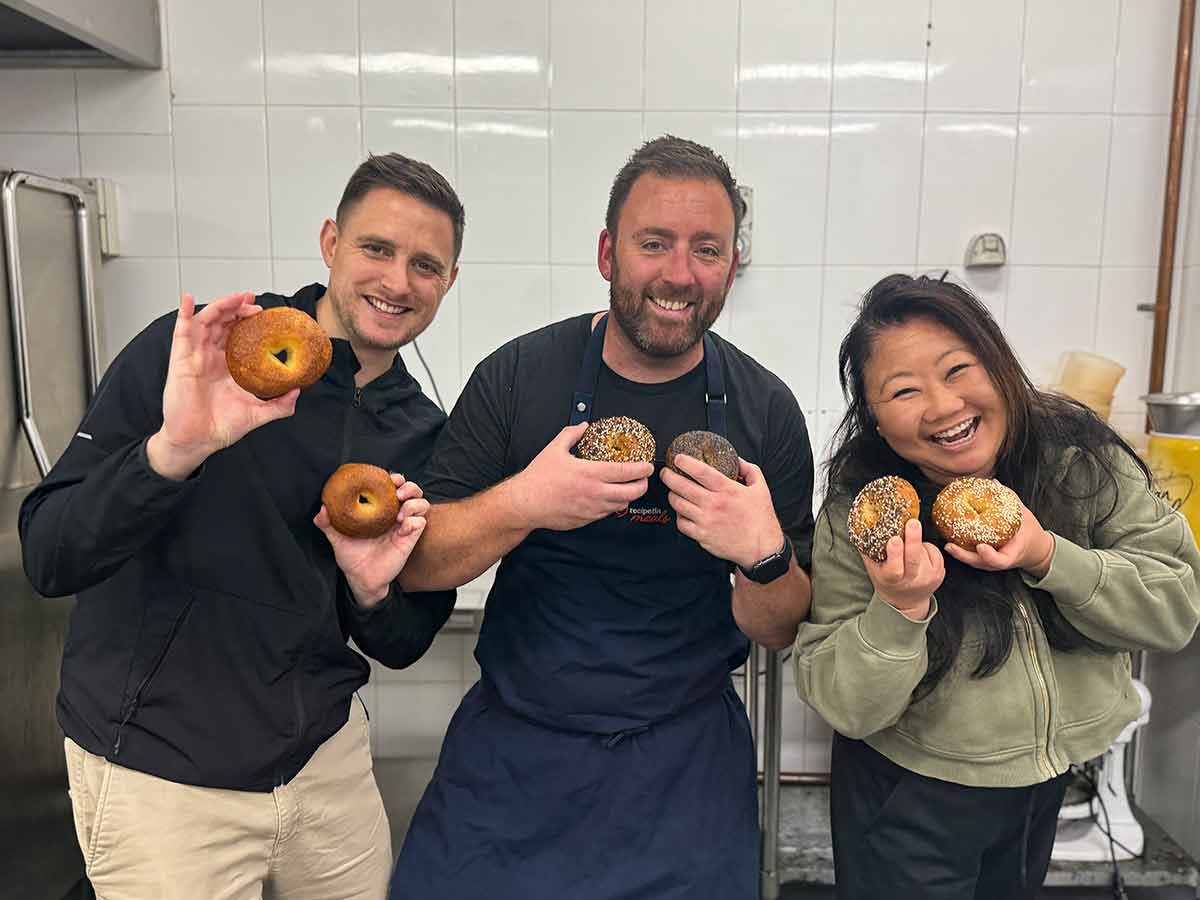
Foreword: Today’s recipe is a team effort between me, JB and Stephen, head chef at RecipeTin Meals, our food bank. Stephen created the original recipe and did most of the development, guided by JB. My job was to try to “break” the recipe, find common pitfalls and write this post.
I don’t even want to know how many hours went into this. Sometimes I wish I wasn’t wired to go to such extremes to make recipes as perfect and foolproof as I can. But I am who I am, and I couldn’t have published this in good conscience without the 45 50+ batches of bagels we made.
I’m incredibly proud of this recipe – not just because the bagels are exceptional (genuinely New York standard!), but because it was such a team effort. Recipe development can be lonely. It’s so much more fun with a team!
Bagels
Stephen clocked up over 80 hours working on these bagels. Which sounds slightly unhinged given he already had an excellent bagel recipe he’d been making for years.
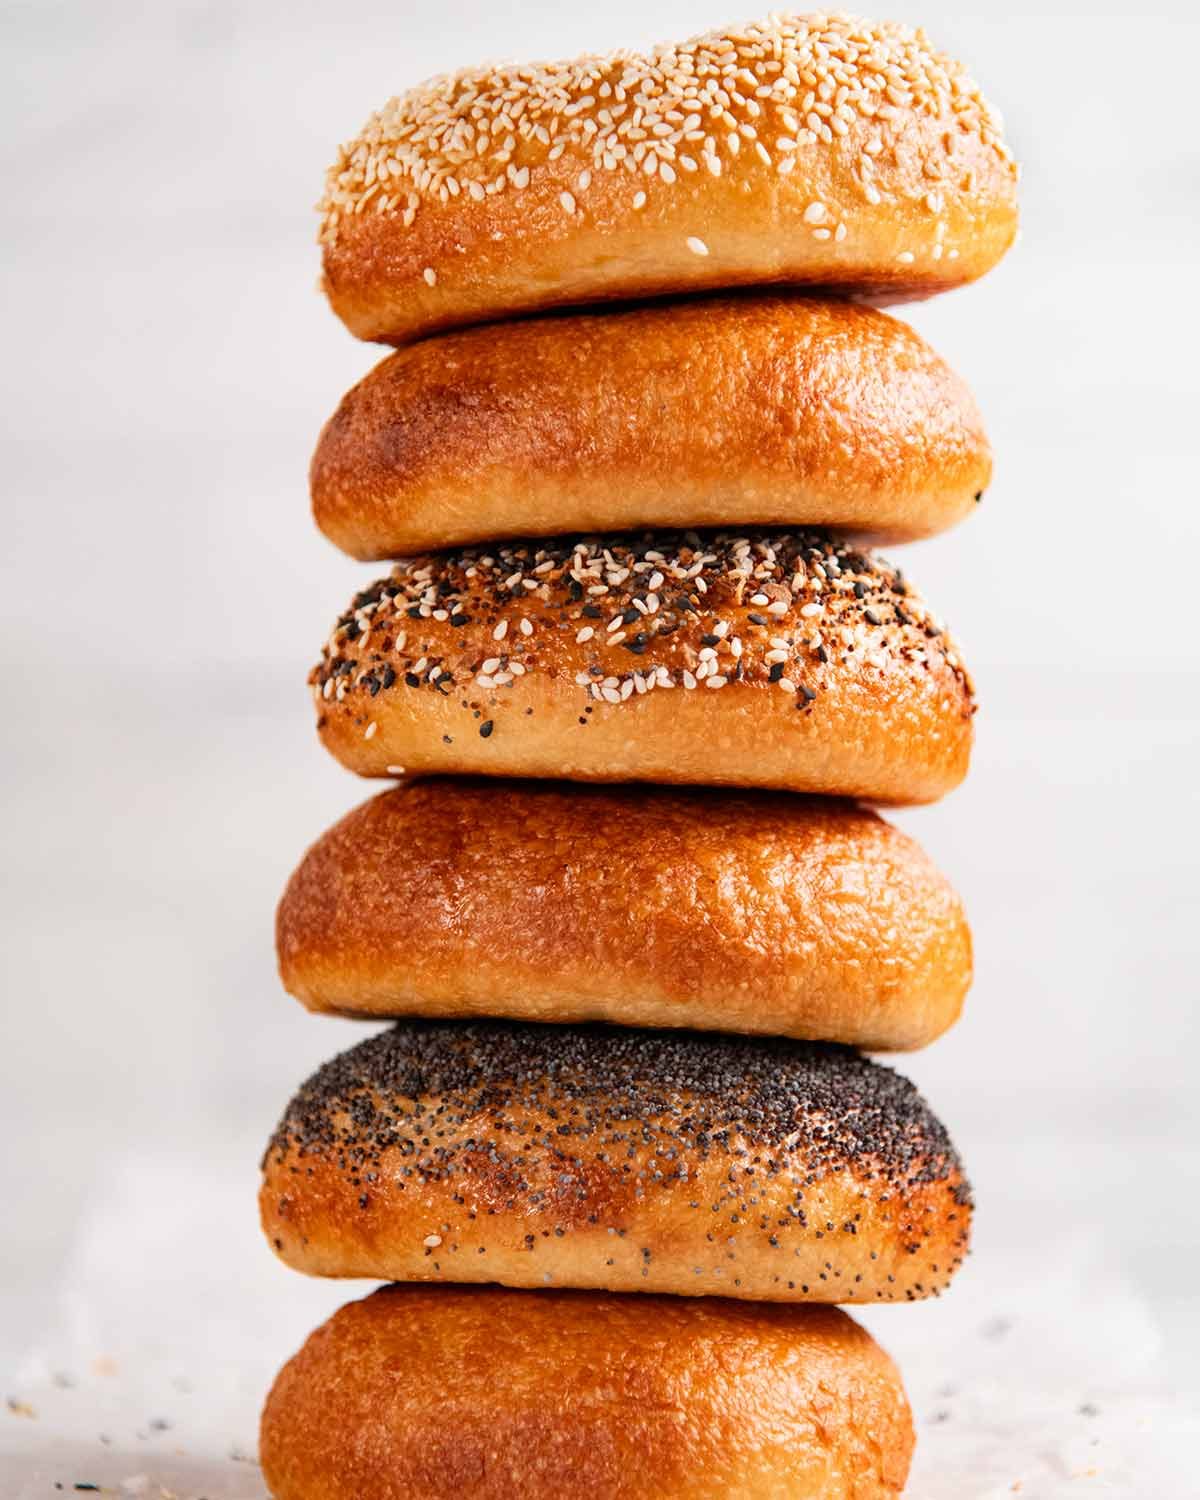
But I wanted a proper New York style bagel, which to me is the Rolls Royce of bagels. It’s everything that makes a bagel a bagel rather than just a bread roll with a hole in it, pushed to the max – deeply bronzed, extra shiny, satisfyingly chewy, with a thin crackly crust and that tight crumb that’s dense-but-never-dry. And the flavour! My mouth waters at the mere thought!
And as with many things in life, the first 90% was easy, for a decent New York bagel. That last 10% to exceptional was tough. So he kept tweaking and testing until we got there. At one point he said to me, “I never thought I’d get sick of making bagels!” – which I promptly passed on to JB with a cheeky, “This’ll be a good test of his grit!” 😆
And grit he showed!
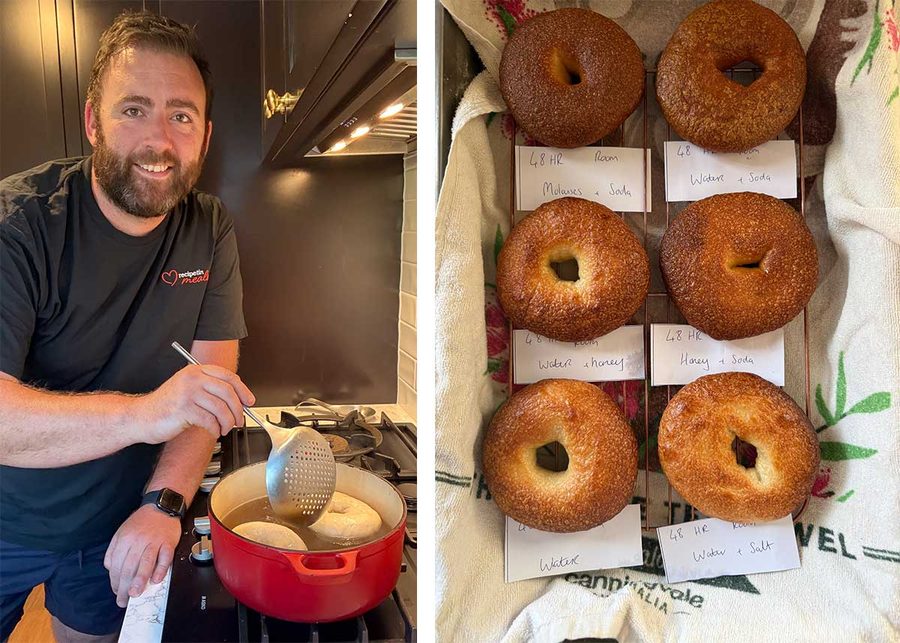
Stephen estimates he made 25 batches, to arrive at The One (he laughingly recalls one weekend he made 32 bagels in 8 different poaching liquids!). Then just as he put his feet up and cracked open a beer, we asked him to stress test it (we like to find common pitfalls, we found a fair few with bagels).
And I really think we’ve cracked it. We’ve had New Yorkers on Instagram absolutely raving at previews – “As a New Yorker, these look legit”, “I’m from NYC and I approve” and my personal favourite “This might be the first homemade bagel I’ve seen online that actually looks like a real New York bagel.”
And now it’s your turn to experience them!!
Stephen, we salute you!
Stephen, I’ve always known you as a great chef and a seriously talented bread maker. But the dedication you put into getting these bagels just right was something else. I hope you’re bloody proud of these. JB and I thank you. The world thanks you! – Nagi
Ingredients In Bagels
I always marvel at how bread making can use basically the same handful of ingredients, yet tiny tweaks to the quantities and method produce completely different results. A little more water, less yeast, shorter proofing – and suddenly you’ve got a bagel instead of a bread roll!
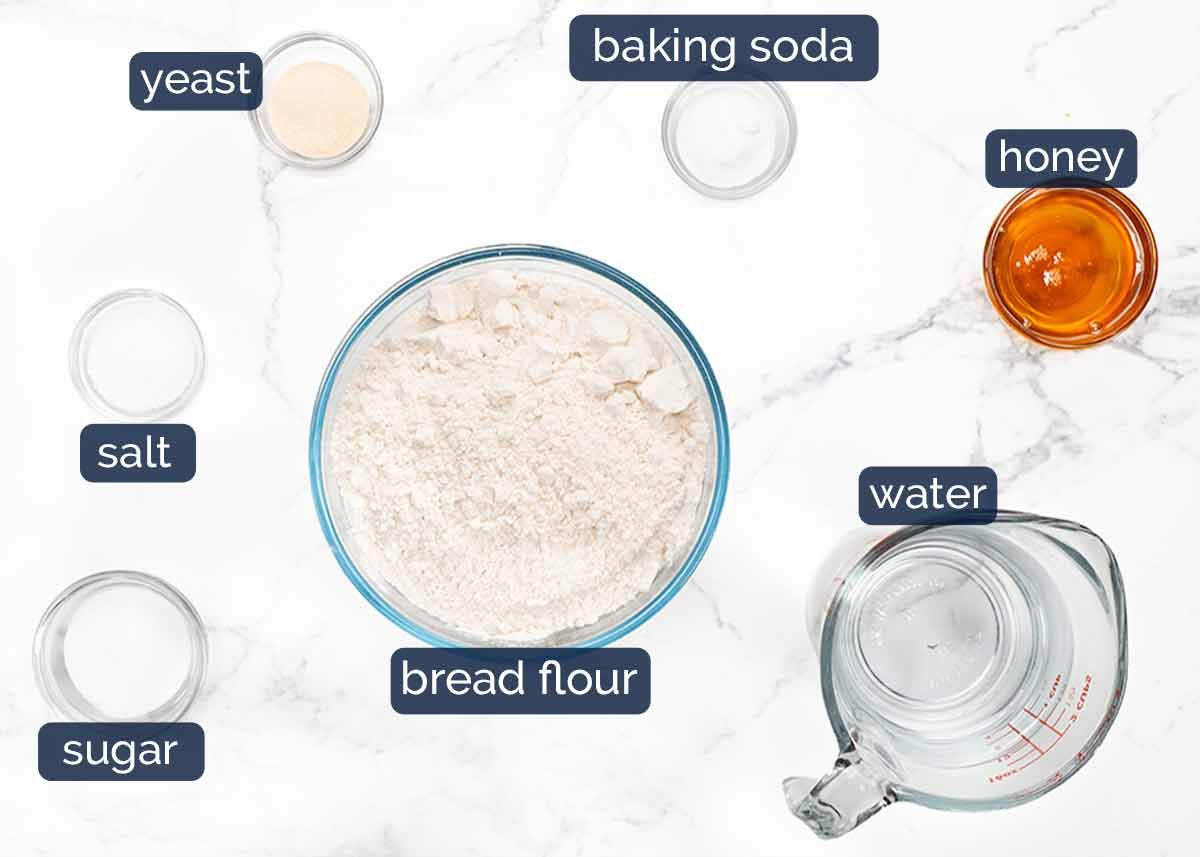
Bread flour – This type of flour is higher in protein and gives breads and pizza a chewy texture rather than being cakey like muffins. For bagels in particular which are known for their chew, it’s important to use bread flour. If you use plain flour / all-purpose flour, the bagel will work but won’t have the same chewiness.
Warm water – This is the liquid for the dough. The recipe calls for warm tap water which gets the yeast reacting quicker and helps the dough develop. This was a late addition to the recipe to make it a little more fail-safe.
The water temperature doesn’t need to be exact, you just want water that’s not ice cold nor boiling hot (like you’d use to scrub oily pans), just a nice temperature you’d want to have a bubble bath in. 🙂
Instant yeast / rapid rise yeast – This is the type of yeast that does not need to be activated until bubbly in warm water. You just add it straight into the bowl with the flour and water, then mix it up to make the dough. You can find it in the baking aisle of regular grocery stores. It needs to be stored in the fridge to keep it fresh.
Active dry yeast can also be used too, but it needs to be activated in the warm water with the sugar. See notes on the recipe card for directions. Note: The recipe calls for 1 3/4 teaspoons of yeast so if you’ve got the sachets which are usually 7g (2 1/4 teaspoons), you’ll need to open and measure out 1 3/4 teaspoons (6 grams).

White sugar – Either regular / granulated sugar or caster sugar (superfine sugar).
Salt – We use cooking salt / kosher salt. If using table salt which is fine, halve the quantity in the recipe. If using flakes, increase the quantity by 50%.
Baking soda / bi-carbonate soda – This is for the bagel boiling water. Well, poaching water! We don’t actually boil the bagels, we poach them gently. 🙂 The baking soda helps give the bagels their deep golden colour, shine and distinctive chewy crust.
Honey – Added to the poaching water to help the bagels brown beautifully, with a subtle sweetness and extra flavour in the crust.
How To Make Bagels
I don’t normally make a point of the most accurate way to measure flour using cups, but for bagels, it matters. Too little flour and you’ll end up with soft sandwich bread in the shape of rings. Too much and the naturally tight bagel crumb will be too dense and tough. So, measuring the flour accurately is step 1!
PS JB did the legwork for this recipe so it’s his hands you see here in this section, he filmed the video, shot the photos and did the step photos.
1. Make the bagel dough
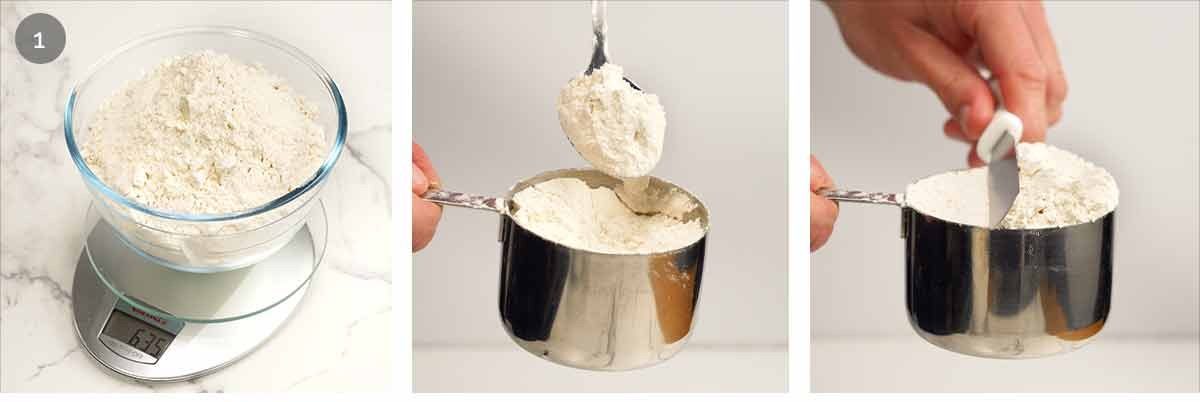
Measuring the bread flour properly – The most accurate way to measure ingredients is using scales. If you don’t have scales, use the spoon-and-level method with your cup measure (it’s the most accurate way):
i) mix the flour in the tub or bag so it’s not compacted.
ii) spoon it into the measuring cup – don’t scoop the flour out of the tub directly with the cup, as this packs in too much flour. Don’t tap or shake the cup.
iii) Level the top with the straight edge of a knife.Or, just get scales. Faster! 🙂
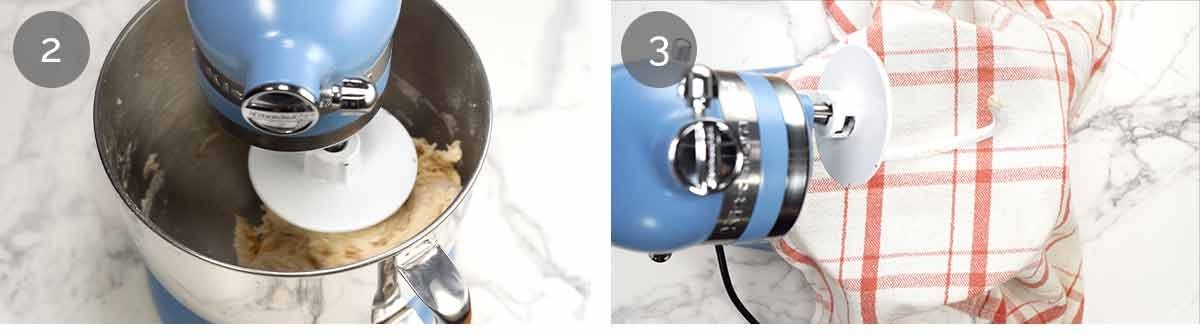
Mix dough – Put the flour, yeast, water, sugar and salt in the bowl of a stand mixer fitted with the dough hook. Mix on low, increasing medium low as the flour gets more mixed in, until it comes together into a shaggy dough and you can no longer see flour (about 1 minute).
Rest 20 minutes – Cover with a damp tea towel and rest for 20 minutes.
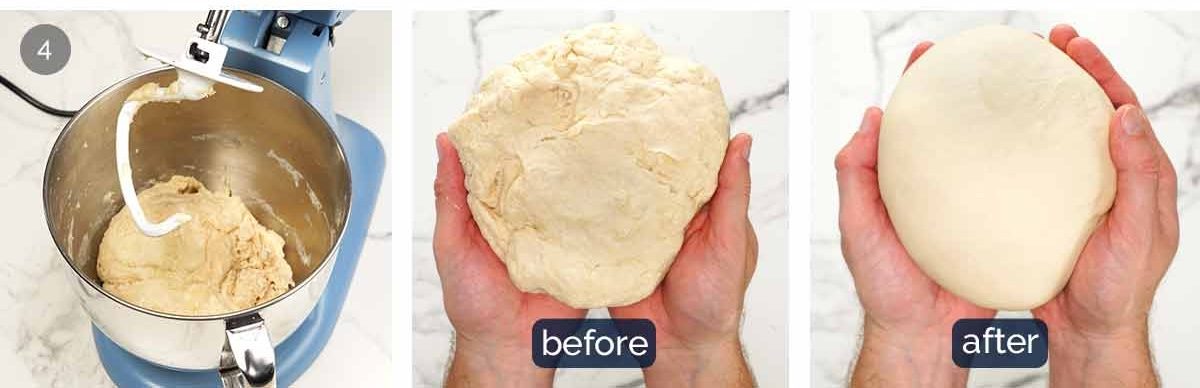
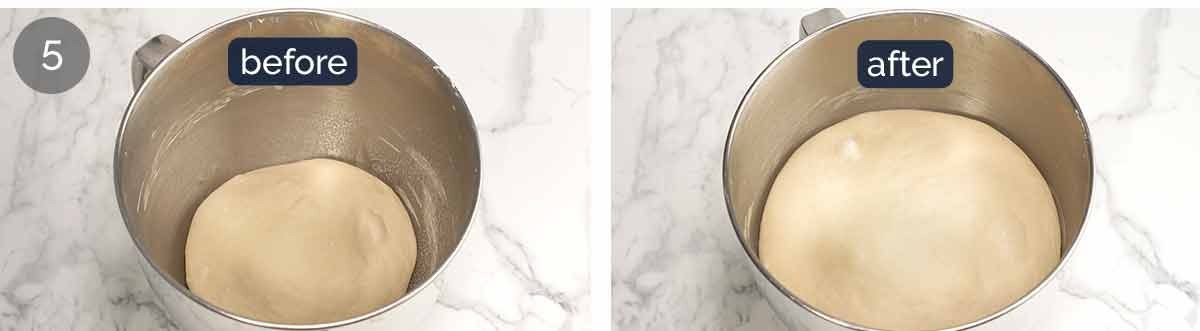
Knead 8 to 10 minutes – Knead the dough using the stand mixer on medium low to medium (speed 2 of 10) for 10 minutes or until you have a smooth ball of dough. When you stretch the dough to make it taut, it should not break (if you do this before kneading, the dough breaks).
You can also knead by hand – it will take about 15 to 20 minutes.
Rise #1 (1 – 1 1/2 hours) – Remove the dough from the bowl, spray or lightly rub the bowl with oil (to stop dough from sticking). Then put the dough in a ball back in and cover with a damp tea towel (run under water, wring out tightly). Put in a warm place around 25°C/77°F for 1 to 1 1/2 hours or until the dough rises by about 75%. Not double, that’s taking it too far (the bagels won’t rise quite as well when they bake because they were over proofed).
The warmer the place you proof the dough, the faster it rises, but the closer you are to 25°C/77°F the better, and it’s better to be too cold than too hot. If it’s too hot (~28°C/82.4°F+) the dough will rise too fast which compromises flavour development and can make the dough overproof and be more fragile so the bagels don’t rise as well. So don’t put the bowl right next to a hot heater to speed things up – speaking from experience here!
If it’s not warm enough and it’s not rising, move it to a warmer place. It’s ok if it takes longer than 1 1/2 hours to rise by 75%. (see FAQ for practical suggestions, what’s too hot and what’s too cold).
2. shape into bagels and rise #2
There are two common ways to shape bagels – roll the dough into a rope and join the ends, or pierce a ball through the middle and stretch the hole, which is the method we use. No matter how thoroughly we pinched and rolled, we could never consistently fully seal the seam with the rope method, and it would open up when baked.
Besides, the hole stretching method is more fun – you’ll see!
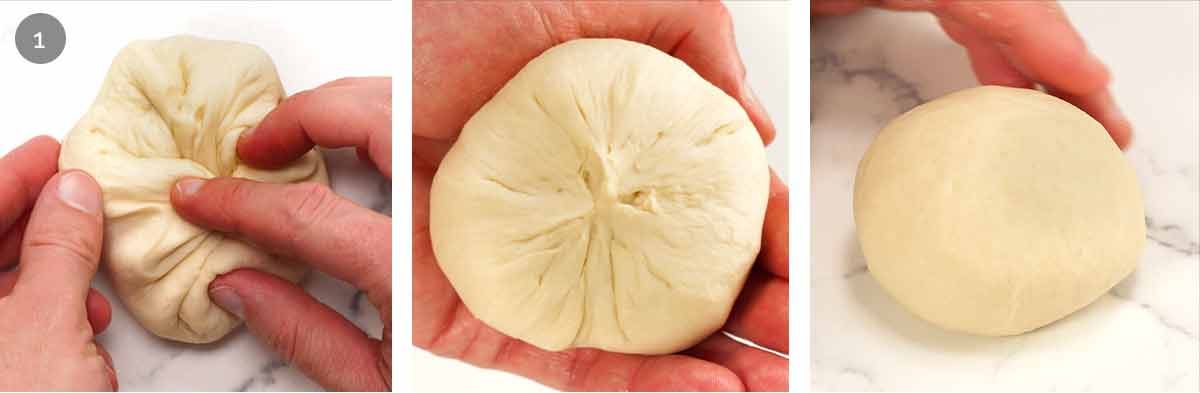
8 balls – Divide the dough into 8 equal pieces (see tip). Flatten each piece to about 2cm / 0.8″ thick then gather the sides in like a money-bag to form a ball – this makes the skin taut so the bagels have a smooth, neat surface (the stretched side becomes the presentation side of the bagel). Pinch to seal then place seam-side down and roll firmly to seal the seams (you can fix the seam as you roll if necessary). Repeat with all balls.
Tip: An easy way to divide the dough evenly is to pat it into a thick round disc, then cut it into 8 equal wedges. If you want to be super accurate, use scales to make each piece 125g / 4.4 oz – you’ll have a tiny bit of dough left over.
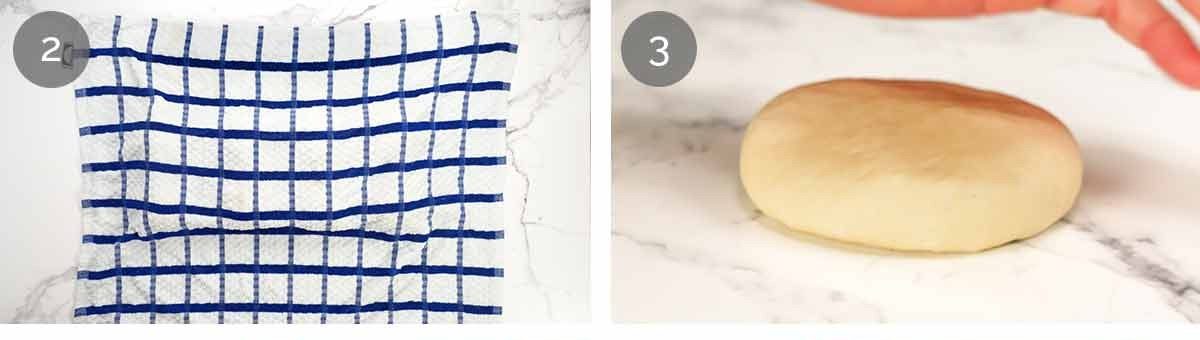
Rest 10 minutes – Leave the balls on the counter and cover with a damp tea towel. Rest for 10 minutes. This relaxes the dough so they can be shaped into bagels. If you don’t, the dough will be too springy and keep shrinking back as you try to stretch it.
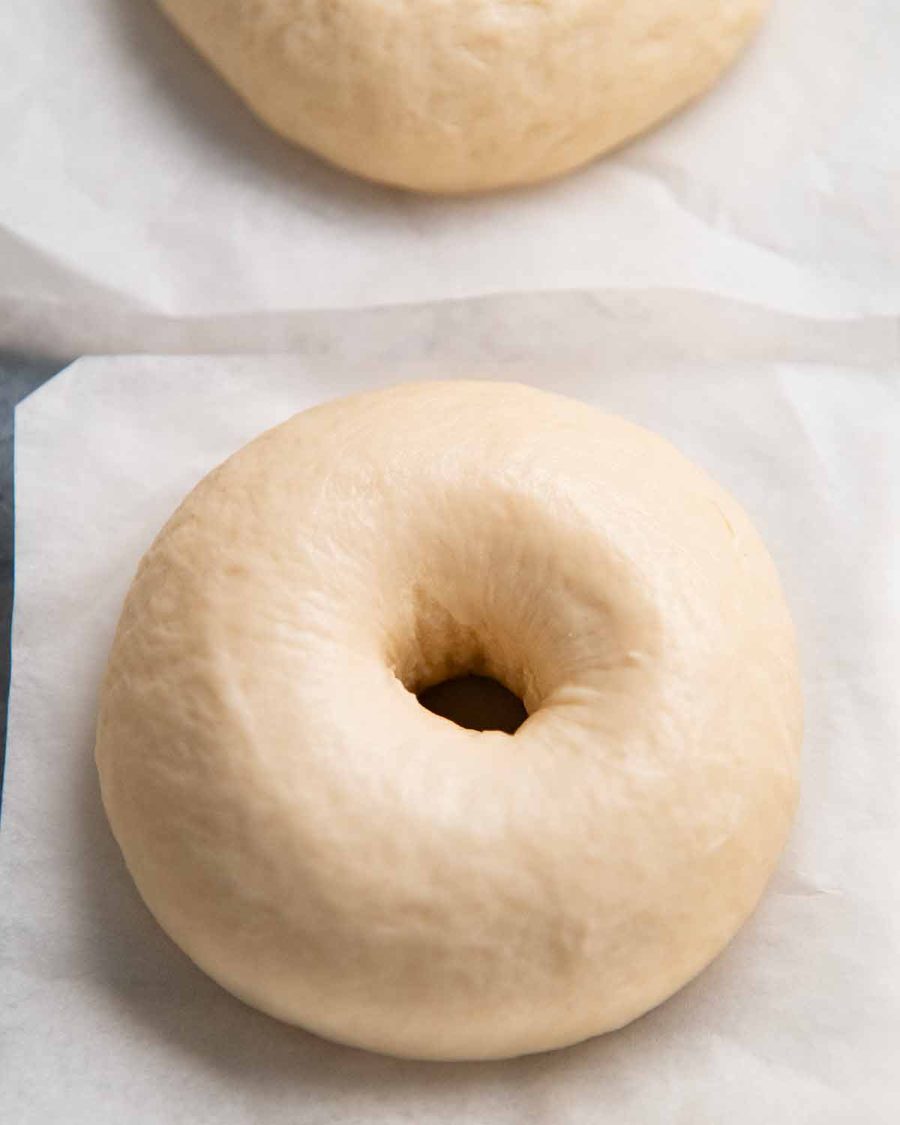
Bagel shaping – Flatten the ball lightly into a disc ~2.5cm/1″ thick.
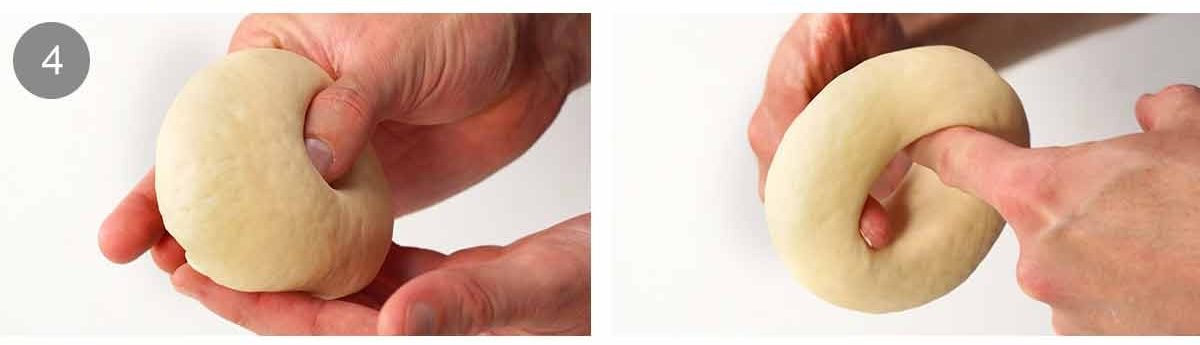
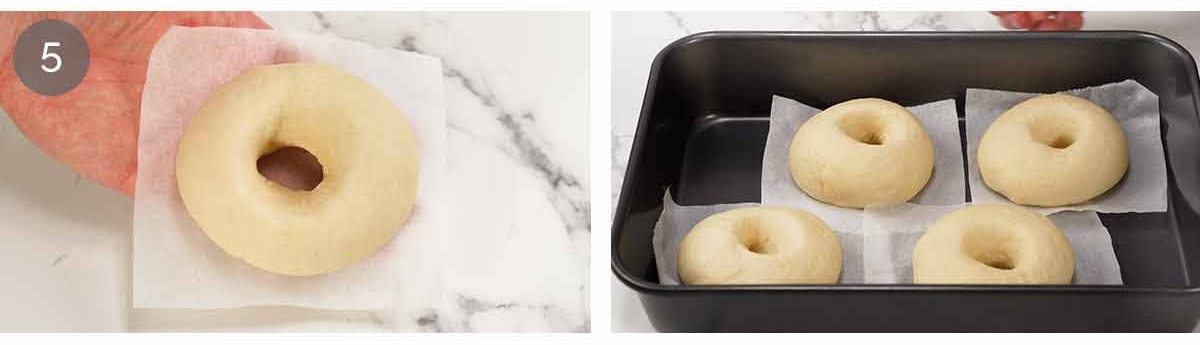
Bagel shaping (continued) – Place in your hand and pierce a hole in the middle using your thumb and index finger. Then rotate the bagel using both your index fingers to increase the hole size to 4cm (1.6″).
Note: the dough will spring back and the hole shrinks as the bagels rise and cook. So make the hole bigger than you think. But don’t be tempted to make the whole TOO big because this will make the ring too thin and can tear the dough, which will prevent it from rising properly.
Place each bagel on an individual piece of baking paper*. Repeat to with remaining balls. Then put them in two pans or baking dishes at least 4cm / 1.6″ deep (standard 23 x 33cm / 9 x 13″ baking pan is ideal) and cover with cling wrap. Or, use large plastic containers with a lid. Make sure the bagels are at least 3 cm / 1.2″ apart, so they have space to expand.
* We use individual pieces of paper for ease of handling when placing in the water to poach, to avoid denting the bagels with your fingers.
CHOOSE – BAKE NOW, OR OVERNIGHT COLD-PROOFING
For this next step, choose whether you want to cook the bagels now, or tomorrow (for extra flavourful bagels with true New York bagel blistering on the surface). Honestly, cold proofing overnight in the fridge definitely takes them to a new level but even the bake-now option is better than any bagel I’ve bought here in Australia. (Sydney – yes, we’ve been to those bagel shops you’re thinking of – multiple times! They are great, but you can’t beat the freshness of homemade. 🙂 )
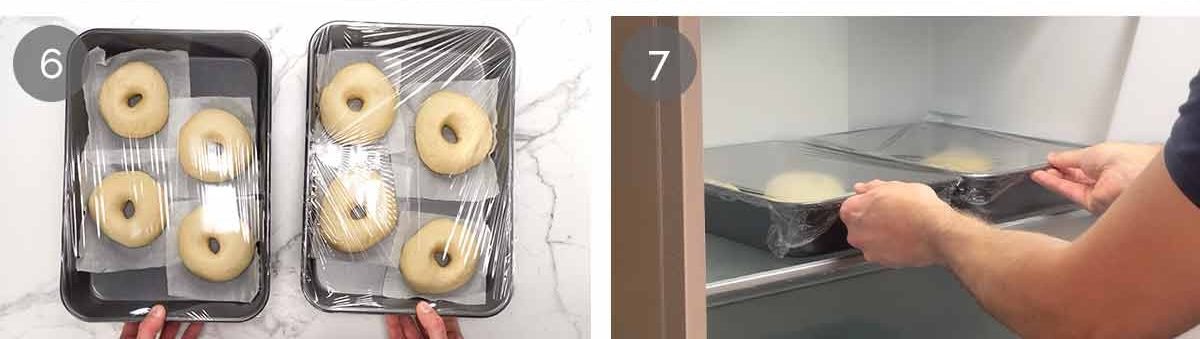
Cooking now option (30 minute proofing) – Place the pans in a warm location and let them proof for 20 – 30 minutes until they increase by around 30%.
24 hour cold proofing (for serious New York-style Bagels) – Place the pans in the refrigerator for 24 hours. They will only rise by about 15 – 20%. These bagels will have sourdough-like blistering on the surface and even better flavour that you can only get from long, slow cold proofing. There’s no shortcuts here!
Note: Don’t go much beyond 24 hours. If you do, the bagels will overproof. We found anywhere between 20 and 26 hours is safe. By 48 hours (even 36 hours), we found the bagels did not rise as well because they had over-proofed.
3. POACHING (NOT BOILING) and baking
The terminology “boiling bagels” is commonly used to describe this step but it’s really important to NOT boil them but rather poach them gently. If you boil – and I have made the mistake of doing so – the bagels will overproof in the water so they will deflate when baked.
So we use the term “poach” rather than boil, to emphasise how important it is!
Poaching the bagels in water with baking soda before baking is what gives them their signature chewy crust and helps with browning, while a touch of honey adds subtle sweetness and even more colour. We tried molasses, treacle and golden syrup – honey was the best!
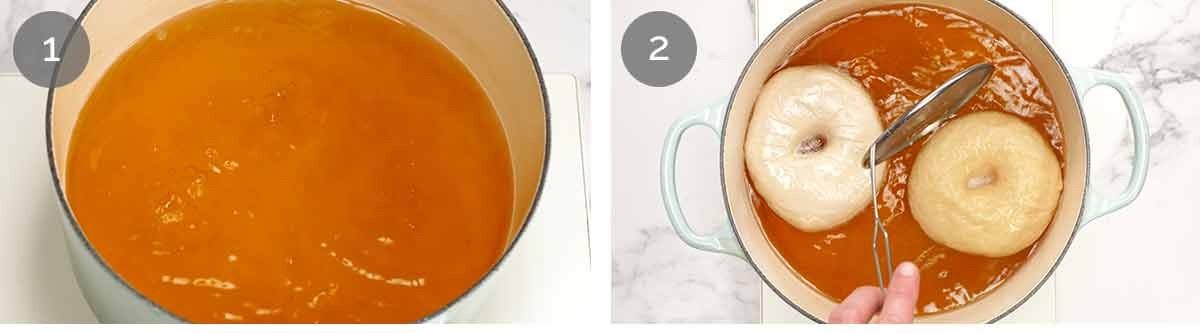
Bagel poaching water – Put the water, baking soda and honey in a large pot at least 24cm / 10″ wide and bring it to a boil over high heat. Then lower heat to medium high so it’s simmering gently – the surface should be rippling with some tiny bubbles coming up from the base but not giant boiling bubbles (too strong, the bagels will poof up too quickly too much and then deflate in the oven and come out bit wrinkly – not a disaster, they are still enjoyable but not as good as they could be!).
Poach 2 minutes – Remember, poaching rather than boiling, boiling is too strong! Using the paper, drop two bagels in top side down (ie. use paper to gently flip the bagels in upside down, then peel the paper off). The bagels will be slightly stuck to the paper so they won’t drop in and splash.
Poach for 1 minute per side, using a spider or a slotted spatula to flip, then drain on a wire rack. The water should not be bubbling nor foamy – if it is, the heat is too strong so reduce it.
Note: If you did the overnight cold-proofing, poach the bagels straight out of the fridge ie. don’t bring them to room temperature first. It can mess with how they rise (we tried).
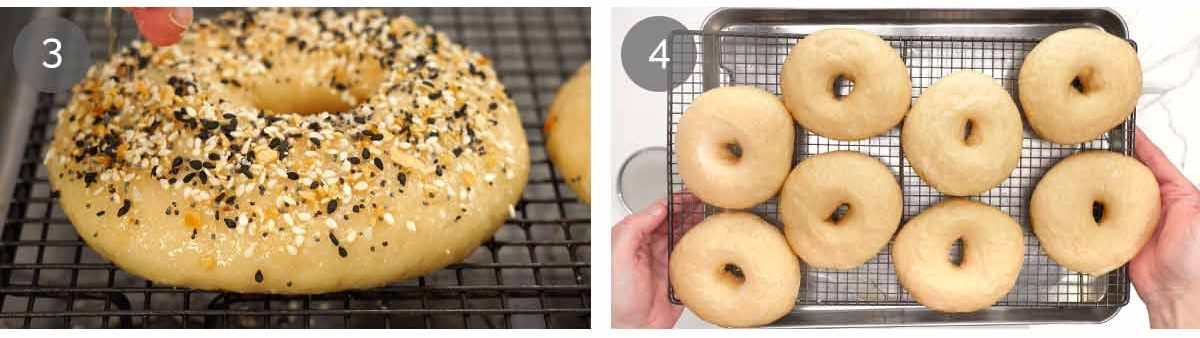
Sprinkle (if using) – Lightly whisk the egg white and water together to loosen. As soon as you place the first two bagels on the rack, add the next two in the water. While they are poaching, brush the top and sides of the first two bagels with the egg white mixture, then sprinkle with toppings. Repeat with remaining bagels if using.
Keep moving – Poach remaining bagels. Keep moving here, you want to minimise the time between boiling and baking. Now is not the time to have a gossip session with your bestie!
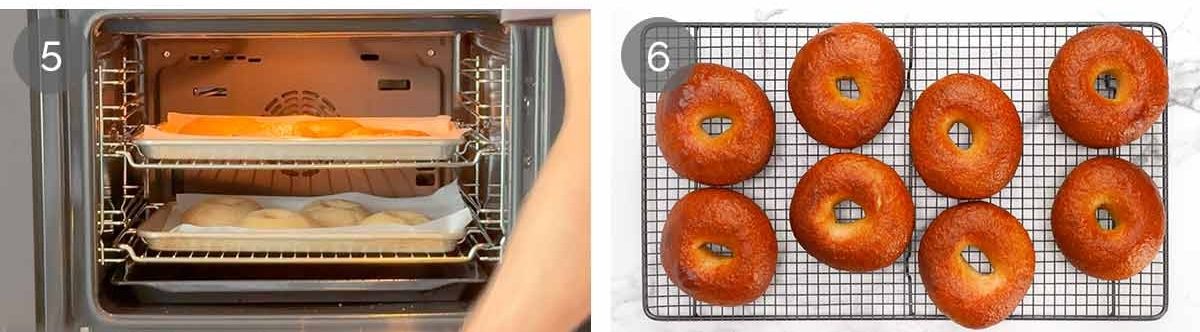
Bake – Place 4 bagels each on 2 trays lined with baking paper (parchment paper). Bake for 20 minutes in a hot oven at 220°C/425°F (200°C fan-forced), swapping the tray shelves and rotating the trays at the halfway mark. The bagels should be a rich dark golden and crispy. The colour is impressive!
Cool on a wire rack for at least 20 minutes before enjoying!
How To Eat bagels
There’s nothing like a homemade bagels are straight out of the oven! They are so heavenly all you want is a bit of butter so you can really enjoy the flavour and texture of the bagel. It tastes so superior to any bagel I’ve had outside of New York – ever. And we hunted high and low for the “best bagels in Sydney” – we’ve been on the prowl since JB started with us almost 6 years ago!
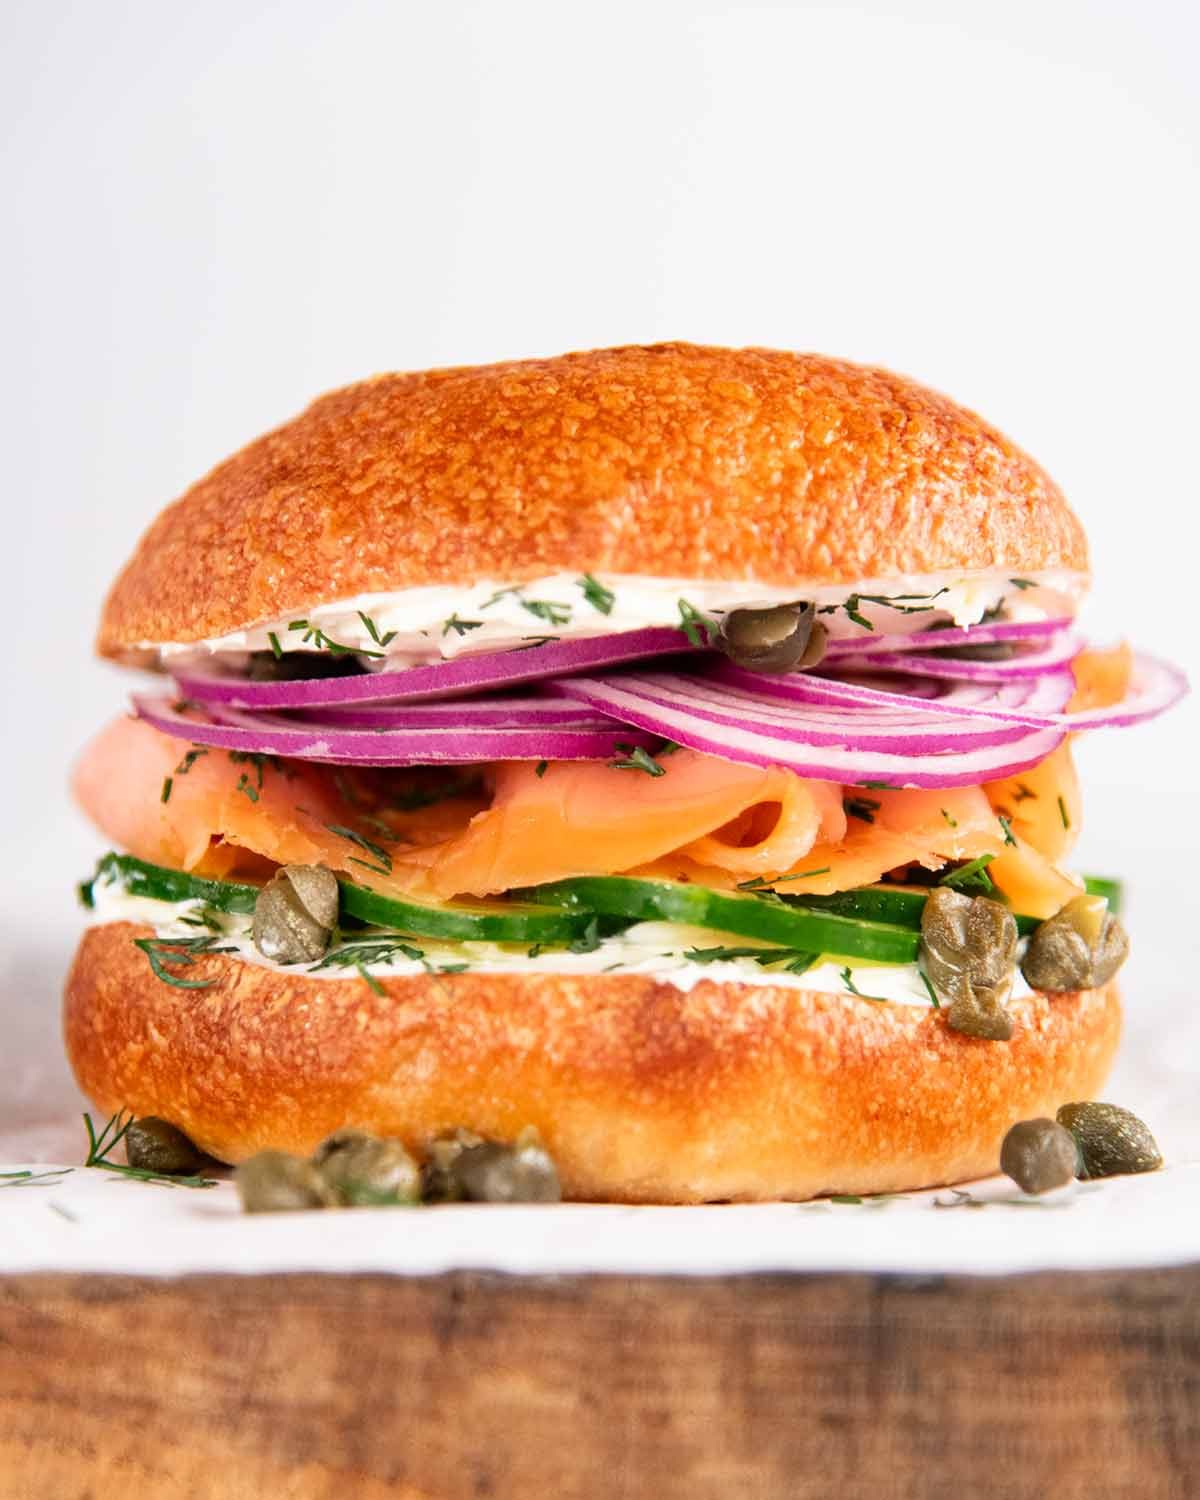
But, of course, if you want to sandwich it with classic bagel toppings you can’t beat cream cheese with smoked salmon, cucumbers, capers and red onion with dill. Just, gorgeous!
To me though, I enjoy bagels the most with butter and my favourite spread – Vegemite!! 🇦🇺 I know there are places famous for bagels overloaded with extravagant fillings and dripping with sauce, but I’m a bit of a purist when the bagel itself is this good, it seems a shame to overwhelm it with other flavours. Just give me a warm, chewy bagel with butter and Vegemite and I’m very, very happy. 🙂
Hope you love this! And once again, a massive thank you to Stephen for developing and testing this recipe. He showed some serious grit with the number of batches it took to get these bagels exactly where we wanted them – tweaking, testing, starting again, then stress testing it to see “what happens if….” and refusing to settle for “good enough”.
But enough from me. I’d love to know what you think! Any bagel connoisseurs out there?? 🙂 – Nagi x
FAQ – Bagels
Bagels aren’t exclusively New York but I think they are the gold standard so it was my benchmark I was striving for all these years. So that’s what I’m referencing when describing a great bagel!
The baseline is this – a bagel should not just be an ordinary bread roll shaped into a ring.
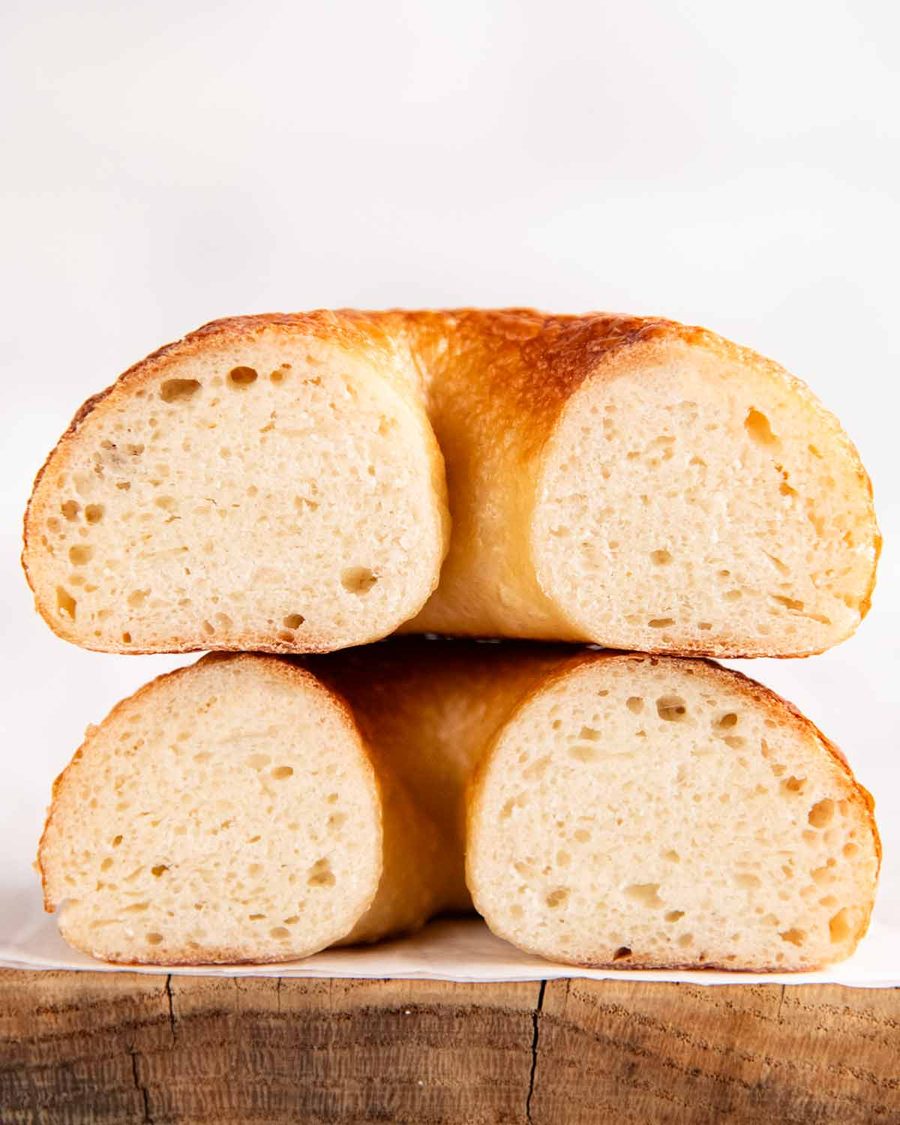
A really great New York bagel has a deeply golden, slightly crisp crust with a satisfying chew, and a dense but tender interior. The flavour should be subtly sweet, a little malty and pleasantly wheaty, with a depth of flavour from the slow fermentation. It shouldn’t taste like white sandwich bread!
The crumb should be tight rather than fluffy – signature bagel characteristic, but not heavy or doughy or dry (why are store bought bagels always so DRY??!).
And while bagels are famously chewy, they shouldn’t require a jaw workout to eat!
Like most homemade breads, bagels are at their absolute can’t-buy-bread-this-good fresh out of the oven, and great for the rest of the day. The next day they are not as fresh but easily resurrected with a quick 5 minutes in the oven, or split and pop it in the toaster.
If you want to really refresh them, give them a light spray of water before putting them in the oven. This will refresh them so they are like freshly baked. This is also a good tip generally to revive stale bread (ie spray the bread with water then bake).
They will keep for 3 to 4 days in the pantry or 3 months in the freezer.
Make and shape the bagels 20 – 26 hours beforehand and proof in the fridge. Then poach and bake on demand for the ultimate fresh homemade bagels!
Otherwise, bake the bagels as close as you can to when you are serving. Honestly, if you make them the day before then bake to warm them gently, they are 97% like freshly made.
The ideal (safe) temperature for dough to rise is around 25 °C / 77 °F – pleasantly warm, but not hot. A warm kitchen is perfect, or try a turned-off oven with the light on, or any warm, draught-free spot in your home. Don’t put it in direct sunlight (too harsh) or too close to a heater (too strong). My fall back is the dryer (laugh – but it works!!) – run the dryer for a few minutes to warm it up, turn it off, put the dough bowl in and shut the door quickly to trap the warm air. Though these days I usually pop it under the kitchen sink because the hot water unit in there for my boiling water tap keeps the cupboard gently warm.
Too hot – Getting up towards 30°C/86°F starts to head into the “too warm” end and 35°C / 95°F+ is definitely too hot, the dough will rise too quickly and it will compromise the structural integrity of the dough so the bagels won’t rise as well when baked, they will wrinkle rather than be smooth and nicely puffed.
Too cool – If your room is cooler than 25 °C / 77 °F, the dough will still rise, it will just take longer. Either be patient, or move it to another room. Taking longer is ok. Rising too fast because it’s too hot is not!
We didn’t try because we know from experience that simply swapping in gluten-free flour compromises the end result so much with breads that it’s not worth recommending. A good gluten-free bagel really needs a recipe specifically developed to be gluten-free.
Yes you can! It comes out identical, I couldn’t tell the difference. See recipe notes for directions.
We find the easiest and most consistent results using the “poke and stretch” method. This is the method where you poke a hole in a flattened disc of dough then rotate the dough with your fingers to enlarge the hole.
The other traditional method is to roll the dough into a rope, then join the ends to form a ring. Both work, but I find the poke-and-stretch method easier and more reliable for home cooks because if you don’t seal the seams really thoroughly with the rope method (and it’s harder than you think), they open up in the oven.
You probably didn’t make them big enough when shaping! Bagel dough is elastic, so the holes shrink as the dough rests, boils and bakes. Stretch the holes to 4cm (1.6″) when shaping. I know it’s tempting to go crazy and make the hole even bigger but if you do, you risk tearing rather than stretching the dough which can lead to the bagel not rising properly in the oven. I made this mistake. 🙂
Flavour and texture! The slow, cold fermentation develops a deeper, more complex flavour and smell as it gives the dough time to mature. The bagels will also have the impressive signature crust with the little sourdough-like blisters. It’s one of the secrets to a proper New York-style bagel
The overnight rest also makes the recipe convenient because most of the work is done the day before, then you poach-and-bake straight from the fridge.
Having said that, the “cook now” bagel is still better than any bagel I’ve had outside of New York. Hand on heart. And I’ve been hunting!!
This can happen if the dough is overproofed, meaning it has risen too much and lost some of its strength before you bake. In laymans terms, it used up all it’s rising firepower before it got into the oven.
This can happen if:
You let the dough rise more than specified in the recipe (75% for rise 1, 30% for rise 2).
It was too hot so the dough proofed too fast which makes the dough more fragile. Aim to be as close to 25 °C / 77 °F as you can, for dough proofing.
You boiled the bagels too aggressively which over overproofs them, rather than poaching. I stress this point in the recipe because this was one of my pitfalls. 🙂
Denting the proofed bagels and deflating them – we avoid this problem by putting each bagel on its own piece of paper which you use to pick it up with touching them.
Yes, but the bagels won’t have the same chew that is a signature characteristic of bagels. It will still be chewier than regular bread rolls because of the way they are made, but not as chewy as when made with bread flour.
Egg white. We used to just sprinkle it on while they were still wet, straight out of the poaching water. But they do have a tendency to fly off when eating, and even more when cutting the bagel to split in half.
Using egg white adheres them better. They do still fly everywhere – but it’s far less than without using egg white!
Watch How To Make It
Here’s a recipe video of JB making these bagels. Marvel at that gorgeous crust and the impressive chew!
Hungry for more? Subscribe to my newsletter and follow along on Facebook, Pinterest and Instagram for all of the latest updates.
Bagels
Ingredients
Bagel dough:
- 4 1/4 cups bread flour , white (Note 1)
- 1 1/2 cups tap water , warm (not hot)
- 1 3/4 tsp (6 g) instant yeast / rapid rise yeast (check it's still alive, Note 2 – also see Note 2 about active dry yeast)
- 2 tbsp (25 g) white sugar (any type – caster or regular)
- 2 3/4 tsp (15 g) cooking salt / kosher salt (if measuring with teaspoons, halve for table salt, +50% for salt flakes)
For poaching bagels:
- 2 litres / 2 quarts water
- 3 tbsp honey (Note 3)
- 1 3/4 tsp (10 g) baking soda (bicarbonate of soda) (Note 3)
Bagel toppings (optional)
- 1 egg white , at room temperature (from large egg 55 – 60g / 2 oz each)
- 1/2 tsp water
- Everything Bagel Seasoning (1 full batch will top 8 bagels, 1 1/2 tsp per bagel)
- 12 tsp white sesame seeds (1 1/2 tsp per bagel)
- 8 tsp poppyseeds (1 tsp per bagel)
Instructions
ABBREVIATED RECIPE
- Mix dough ingredients until incorporated. Rest 20 min, knead until smooth, proof 1 – 1.5 hrs 75% increase. Divide into 8 balls, rest 10 min. Form bagel shape, proof 30 min (30% rise) or fridge 24 hrs (15 – 20% rise). Poach 1 min each side, brush with egg wash and sprinkle toppings (if using), bake 20 min at 220°C/425°F (200°C fan).
FULL RECIPE
Make bagel dough:
- Mix – Put all the dough ingredients in the bowl of a stand mixer and mix on low speed using the hook attachment until you can no longer see flour – about 1 minute.
- Rest – Cover the bowl with a damp tea towel, and leave the dough for 20 minutes to rest.
- Knead – Still using the stand mixer with the hook, knead the dough for 8–10 minutes on low speed (speed 2 of 10 for a KitchenAid) until smooth and elastic. It should pass the "window pane" test (see video at 42 sec). Or you can do this by hand (15 – 20 minutes).
- Oil bowl – Remove the dough so you can lightly spray the bowl with oil, then put the dough back in. Cover with a damp tea towel.
- Dough proofing #1 – Put the bowl in a warm place (Note 4) and let it rise for 1 to 1.5 hours or until it has increased by 75% (not doubled, that's taking it too far).
SHAPING BAGELS
- Roll into balls – Divide the dough into 8 equal pieces (125g / 4.4oz). Flatten each piece to about 2cm / 0.8" thick then gather the sides in like a money-bag to form a ball. Pinch to seal all the seams then place seam-side down and roll firmly to seal the seams (you can fix the seam as you roll if necessary). Repeat with all balls.
- Rest 10 minutes – Leave the balls on the counter and cover with a damp tea towel. Rest for 10 minutes (to relax so they can be shaped).
- Individual paper – Meanwhile, tear 8 x 15cm / 6" squares of baking paper (parchment paper) – these will be used to prevent the bagels from sticking and also for handling, to avoid accidentally squishing them. I just tear off four 15cm / 6" lengths from a standard roll, then tear each one in half.
- Bagel shape – Flatten the ball lightly into a disc ~2.5cm/1" thick. Place in your hand and pierce a hole in the middle using your thumb and index finger. Then rotate the bagel using both your index fingers to increase the hole size to 4cm (1.6").
- Place the bagel onto a sheet of paper and repeat to shape remaining bagels. Put 4 bagels each into two 23 x 33cm (9 x 13") pans or baking dishes at least 4cm / 1.6″ deep and cover with cling wrap. Or use containers with lids, as long as the bagels are 3cm / 1.2" apart.
PROOFING #2 – choose your method:
- Cooking now – Place the pans in a warm location and let them proof for 20 – 30 minutes until they increase by around 30%.
- 24 hour cold proofing – Place the pans in the refrigerator for 24 hours (20 – 26 hrs is the ideal timeframe). They will only rise by about 15 – 20%. These bagels will have sourdough-like blistering on the surface and even better flavour.
POACHING and BAKING:
- Preheat oven to 220°C/425°F (200°C fan-forced).
- Bagel poaching water – Put the water, baking soda and honey in a large pot, at least 24cm / 10" wide and bring it to a boil over high heat then lower heat to medium or medium high so it's simmering gently – the surface rippling with tiny bubbles, no giant boiling bubbles.* Don't try to get ahead and have the honey-baking soda-water mixed and sitting around waiting to boil. Mix just prior to boiling the water.
- Poach 1 minute – Using the paper to pick the bagel up, drop the bagels into the water top side down then peel the paper off, 2 bagels at a time. Poach gently for 1 minute per side using a spider or a slotted spatula to flip (water should not be foaming or bubbling – too strong!). Then remove and drain on a wire rack.(For cold-proofed bagels, poach cold, straight from fridge – don't bring to room temperature).
- Sprinkle (if using) – Lightly whisk the egg white and water together to loosen. As soon as you place the first two bagels on the rack, add the next two in the water. While they are poaching, brush the top and sides of the first two with the egg white, then sprinkle with toppings. Repeat with remaining bagels if using.
- Repeat – poach remaining bagels. (Keep moving here, minimise the time between poaching bagels and baking).
- Line 2 trays with baking paper. Place 4 bagels on each tray.
- Bake for 20 minutes, swapping the tray shelves and rotating the trays at the 10 minute mark. (I recommend checking the bagels after 15 minutes to make sure they're not browning too much.)
- Cool – Remove from the oven and transfer the bagels to a wire rack. Cool for at least 20 minutes before enjoying. That first bite of a homemade bagel is so memorable, it will be unlike anything you've ever experienced!
Recipe Notes:
- Mix the yeast with all the warm water, making sure the water is very warm, around 40°C (104°F), plus the sugar. Set aside for 5 to 10 minutes until it gets foamy across the surface. Put in the stand mixer bowl with everything else and then proceed with the recipe as written.
If it’s coldish in your kitchen (22°C/70°F or less) OR it’s just not rising (check at 1 hour), then tuck the bowl somewhere warmer. Yeast loves warmth! But 30C/86F is getting too hot – the dough will rise too quickly and it may comprise the integrity of the crumb, causing it to collapse when baking. Best way to make ahead is to do the overnight cold proofing, so make it 20 – 26 hours before baking. Though honestly, if you make it the day before then bake for 5 – 8 minutes at 180C/350F (160C) to warm it up and crisp the crust, they are 97% like freshly made. Leftovers and storage – Bagels are at their absolute unbeatable prime straight out of the oven, great for the rest of the day, then they will keep for 3 to 4 days though I recommend sprucing them up in the oven (whole) for 5 – 8 min (180C/350F – 160C fan) or toasting (split). If you can give them a light spritz of water, even better – this will really bake them up like freshly made! They can also be frozen for 3 months. Nutrition per bagel.
Nutrition Information:
Life Of Jaffle
This is called procrastination. 🤣
I don’t have a mixer with a dough hook (actually don’t have a mixer at all!) Can I make them any other way?
What happens if you just treat them like bread rolls, ie without the hole ?
How many did the Jaffman and local birds eat ? I think I’ve eaten every type of bread but not a bagel ….closest would be a Bretzel from Otto’s in Townsville to eat on the plane .
After months of teasing and taunting, it is finally here!!!
My weekend suddenly got exciting! Bagels for Sunday brunch. Thanks the serious recipe development – got to love team work.
Did you forget to add the video or is my computer screwing up?
Truly another labor of love! These look incredible and delish. Toasted with cream cheese, thin sliced tomatoes, a sprinkle of salt & sesame seeds…a wonderful medley of textures and flavors. These would be great to make with kids on a Sunday, as it would build in that patience and perseverance that cooking real and healthy food demands.