A completely edible Christmas gift – Gingerbread Cookie Boxes and Mason Jars! The Mason Jar is made simply by wrapping dough around a can! You don’t need any cookie cutters, mixers or any special equipment to make these. Or baking talent (which I lack). My kind of Christmas baking!!
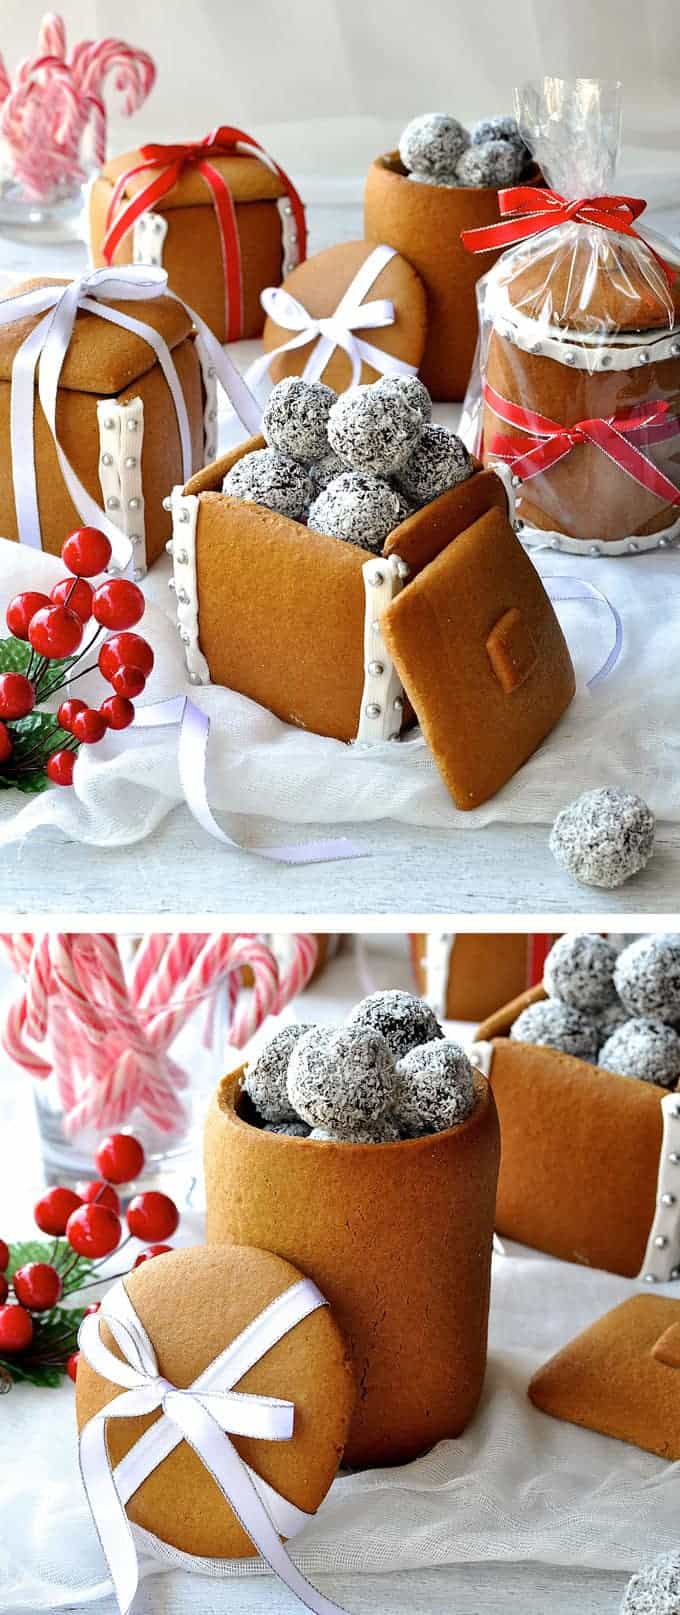
“Gingerbread Boxes and Mason Jars are my solution for a Christmas centrepiece/gift which is a more sensible size than making a gigantic Gingerbread house that won’t get eaten.”
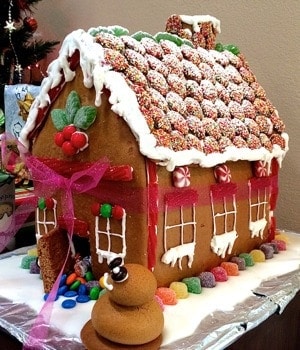
Last year I made a Gingerbread House for my family Christmas dinner. Other than the fact that tins of lentils I used to stabilise the walls got trapped inside the house (I forgot they were there when I put the roof on) and that the house went a bit lopsided when I was driving to my mother’s house (hence the ribbon around it), I was rather chuffed with my efforts. Especially given that it was the first time I attempted it.
However, after a 12 course Christmas dinner, there was little room left for dessert. So after all my efforts to make the Gingerbread house (I even made a snowman!), only part of the chimney and about 1/8th of one roof was nibbled at.
So I swore I would never make another Gingerbread House again unless I was going somewhere with 50 people! But as Christmas approaches in 2014, I started having nagging thoughts about making something with gingerbread because….well, I just love gingerbread. This is the only time of the year I make it, it sings of Christmas to me. And being the first Christmas with my blog, I wanted to share an edible gift recipe. Something a little different.
“The Gingerbread Mason Jars are really easy to make because they don’t require constructing. Just wrap dough around a baking paper lined can, and bake. It’s really that easy!”
And that is the story of how the idea of the Gingerbread Boxes and Mason Jars was born. A more sensible size than a giant Gingerbread House that takes an army to consume. Something that is easily transportable, can be packaged up nicely and isn’t difficult to make (because I don’t do difficult!).
It took several goes to get this right. I only found one recipe for Gingerbread Boxes on a commercial recipe site. I won’t get into details but suffice to say it didn’t work. So I decided to make one up myself.
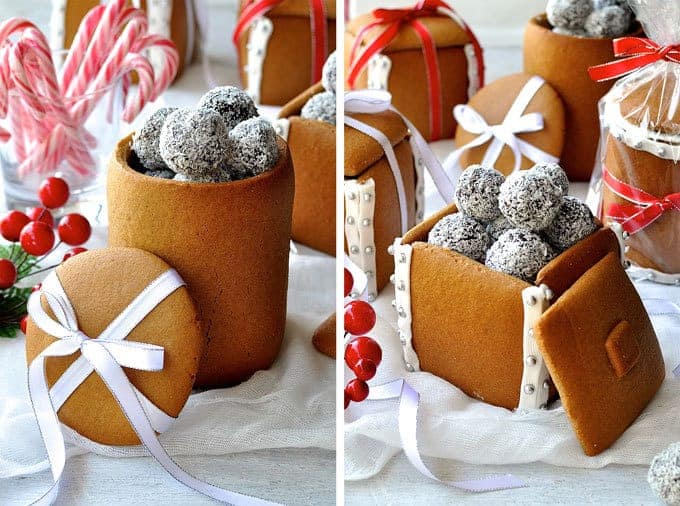
Firstly, let me assure you that these are really easy! They take time, but they are not hard. Don’t let the length of the instructions fool you! I jammed 2 recipes into 1 (i.e. the Boxes and Mason Jars) plus it got wordy describing how to cut the dough and construct the boxes.
If you aren’t into fiddly, then I recommend making the Mason Jars because they don’t require constructing. All you need is an empty can covered with baking paper (parchment paper). Then wrap it with dough. It sticks perfectly because Gingerbread dough is quite sticky. Then the other step you don’t normally do with gingerbread is to chill it again. This helps the Mason Jar from sliding down while it bakes because it needs to be baked upright. I tried baking it lying on its side but the jar ended up flat on one side which didn’t look so nice!
You don’t even need to “glue” the base on. If you use the can to press out rounds, those rounds should just about fit perfectly into the base (if not, just trim it with a knife). And because gingerbread is slightly sticky, the base stays in without the help of icing or melted chocolate.
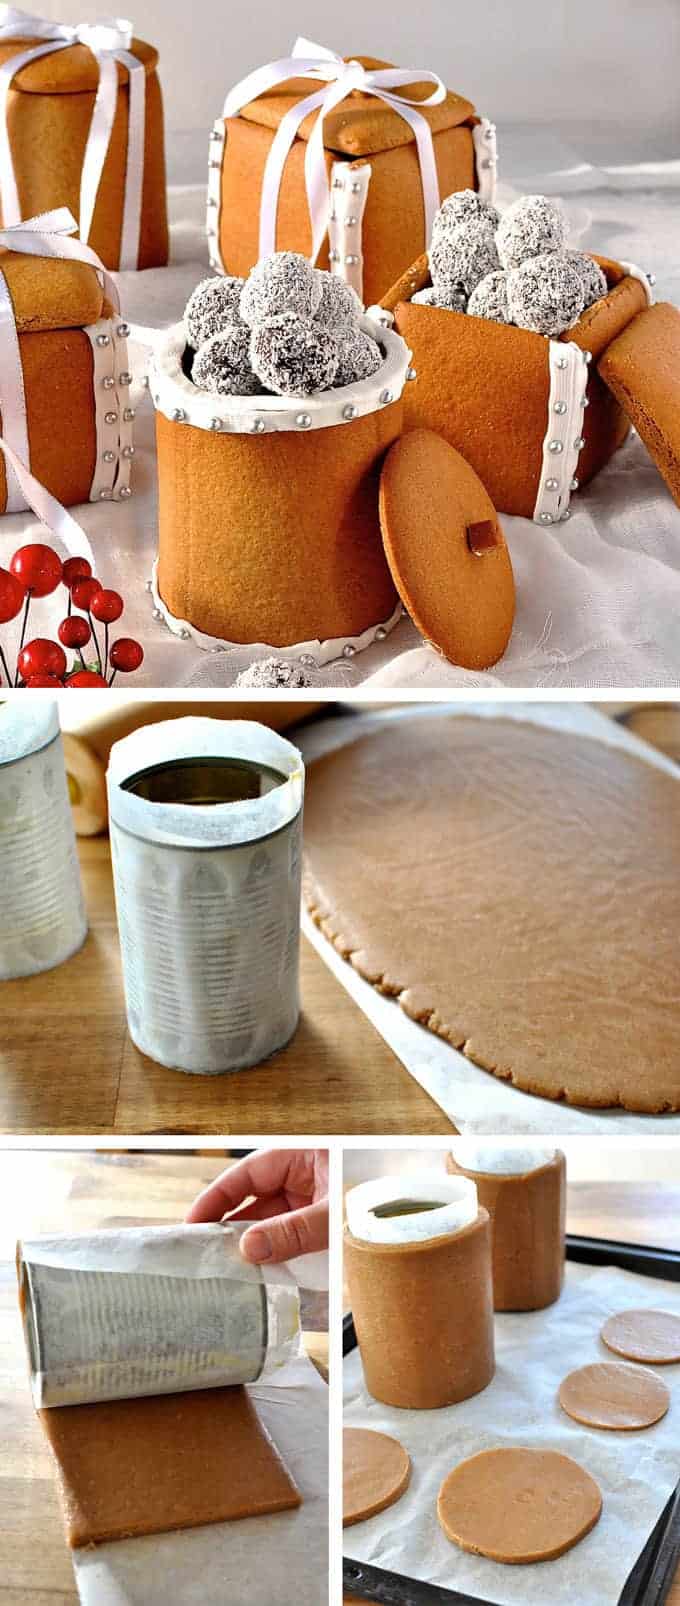
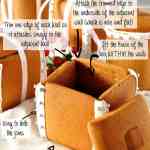
The Boxes are easier to cut out because you just need 8 squares for each box. But they take longer to assemble because you need to “glue” them together using melted chocolate (which I find sets faster and is stronger than Royal Icing). Also because the gingerbread squares puff slightly when baked, you need to do a bit of trimming to make it easy to construct and so the Box stands flat on the table. It’s lengthy to explain in words so I’ve done up a diagram to show you (see recipe below).
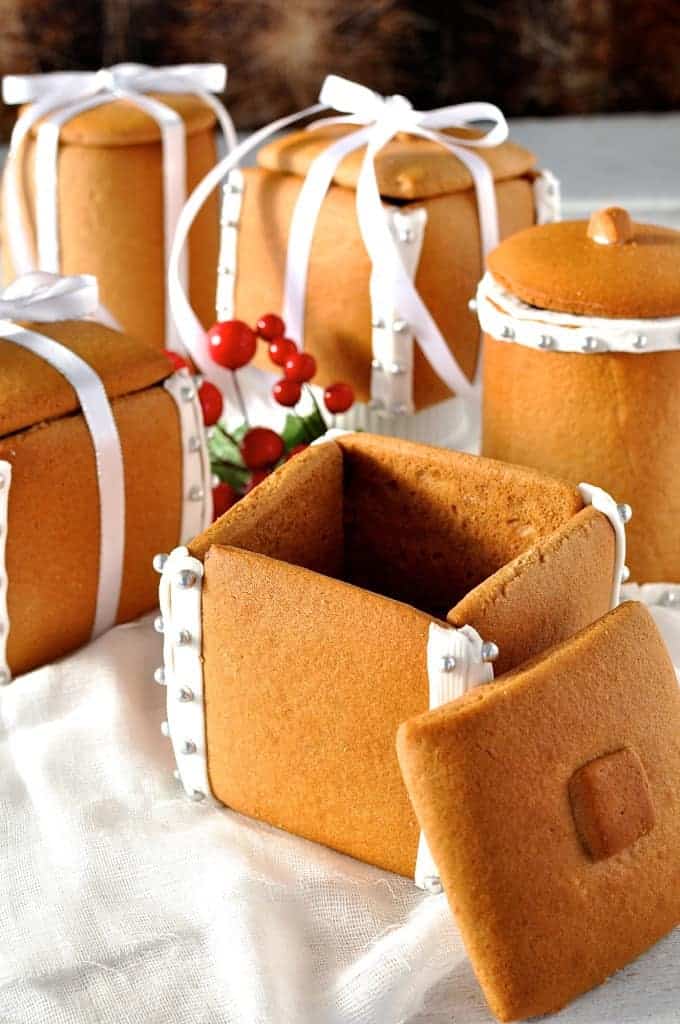
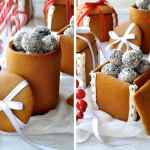
I think these make a great gift – for Christmas or any occasion! You can fill them with whatever you want. I filled mine with homemade Chocolate Ganache Truffles (psst, I’ve got some tips to make rolling these up really easy instead of looking like you had a chocolate fight!).
So to all my (AustralianSydney based) friends and family reading this, I guess you know what you’re getting for Christmas this year! 🙂
Happy baking! – Nagi
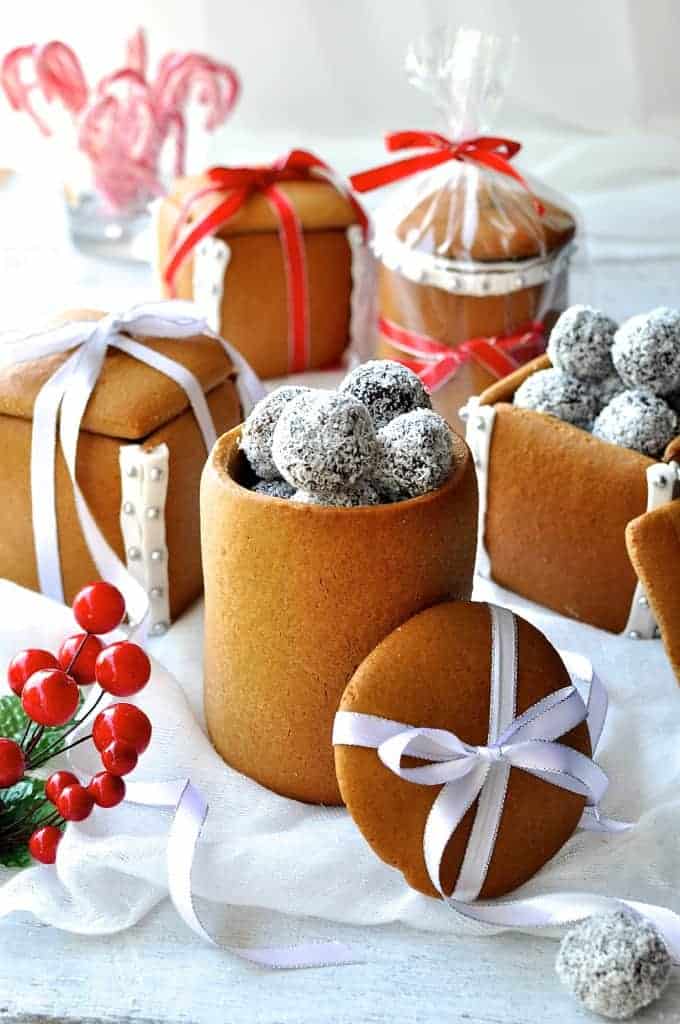
*** UPDATE – Which Should I Make?? I’ve had a few people ask me which was easier to make – the Mason Jars or the Boxes. The Mason Jars require less time because it is actually quite easy and fast to roll up onto the can. Then once baked, the only thing you have to do is slot the base in (no “glue” required). Whereas the Boxes need to be constructed using melted chocolate, which isn’t hard (I’ve provided a few tips that make it easier than you’d think) but takes time – around 15 to 20 minutes start to finish. However, with the Mason Jars there is a risk that they slide down around the can while baking, causing the bottom of the jar to be wider than the top. My recipe includes steps to avoid this, and also the gingerbread recipe I use is one that I use specifically for the Mason Jars because it is lighter and less buttery (so it maintains it’s form while baking instead of sliding down the can).***
Hungry for more? Subscribe to my newsletter and follow along on Facebook, Pinterest and Instagram for all of the latest updates.
Gingerbread Boxes & Mason Jars
Ingredients
Gingerbread
- 50 g / 1.8 oz unsalted butter , chopped
- 1/2 cup firmly packed brown sugar
- 1/2 cup honey
- 1 egg , lightly whisked
- 2 1/2 cups plain flour
- 1 tsp baking powder
- 1 tsp bicarbonate of soda
- 1 1/2 tsp ground ginger
- 1 1/2 tsp ground cinnamon
- 1/2 tsp All Spice (or ground cloves)
To Construct Boxes
- 1 cup milk chocolate buttons
Royal Icing (Optional for decorating)
- 1 egg , white only
- 2 cups sifted icing sugar (confectioner's sugar)
Decorations (Optional)
- Silver Sugar Balls
Equipment Required for Mason Jars
- 2 x empty 400g /14oz cans , washed and labels removed (e.g. canned tomatoes)
Instructions
- Place butter, brown sugar and honey in a small saucepan over low heat. Stir until the butter is melted and sugar is dissolved. Set aside until almost at room temperature. (Note 1)
- Pour into a large bowl and add the egg. Mix until combined.
- Sift the remaining Gingerbread ingredients straight into the bowl. Mix until just combined, then use your hands to knead it a few times in the bowl to bring the dough together. (Or turn onto work surface if your bowl isn't large enough).
- Flatten dough into a disc, wrap in cling wrap and place in the fridge for 1 1/2 hours. (Note 2)
- Remove dough from fridge. For ease of handling, cut the dough into 2 pieces. Use a rolling pin to roll out to 3mm / 1/ 10" thickness between two pieces of baking (parchment) paper. See Note 3 for an easy way to do this.
- Proceed with instructions to make Boxes or Mason Jars.
Preparing and Baking Boxes
- Preheat oven to 180C/350F with one oven shelf in the centre and the other directly below it.
- Line 2 baking trays with baking paper (parchment paper).
- Cut out 12 squares from the rolled out dough that are 8cm x 8 cm (3" x 3"). Place onto baking tray.
- Optional: Cut 2 x small squares to use as the "knob" in the centre of the lid. Place small squares in the centre of 2 squares.
- Bake for 12 to 15 minutes until golden brown. The top tray will take around 12 minutes, the bottom tray will be closer to 15 minutes (move it to the upper shelf when you take out the first tray).
- Allow to stand for 5 minutes on the tray then remove onto cooling racks.
Constructing Boxes
- Once the squares are cool, select 8 squares to be the walls of the boxes and line them up in front of you with the flat side down on the bench (i.e. the side that was on the baking tray).
- Use a knife to trim the bottom and right side of each square (to make the edges flat - easier to construct).
- Melt the milk chocolate buttons.
- Use a knife to spread melted chocolate on the right edge (that you trimmed) of one square (Square A). Hold Square A standing upright so the bottom edge (that you trimmed) is flat on the work surface.
- Get another square (Square B) and hold it upright so the bottom trimmed edge is on the work surface. Attach the chocolate edge of Square A to the flat side of Square B (i.e. the side that was on the baking tray). Hold for 20 seconds to let the chocolate firm up a bit.
- On Square B, use a knife to spread melted chocolate on the right edge you trimmed. Then attach that to another square, then repeat until you have constructed the walls of a box. Repeat for other box.
- While the walls are setting, get two more squares. Trim them with a knife so they are the right size to fit inside the walls - this will be the Base of the box. Spread a little chocolate on the edges of the square then pick up the walls and put it over the Base and push down so the Base fits inside the walls.
- Use Royal Icing to hide the edges and decorations of choice. I used Silver Sugar Balls. Attach the decorations while the Royal Icing is wet.
Prepare Mason Jars
- Line 1 baking tray with baking paper (parchment paper).
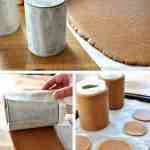
- Press the open end of the can into the dough to cut out 2 rounds. These will be the base.
- Cut 2 x strips of baking paper that are at least the height of the can and are long enough so it will overlap when you wrap the can. Butter the baking paper then wrap around the cans.
- For cutting the dough: Cut a rectangle out of baking paper that is the height of the can and the length to wrap around the can with a 1 inch / 2cm overlap. **This is important. See Note 4.**
- Lay the rectangle from step 4 on the dough and use a large knife to cut out the rectangle. Repeat to make two rectangles.
- Leaving the dough on the baking paper it was rolled out on, place the can on one end of the dough and roll up firmly to cover the can. Make sure it wraps snugly, saggy dough will result in a saggy Mason Jar. Remove parchment paper, trim any excess dough and use your fingers to seal. Repeat with other can. Place the cans on their side on the baking tray, seam side down.
- Gather up the dough remnants and roll out again. Place one can with the dough wrapped around it upright onto the dough and use a small knife to cut out rounds. Repeat to make 2 rounds. These will be the lids. Place onto baking tray.
- Optional: Cut a small square and place in the centre of the lids. (I forgot to do this and had to stick on a cooked piece of gingerbread!)
- Place baking tray in the fridge with the cans on their side for 30 minutes. This helps stop the mason jars from sliding down when baking.
Baking Mason Jars
- Preheat oven to 180C/350F. Put the oven shelf in the middle of your oven (note 5).
- Remove the baking tray from the fridge. If the dough on the cans has sagged slightly, use your hands to press it against the can.
- Turn the cans upright on the baking tray and place the tray into the oven.
- Bake for 20 to 25 minutes, until golden brown, turning the tray halfway through (so the mason jar bakes an even colour).
- Remove from oven and let cool for 5 minutes before transferring to a cooling rack.
- Once cool, gently pull the can and baking paper out of the Mason Jar. It should slip out fairly easily, if not, just twist it slightly to loosen then pull out.
- Fit the small circles into the base of the Mason Jar. It might need trimming to fit - be careful not to over trim, you want it to fit snugly. You do not need anything to make it stay in place because the gingerbread is sticky and the base should fit snugly.
- Decorating is optional. With a ribbon, I don't think any decorations are required. On one, I piped Royal Icing along the bottom, top and rim with Silver Sugar Balls.
Royal Icing
- Use a mixer to beat the egg white until soft peaks form. Gradually add icing sugar, a heaped dessert spoon at a time, making sure it is incorporated before adding the next tablespoon.
- Transfer the Royal Icing into a piping bag with tip of choice.
- Use to decorate the Boxes and Mason Jar, as desired.
To Gift
- Fill with homemade (or bought) treats of choice. Mine are pictured filled with homemade Chocolate Ganache Truffles. Tie with ribbons to make them pretty!
Recipe Notes:
Nutrition Information:


Hey! Could you use a sugar cookie mix instead of ginger bread to make the jars?
Sorry Lisa, haven’t tried that. 🙂
YOU’RE A GENIUS!!!!
Thanks a lot for sharing this with us!!!!
Love your enthusiasm! 🙂 N x
Hello ! Love the idea , once made how long will they last in cool dry place ?
Thanks
Hi Violet! In an airtight container they are good for 4 days, even 5 🙂 N x
Please do you have the recipe in grams? I’m based in the UK & not happy working with cups as I find such a variety of weights depending how packed the cup is. Thanks
Hi, I love this gingerbread recipe. I’ve used it as a cookie recipe and it was the best!I have just one question: Do you know how long the dough can be refrigerated (and Frozen)before it starts to go bad?
So glad you love this Maria! 🙂 The rule of thumb is 3 months 🙂
This is so cute. I love it! I’m thinking of trying to make this but i don’t have allspice. What affect is there if i don’t add the allspice and will it still turn out alright?
It definitely will Lily! The All Spice flavour is very subtle 🙂
Hi I love the idea of making gingerbread mason jars! i just wanted to know if bicarbonate of soda is the same thing as baking soda. I don’t to mess it up when i try it. Oh and any extra tips (Cause apparently I don’t do well with powders. ) 🙂
Hi Mariana! yes it is the same as baking soda. I should have clarified, thanks for the question!
Hi, I was just wondering how long do they keep ? How far in advance before Christmas can you make them ? Christmas is always so busy, it would be good if they can be made well before then Lol
Gingerbread houses seem to last forever as long as it was baked long enough before putting together. The gingerbread dries out more with being set out on display. You can actually cover it after the holidays and keep it for the next year; store in a cool, dry place – even a tote will work. Once put together with royal icing, it’s like fruitcake. LOL Some of the gingerbread cookie mixes make great houses, too, so you can avoid putting ingredients together for dough making and get in to the fun quicker.
Woah! I didn’t know that Sharon, thanks so much for that information! 🙂 N x
Hi Lynda! I must admit, I haven’t tried freezing them! I will try it out soon and report back! 🙂
currently attempting the mason jars but i think maybe theres too much flour, my dough is feeling like shortbread dough at the moment! :/
Oh no!! So it’s crumbly?? If anything I worry that sometimes on really hot days it goes the other way! i.e.. too soft! I’ve never ever had it come out crumbly.
SO glad I saw this at #FoodieFridays. A follower of your blog now!
Thanks Susan!! Hope you enjoy my recipes!!
Wow
These are awesome!!!
I usually do baked goods in jars but this is way cuter!
Can you tell me how long you think these would keep for. If I make them now for christmas day, will they keep well or are they best made only a few days out? I’d love to stockpile them for the unexpected gifts!
You can make gingerbread items long before Christmas if it’s not going to be eaten. If it’s for snacks then a few weeks ahead is still okay as it doesn’t go stale very quickly. Keep it stored in a cool and dry place; never refrigerate or freeze. Save time and use a cookie mix instead of mixing all your own ingredients. I’ve used the pouch mixes and they work well.
Hi Louise! Thank you for your kind words! I’m afraid they only last for a week or so, then the gingerbread starts to get soft (i.e. stale). I have not tried freezing it though – I plan to make another batch very soon so I will try freezing it and let you know how it goes!! I would absolutely love to hear what you think if you try this!
Oh my goodness! These are a work of art and truly amazing ~ well done! I am hoping I have time to try these this year.
Thanks Elizabeth! I hope you do too! 🙂
I love this idea!! And I agree with all the above comments — you are so creative and have totally outdone yourself with the idea, the styling, the post… must have taken ages to do! So impressed!! LOVE IT.
Thanks Kristen!! Had loads of fun coming up with this and experimenting to see what worked best!
….4 days to set on any new part of the structure you add. So you could build the base and let that set, then add roof after 4 days and start decorating the base while the roof dries. 4 days after the roof sets, finish it off. I also always used the store bought white frosting. That stuff hardened amazingly. those houses survived a 2.5 hour trip from chicago to Wisconsoin, and then my sister refused to break into it so they sat on display another year after that=) Aside from dust, they were solid. I think I’m going to have to make one again this year too. I’m thinking of more ideas as I type that I want to try out. Thanks for geeking out over gingerbread with me and Merry Christmas!
2.5 hr trip? And it stayed there for a YEAR??!! Oh wow!! I would LOVE to see a picture of that if you have one!! You really know your stuff Mary. I might have to hunt you down next year when I attempt another gingerbread creation, you can be the Chief Baking Engineer!!
I’m a little confused. Its says for the jars, to
Once cool, gently pull the can and baking paper out of the Mason Jar. It should slip out fairly easily, if not, just twist it slightly to loosen then pull out.
Fit the small circles into the base of the Mason Jar. It might need trimming to fit – be careful not to over trim, you want it to fit snugly. You do not need anything to make it stay in place because the gingerbread is sticky and the base should fit snugly.
It doesn’t sound like the bottoms or tops were baked like the jar, as it’s “sticky and will fit snugly.” Do you bake them and then put them on, or bake the bottom attached to the “jar” except the lid?
Hi there! Yes you do bake the top and bottoms as well. They are slightly sticky because the gingerbread is slightly soft, not crisp like a cracker, and because of the sugar so it is sticky. So the base does stay in both because it fits quite snugly and because the gingerbread itself is quite sticky (once baked). There is a picture in the recipe that shows 4 circles on the baking tray – 2 are the base and 2 are the lid. 🙂 Hope that helps!
Hi Nagi!
I absolutely love all your ideas! I will be trying your ginger bread mason jars this week. I was reading the beginning of your post about last years gingerbread house. I love gingerbready houses and have made them for years. I have some tricks which I hope will make you want to try a house again!
I’ve made many gingerbread houses. My favorites were a traditional panel style, and one that was log cabin style made with gingerbread slats. Here are my tricks:
1. Wait at least 4 days for the icing to harden on your structure before adding any decoration, and use LOTS of icing piped in the inside corners.
2. If time permits, build the structure in small sections so as you add onto the structure, you are adding onto pre-dried, very strong pieces.
3. Use Pretzel Rods. These work great for support beams or if you are doing a log cabin, wall supports. I also use them for where the roof attaches to provide a wider ledge so you can use more frosting to glue the roof.
Have a happy Holiday – can’t wait to make my mason jars!
MARY! These are brilliant suggestions! Especially the pretzel rods – GOLD!! Oh my gosh, I really need to try gingerbread houses again! So 4 days for the structure icing to set before adding roof and other decorations? OK, I am going to start planning now because I have a big Christmas party coming up and I want to make a gingerbread house because I think the kids will love it so much! Thank you SO MUCH for these tips Mary! I will have to send you a picture when (IF) I do it successfully this time!! 🙂
These gingerbread cans and boxes are so adorable and a brilliant idea. I do not know if mine will turn out as cute as yours but want to give it a go! Take care, BAM
Thanks BAM!! I would love to see yours!
Nagi, GURRRRRL, you have outdone your self ! Everything about this is BEAUTIFUL – the pictures, gingerbread boxes , the styling . Truly Unique. This is going at the top of my Christmas Board. I wish I could give it 10 stars .
Thank you Imma!! This is definitely not my usual type of recipe, I’m not a sweet baking sort. But these were actually really easy and so much fun to make!
This is amazing!! I love the idea of Gingerbread boxes and Jars! I can’t wait to give them a go! 🙂
Thanks Dini!! I would love to see yours!
Those are perfect Christmas gift and you made them even more perfect! Finish them in 1 hour? I don’t believe! They look so delicate and beautiful! Aside of the coming holidays, I need to make this for my best friend. She has a baby girl and they will definitely love this!
Hey Maggie! Well, there is resting time because the dough needs to be refrigerated so I did not take that into account. Love to hear how it turns out if you do try this!
This is brilliant!! I love this idea. And stuffed with truffles…how awesome! I would be so excited to get a gift like this! Pinning and sharing everywhere!
Thanks Michelle!! I do love the boxes and jars themselves, but I’m with you, the truffles are the best!
I wanted to let you know you are featured this week at Foodie Fridays! I’ll be pinning you to our new special featured board and sending some extra sharing love your way!
Wow, thanks so much Michelle, I’m SO honoured!!