
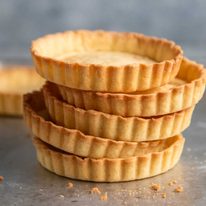
This is a recipe for individual sweet tartlet shells made with pâte sucrée, the classic pastry used by French pâtisseries for tarts. It’s my go-to crust for sweet tarts – crisper, more delicate and easier to work with than regular shortcrust. It’s used for JB’s Raspberry Tartlets he published today!
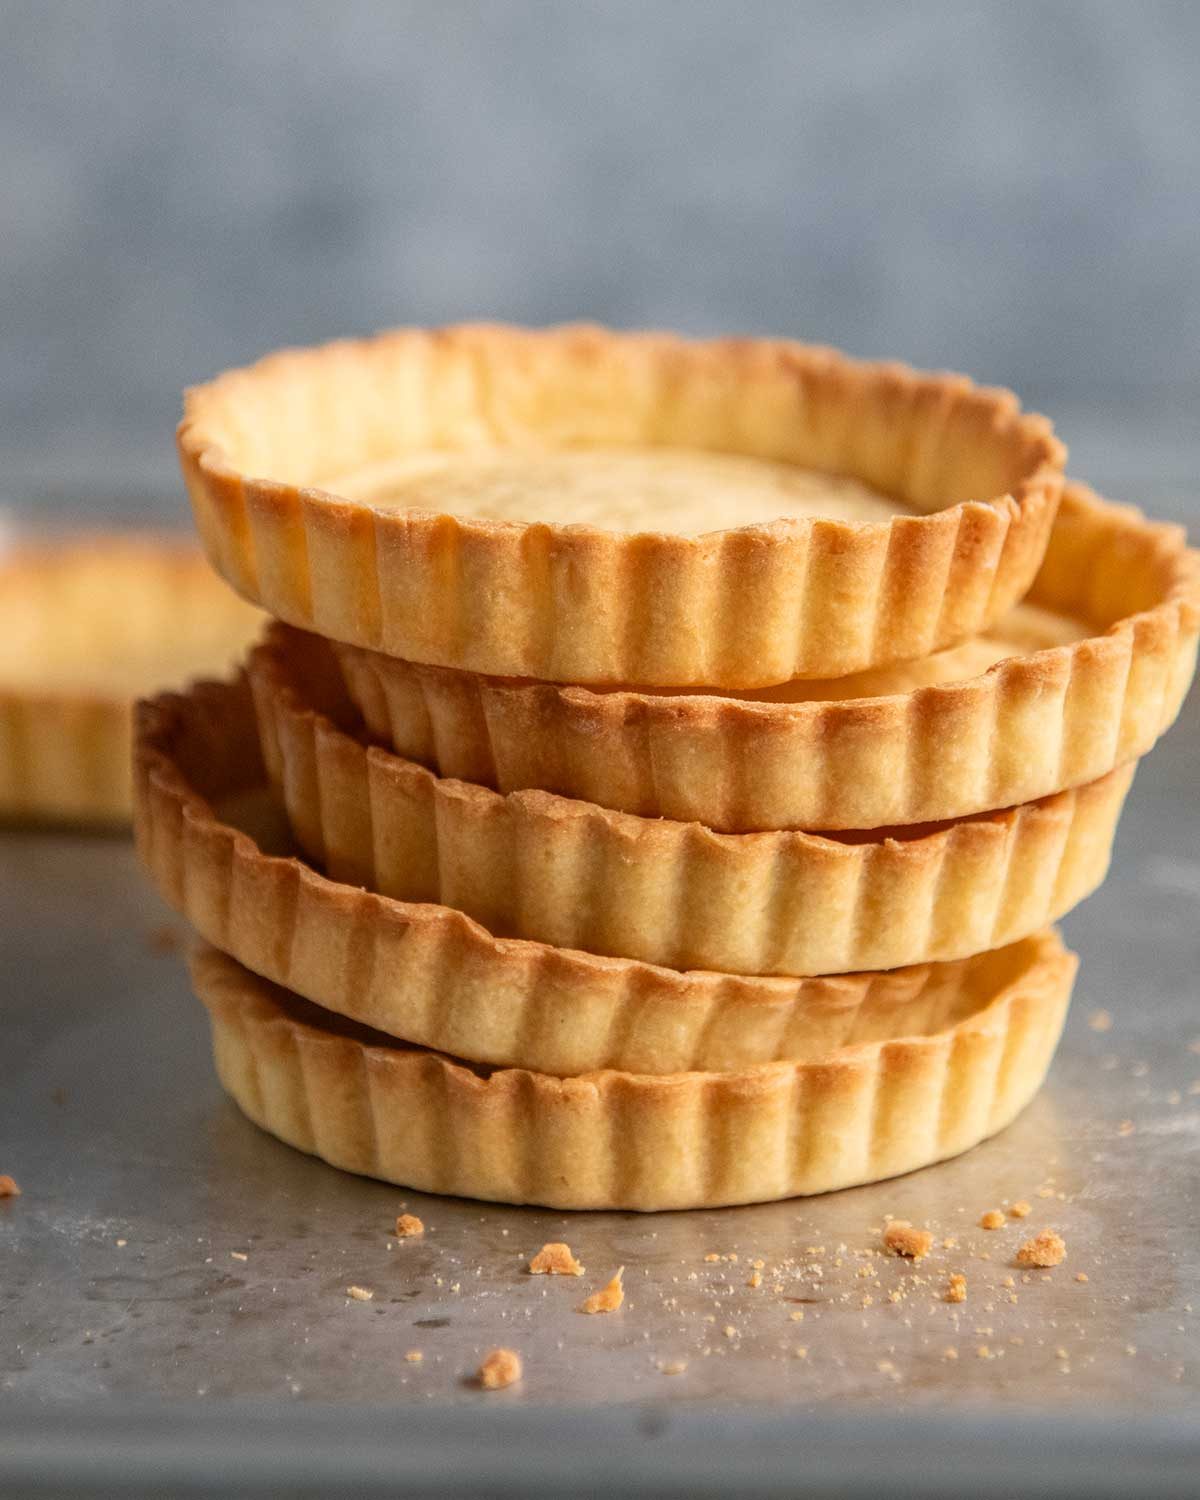
Sweet tartlet shells – individual size
This recipe for individual tartlet shells accompanies the Raspberry Tartlets that JB also published today. He had originally planned to include the tart crust recipe there as well, but it was getting very lengthy. We also realised that it’s the first individual tart recipe on this website – but it certainly won’t be the last.
So it seemed sensible to publish the tartlet shell recipe separately!
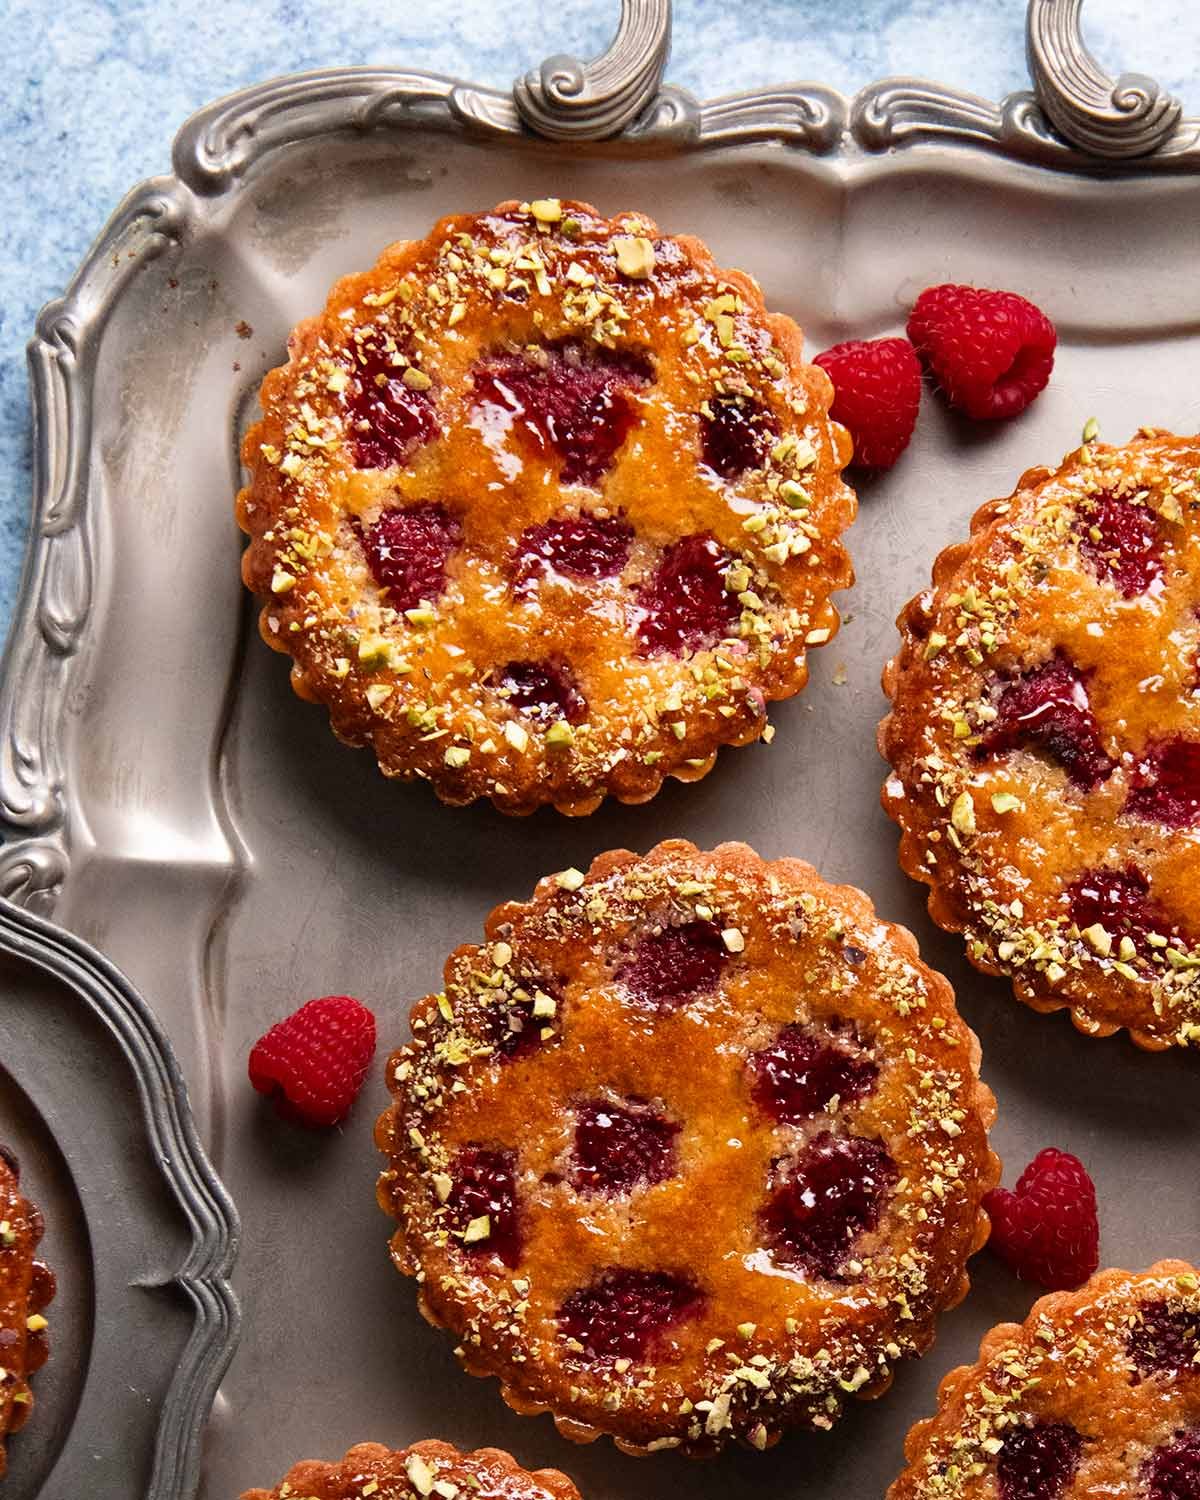
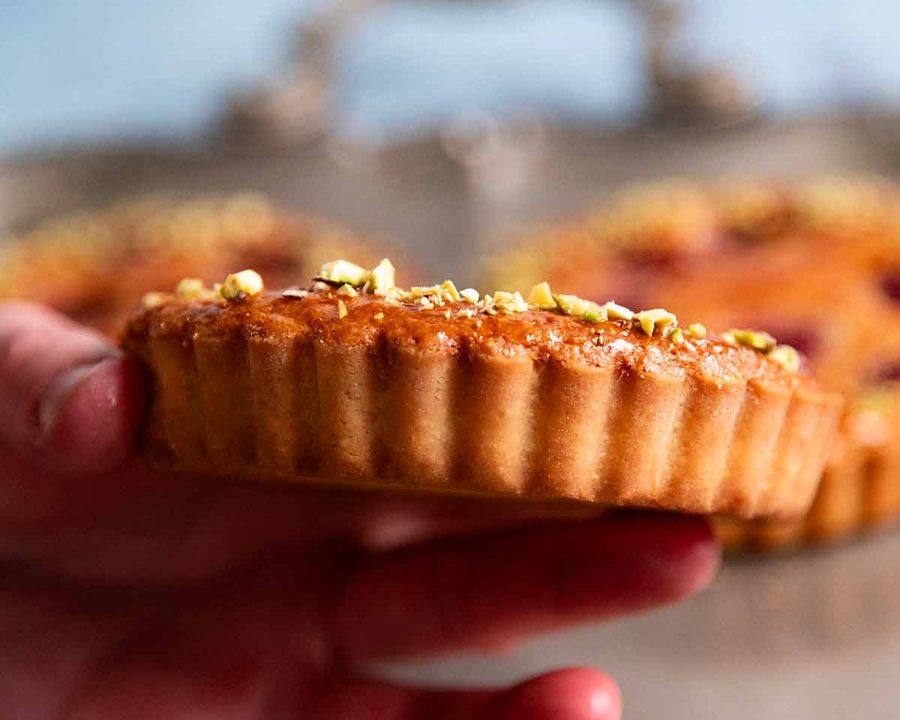
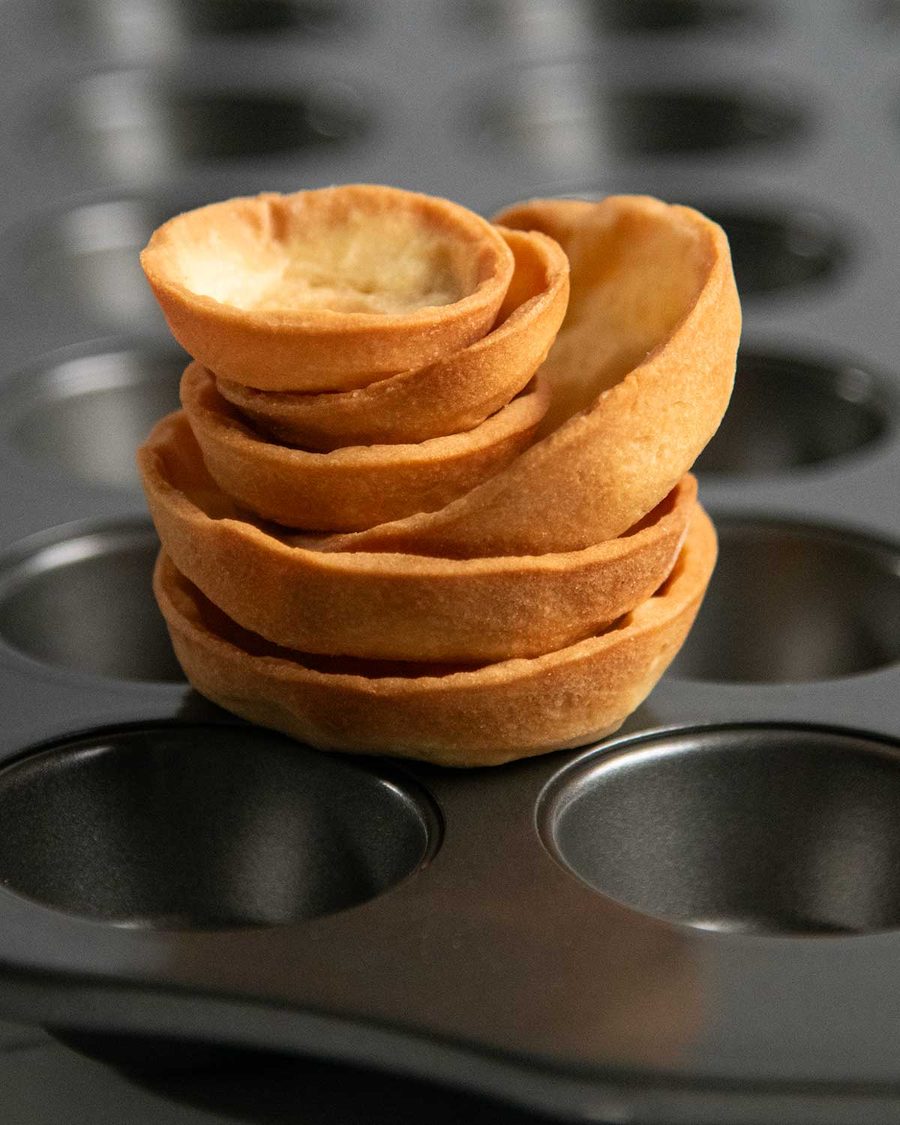
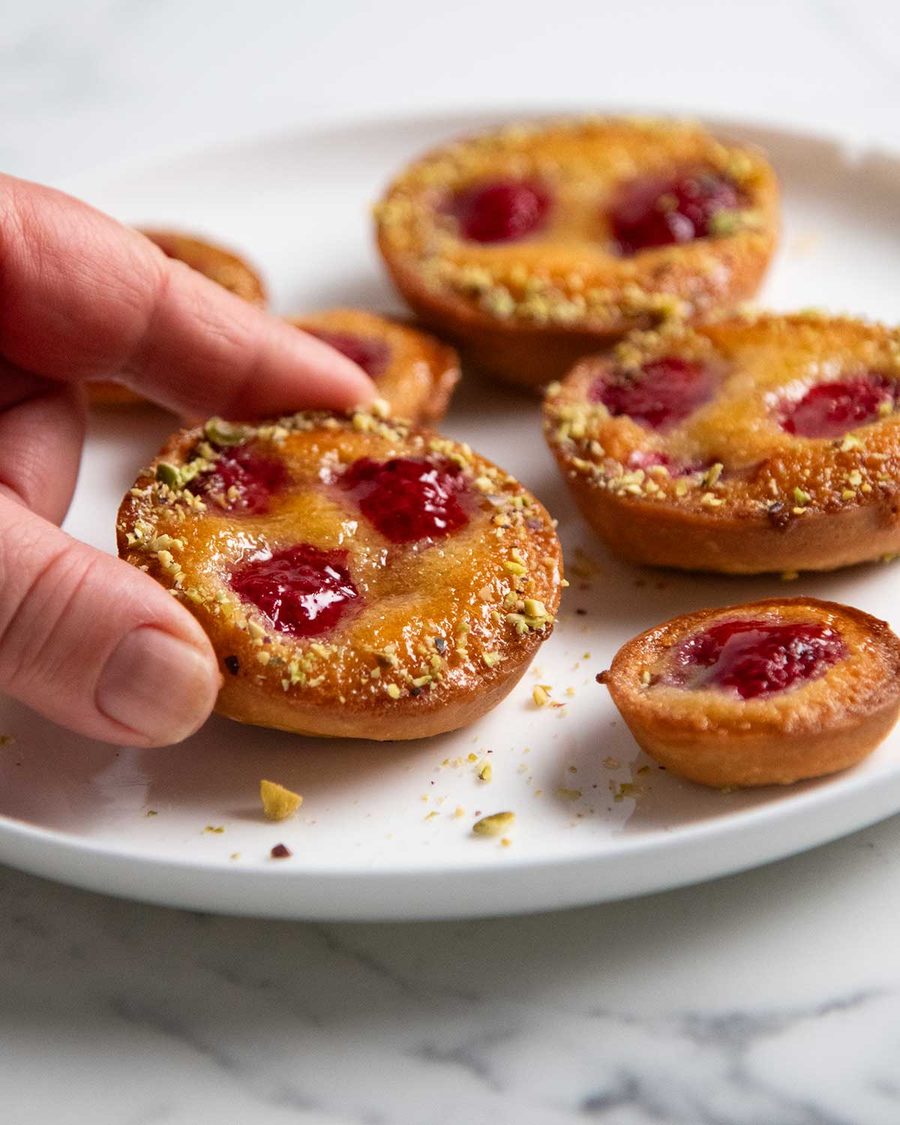
These individual size tart crusts are made with pâte sucrée which is the classic French sweet pastry used for fruit tarts and other pâtisserie-style desserts. Both large ones for sharing – like JB’s very popular Pistachio Pear Tart – and small single serve tartlets like the raspberry ones above. And if you don’t have individual tartlet tins, you can make mini ones in a muffin tin!
It’s buttery, crisp and delicate, yet surprisingly easy to work with. It’s more pliable than shortcrust which is more prone to breaking. I also much prefer the finished tart shell – it has a more luxurious, finer, crisper texture that doesn’t crumble apart into powder with every bite so it’s more practical to eat.
It’s the perfect base for all sorts of sweet tartlets – from fresh fruit tarts with custard to chocolate ganache (photos below), lemon curd and more.
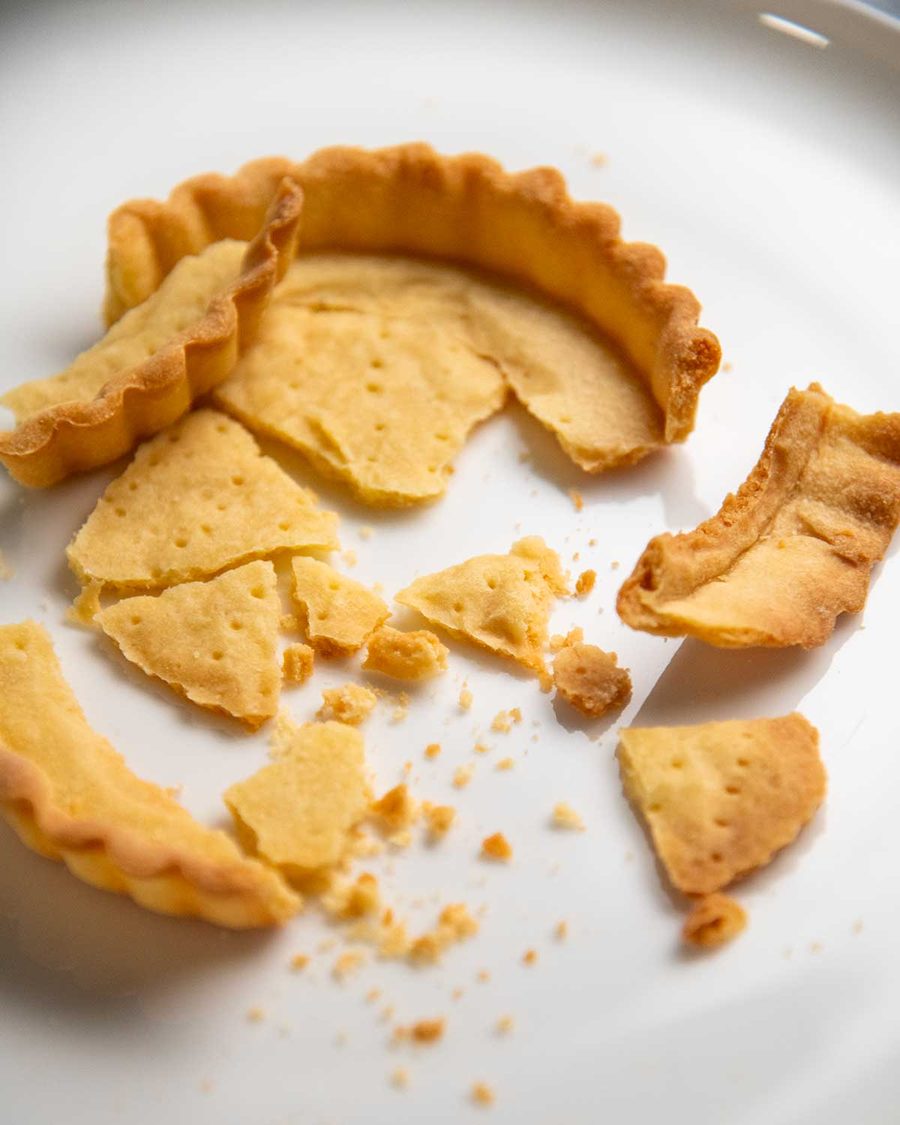
Ingredients in Sweet Tartlet Shells
Here’s what you need to make this tartlet shell. Almond meal and icing sugar are the key ingredients that set pâte sucrée apart from regular shortcrust, giving it a more delicate texture and a buttery, pâtisserie-style finish. And egg is the reason the dough is much easier to work with – more pliable, less prone to breaking!

Flour – Just plain / all purpose flour;
Icing sugar / powdered sugar – The finer, powder-like grains make this incorporate more thoroughly and easily into the dough compared to ordinary white sugar grains;
Almond meal / ground almonds – Not to be confused with almond flour which are finer grains, this adds a touch of nuttiness that complement sweet fillings as well as adding a hint of moistness to the pastry. It can be substituted with ground hazelnut.
Butter – If it didn’t include butter, I would seriously question if it was French! 😂
Egg – Unlike regular shortcrust pastry which uses water, pâte sucrée contains egg. It enriches the dough while also making the dough easier to handle.
How to make Sweet Tartlet Shells
Confession – I used to make pâte sucrée by hand, mostly because I thought it earned me extra French pastry points. But actually, it’s 10x faster using a food processor and comes out 100% exactly the same – and now even JB uses the food processor! (He’s French, and he’s a Michelin trained chef. I feel so validated. 😂) But on a leisurely Sunday afternoon when I’m pottering around the kitchen without the time pressure of a working day, I do still like to make doughs by hand.
PS The hands you see in the step photos are JB’s, because this is his recipe. I’m just writing this post. 🙂
1. Make the pâte sucrée dough
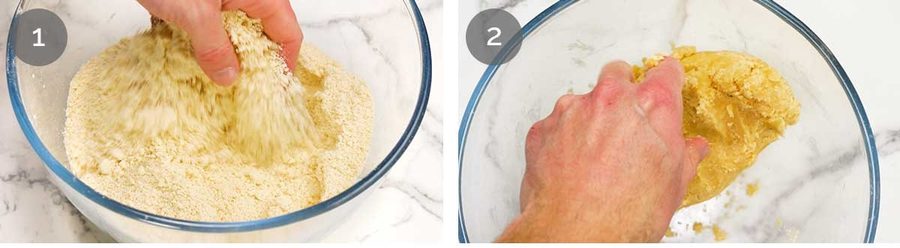
By hand – Mix the flour, icing sugar, almond meal and salt in a bowl. Then rub the butter in using your fingertips until it resembles breadcrumbs – it takes about 5 minutes, at a leisurely pace!
Dough done – Then mix the egg in using a wooden spatula, mixing until it gets too hard to mix anymore because it becomes thick like a dough. Finish it off by kneading in the bowl with your hands to bring the mixture together into a dough ball.
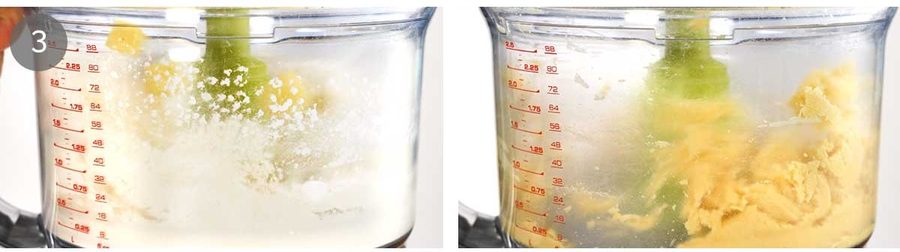
Food processor method (30 sec) – Use a food processor fitted with a regular metal S blade. Pulse once to combine the dry ingredients, then add the butter and pulse 4 to 5 times until the mixture becomes breadcrumbs. Add the egg and blitz until a dough ball forms, about 15 to 20 seconds.
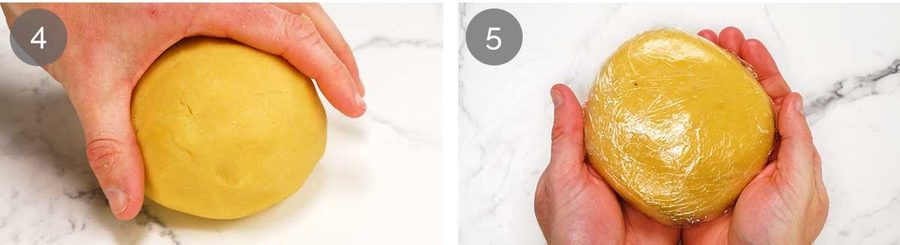
Disc – Turn the dough out onto a work surface. Lightly knead to form a smooth ball then shape it into a 2cm / 0.8″ thick disc.
Fridge 30 minutes – Wrap with cling wrap then refrigerate for 30 minutes. This firms up the butter in the dough which is what makes the crust nice and flake.
2. roll-out and line tartlet tins
The ball-rolling and rolling-out method set out in this section is a very efficient way to line tartlet tins around 12 cm / 4.7″ in diameter (the recipe makes 6), approximately the size most commonly used in pâtisseries. You end up with barely any pastry scraps, and the pastry will be of even thickness in every tartlet.
However, if you are making mini tartlet shells, I don’t think it’s the most efficient method. Instead, roll the dough into one large sheet, press out rounds using a cutter, line the tartlet tins, then gather and re-roll the scraps as needed.
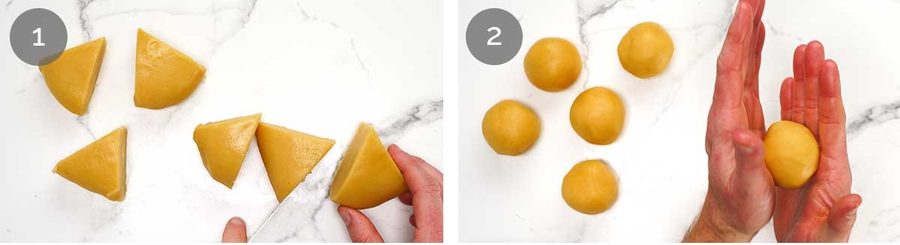
Individual balls – Divide the dough into 6 equal portions. Cut the disc like pizza!
Roll each piece into a ball.
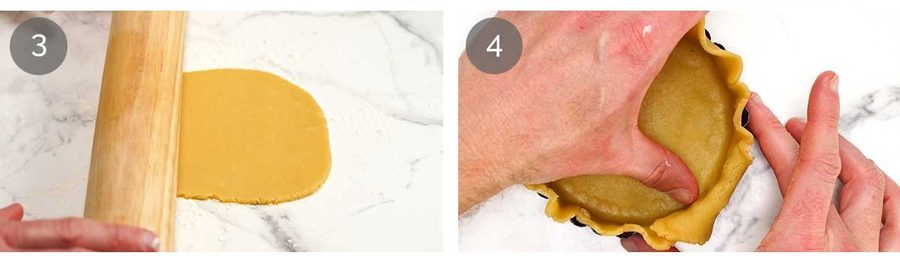
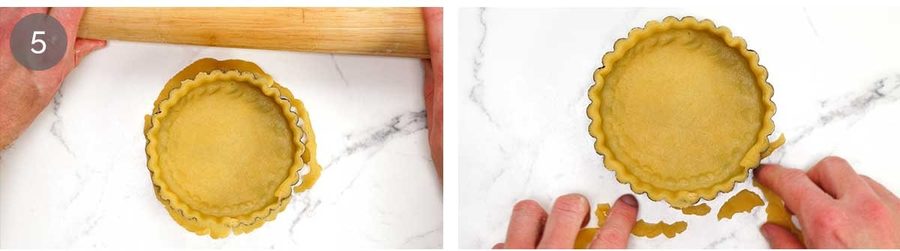
Roll each ball out into a 15 cm / 6.5″ round (it will be ~3mm / 1/8″ thick). This is for the 12 cm / 4.7″ tartlet tins I am using.
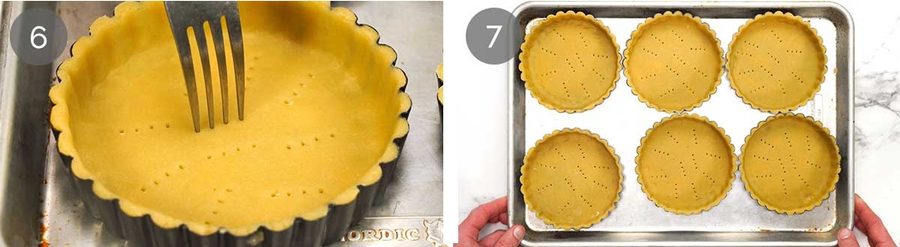
Line tartlet tin – Drape the pastry into the tartlet tin and gently fold it into the corners. Take care not to pull and stretch the pastry as this makes it shrink when it bakes.
There is no need to grease the tart tins, even if yours are not non-stick ones. As reader Ali so succinctly put it, the butter in the pastry essentially self-greases the tins!
Trim – Roll the rolling pin across the surface of the tartlet tin to cut excess pastry off.
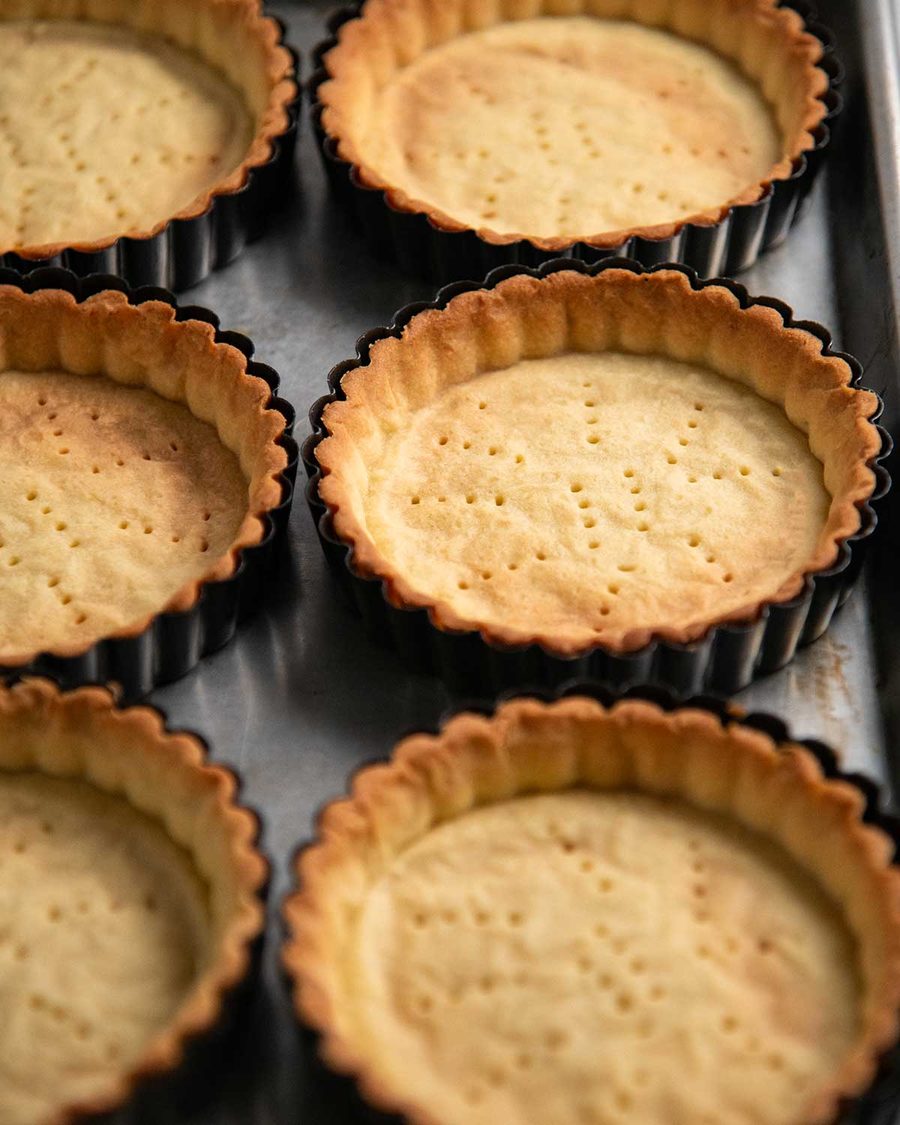
Prick the base with a fork (not all the way through), about 10 in each. This prevents the base from puffing up, which it otherwise would in the 2nd bake after the baking beads are removed.
Refrigerate for 30 minutes before baking. This is a bit of an insurance policy to re-solidify the butter in case it softened a bit too much as you rolled out the pastry. Cold butter = lovely crispy crumbly pastry!
3. baking
The bake times in the recipe are for the pictured tartlet tins. If you are making smaller ones or mini ones using a muffin tin, you can reduce the bake time to 12 minutes with the baking beads and 2 minutes uncovered.
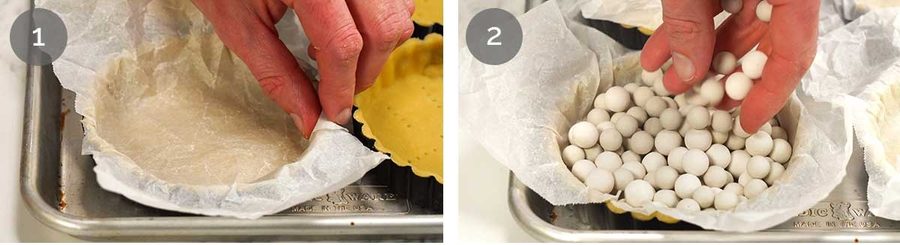
Crumple the baking paper – For each tartlet, cut a piece of baking paper about 50% larger than the tart tin. Crumple it into a ball, then unfold it. The creased paper becomes more flexible, making it easier to press neatly into the base and corners of the pastry without springing back like a flat sheet;
Baking beads – Fill each with baking beads. This keeps the pastry shell shape in place as it bakes – it prevents the base from puffing up, the walls from sliding down and pastry from shrinking. If you don’t have baking beads, use uncooked rice grains or dried beans instead.
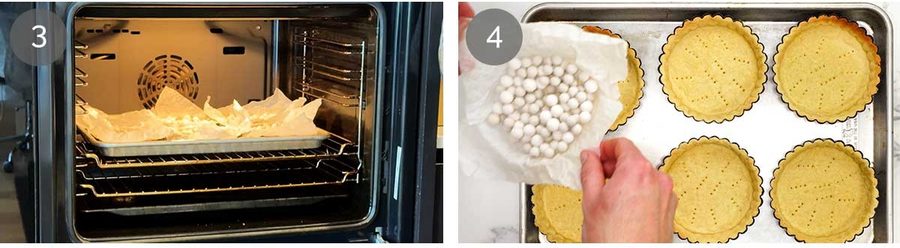
Bake 1 – Bake for 12 minutes in a 200°C / 390°F (180°C fan-forced) oven. It needs to be a hot-ish oven so the pastry walls set before the butter melts and causes the sides to slide down a bit.
If the tarts won’t be baked again (eg. filled with custard, pastry cream, whipped cream), bake for 14 minutes which will fully cook the tart base all the way through (whereas for tarts that will be filled and baked again, the base can be a bit undercooked as it will finish cooking through with the filling).
Remove beads – Use the paper overhang to carefully remove the beads. They are hot, so be careful! I pile them all into a metal bowl to pack away later when they cool down.
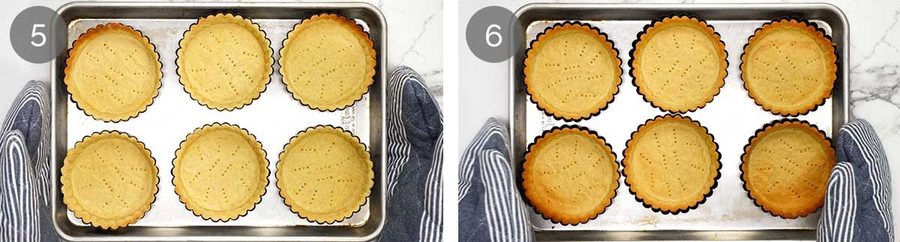
Bake 2 – Then return the uncovered tart shells to the oven and bake for a further 5 minutes if the tarts will be filled with something that needs to be baked. The purpose of this step is to colour the tarts. The tart shells will be fully cooked but the edges will be light golden, so when the tarts are baked again the edges don’t get too brown.
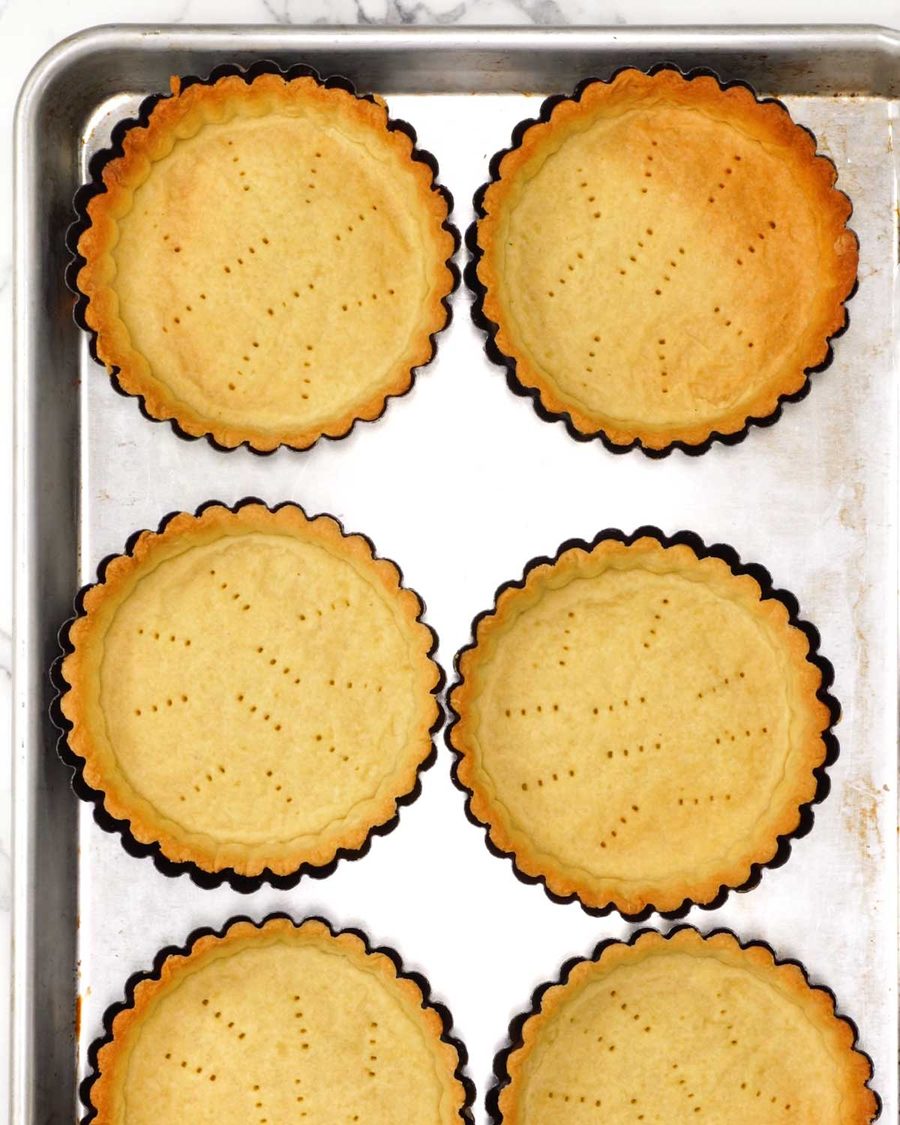
Cool – Then this is what they look like after the uncovered baking time in the fridge. Let them fully cool in the tart tins. Then use!
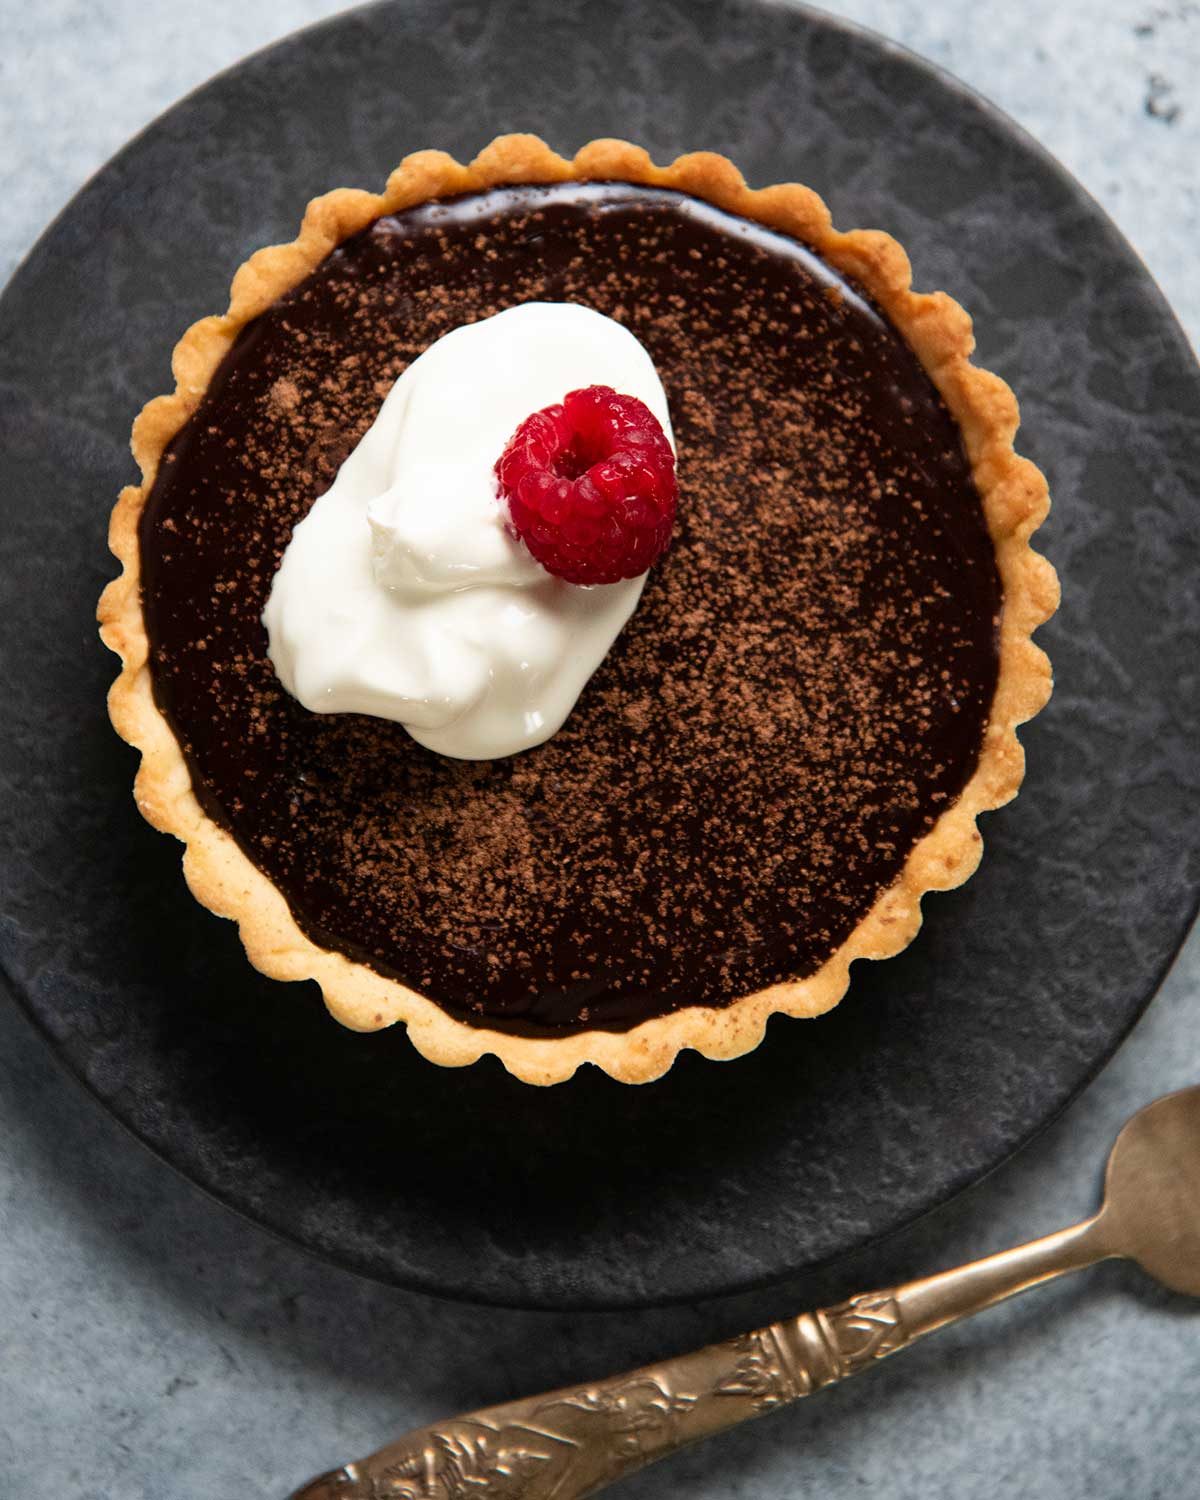
How to use Tartlet Shells
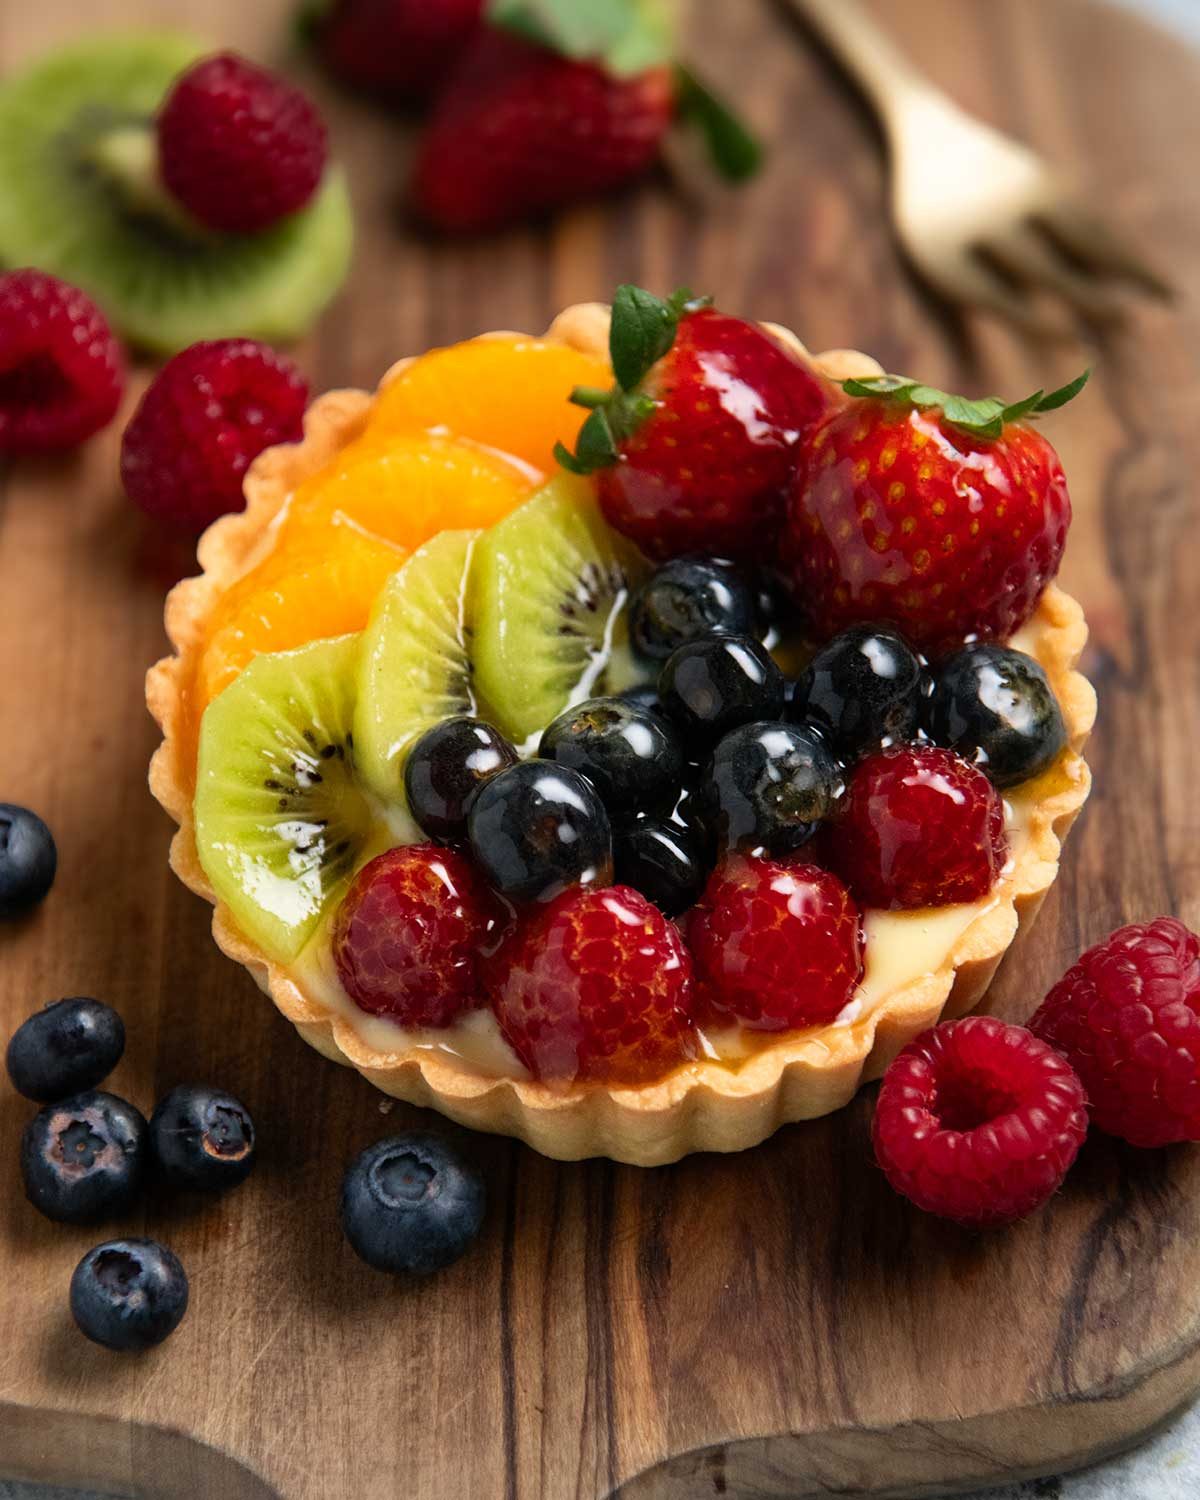
These little tartlet shells are incredibly versatile. Fill them with no-bake fillings like pastry cream and fresh fruit to make a Fruit Tart (see photo in introduction section), chocolate ganache (above), lemon curd, cheesecake filling or mousse.
Use them for baked fillings such as frangipane / almond cream (like in JB’s Raspberry Tartlets), or a baked custard. Just don’t forget to blind bake the tartlet crust for the shorter baking time so the crust doesn’t become overly brown when it’s baked again with the filling!
You can also store the unfilled tarts in an airtight container for 3 days and they will stay fully crisp and fresh!
Love to know what you use these Tartlet Shells for. Share your ideas in the comments below – other readers are always looking for new tart inspiration! – Nagi x
Sweet tartlet crust FAQ
Yes you can, but it would be better to use this recipe here which is for a single large tart. The assembling and baking instructions are slightly different.
Absolutely. See Notes 4 and 5 for tips and amending the baking time.
You sure can! See in post for a photo of tartlet shells I made using a regular and mini muffin tin. Notes 4 and 5 in the recipe card gives instructions on how to use a muffin tin.
I haven’t tried gluten free flour unfortunately. The absorbency is different so I’m not 100% sure if the pastry would hold up to gluten free flour. Sorry!
I haven’t tried but this shouldn’t bee a problem as it is a relatively small amount. If you find the dough a bit stick when bring it together to form a disc, just sprinkle a bit of flour on it and knead it it.
Watch how to make it
The video features JB making it, because this is his pastry recipe!
Hungry for more? Subscribe to my newsletter and follow along on Facebook, Pinterest and Instagram for all of the latest updates.
Sweet tartlet shells (individual tart crusts)
Ingredients
- 1 1/2 cups plain flour (all-purpose flour)
- 1/2 cup soft icing sugar (powdered sugar) , sifted (Note 1)
- 2 1/2 tbsp almond meal (ground almonds) , not almond flour (Note 2)
- 1/4 tsp cooking salt / kosher salt
- 100g / 7 tbsp unsalted butter , unsalted, softened, cut into 1cm / 0.4" cubes
- 1 large egg , at room temperature (~50 – 55g/2 oz) (Note 3)
Instructions
ABBREVIATED RECIPE:
- Mix dry ingredients, rub in butter then egg (or use food processor). Form disc, fridge 30 min. Portion into 6 balls*, roll out 15 cm / 6.5" round (~3mm / 1/8" thick), line 6 tartlet tins, trim excess. Fridge 30 min. Blind bake 12 min at 200°C / 390°F (180°C fan) with weights + 5 min uncovered for par-baked. * For mini tins or muffin tin, roll out single large one and press out circles. Gather scraps and repeat.
FULL RECIPE:
Pâte sucrée pastry dough:
- By hand option – Mix together flour, icing sugar, salt and almond meal in a bowl. Add butter and use your fingertips to rub it in until it resembles breadcrumbs. Add egg, mix with a rubber spatula until it becomes too hard to stir anymore, then use your hands to bring it together into a dough.
- Food processor (30 sec) – Using the standard metal S blade, pulse the flour, icing sugar, salt and almond meal once just to combine. Add butter and pulse 3 to 4 times until it resembles breadcrumbs. Add egg and blitz for 15 to 20 seconds until it comes together into a dough.
- Fridge 30 min – Turn dough out from the bowl or food processor onto a work surface. Knead lightly just to bring together into a smooth ball. Flatten into a 2cm / 0.8" thick disc. Wrap with cling wrap and refrigerate for 30 minutes.
Rolling out:
- Divide dough (for larger tartlet tins) – Cut the disc into 6 equal portions, or however many tartlet tins you are using, then roll into balls. (If using a muffin tin or lots of mini tart tins, don't portion, roll out one big sheet, press circles out and press into tin. See Note 4)
- Roll each ball out into a 15 cm / 6.5" round (~3mm / 1/8" thick).
- Line and trim – Press pastry into 6 tartlet tins (12cm / 4.7"), taking care not to stretch the dough as this causes shrinkage during baking. Roll the rolling pin over the tartlet tin to trim excess dough. (No need to grease the tins even if they are not non-stick ones, the butter in the pastry essentially self-greases the tins – as reader Ali so succinctly explained!).
- Prick the base of the pastry 10 times with a fork. Not all the way through – just make a light prick on the surface. (Do less pricks for smaller tarts).
- Refrigerate 30 minutes – Put the pastry in the tart tin for 30 minutes. (Extra insurance policy to avoid shrinkage and walls sliding down).
Baking:
- Preheat oven to 200°C / 390°F (180°C fan-forced).
- Baking beads – Cut or tear baking paper into pieces about 50% larger than the tart shells. Scrunch the paper in your fist then unravel, smooth out and fit into the tartlet tins (scrunching makes it fit in more easily into the corners). Fill with baking beads (or dry raw rice or beans).
Baking (par-bake or full baked):
- Park-bake or fully baked? Par-bake if the tartlet shell will be baked again after filling (eg. almond cream / frangipane like Raspberry Tartlets). Fully bake if they will not be baked again (eg filling with pastry cream or whipped cream).
- Par-baked (12 + 5 min) – Bake 12 minutes. Use paper overhang to remove the beads, then bake uncovered for 5 minutes. Pastry should pale golden on the base and light golden on the edges. It will go golden when the filled pastry is baked.
- Fully baked (14 + 5 min) – Bake 15 minutes, remove beads, then bake 5 minutes uncovered. The base should be light golden and the edges should be golden.
- Cool and fill – Fully cool in the tart tins before filling and baking again if filling needs to be cooked (like Raspberry Tartlets).
- Storage – Or keep unfilled in an airtight container for up to 3 days.
Recipe Notes:
Nutrition Information:
Life of Jaffle
The number of times I’ve been asked, “Is your puppy okay??” and I have to explain that this is simply Jaffle’s method of protesting when it’s time to go home ……

…… because if he had his way, he’d spend all day at the dog park!


Me, on the other hand, have other things to do. Like LAUNDRY. 😝

Splitting the tartlet shells out into their own recipe was the right call, because pâte sucrée deserves the space rather than being buried at the end of a raspberry post. Crisper and easier to handle than regular shortcrust matches my experience with the individual dough exactly. Chilling twice is the bit people rush. I have had sizeitup open too much lately.
As I bake for a few coeliacs myself included . This recipe is a go to for all my dessert pies and tarts. So yes it works wonderfully with gluten free flour.
I like that your avid readers know if it’s your hand or not and you have to warn them that it’s not your hand in the photos. because oh boy, we would complain and have doubts if this recipe is even really tested in your kitchen or made with AI 🤣 thank you for this amazing recipe and putting up with us ❤️
Hi Nagi, I am using this Pastry recipe to make a 24cm tart instead of the 12cm size, do I prebake the larger pastry size, can you please explain, there seems to be a lot of filling, will it be too much for the 24cm size ? Xx
Hi JB, the Almond meal, did you grind your own skinless almonds as I can only find almond meal with skin on ?? Bit confused. Or what brand did you use please.
Hi Jenny! Almond meal is usually made with skin on almonds which is why it’s a little darker than almond flour. We just use the almond meal from Coles, Woolworths, Harris Farms. Hope that helps! – N x
Hi Nagi, thank you for your quick reply. Xx
Could you use Gluten Free plain flour for this recipe?
Hi Gillian – I haven’t tried, it should work because it’s not a leavened cark, but I worry it might make the tart crust a bit less crispy. I’d have to give it a go to check. Sorry! – N x
Is it possible to just omit the almonds/hazelnuts to make these nut free?
Hi Laura – yes, it will work fine. If you find the dough a bit sticky when you’re shaping it into a disc to put in the fridge, just add a bit of flour onto the work surface and that will solve that nicely 🙂 – N x
Thank you for taking the time to respond!
Excuse my ignorance, but do you need to grease the tins before you put the dough in?
Hi Greg – the butter in the pastry sort of self-greases the tin. No need to add anything more. 😊
That is put much better than I explained it! I will use your words in the recipe card!! 🙂 – N x
Thanks Ali and Nagi. Will give it a go!
Hi Greg! That’s a good question 🙂 No, you don’t need to. Tart crusts are so buttery and aren’t high in sugar so they won’t stick even if you don’t use a non-stick tart ring. I will pop this point in the recipe card, thanks for asking! – N x
Oh Jaffle. The pain. The agony. The neglect. Call the RSPCA stat. 🤣🤣🤣 Seriously tho that pastry looks epic.
Haha, what a good actor isn’t it!! 🙂
Ha ha I know right?? 😆
Lovely recipe Nagi, and best of all – bonus Jaffle pictures! 🐾 💕
Thanks Sarah!
He’s always the cherry on top! 😅
Will this recipe work with just rims?
So bottomless moulds?
I’ve heard this can give a better finish- not sure if its true or not, or if it will work with this recipe
I have 20cm round rim
Hi Kim, yes, it should work with a bottomless tart ring, though I haven’t tested it myself. Just make sure to keep an eye on the baking time.
Hi JB, Thanks, thats what i meant bottomless tart ring.. lols. Glad you were able to work out what I was trying to say.. will try these soon
Hi JB, Thanks, thats what i meant,Bottomless tart ring. Glad you were able to work this out from my comment. Looking forward to making these one day soon.
Hi Kim – it’s true, they do give a crisper base finish because there’s one less layer of metal 🙂 As long as it’s one of the proper entremet ring that is heavy duty and you have a perfectly flat tray to put it on that will not warp in the oven, then it will work perfectly. 🙂 – N x