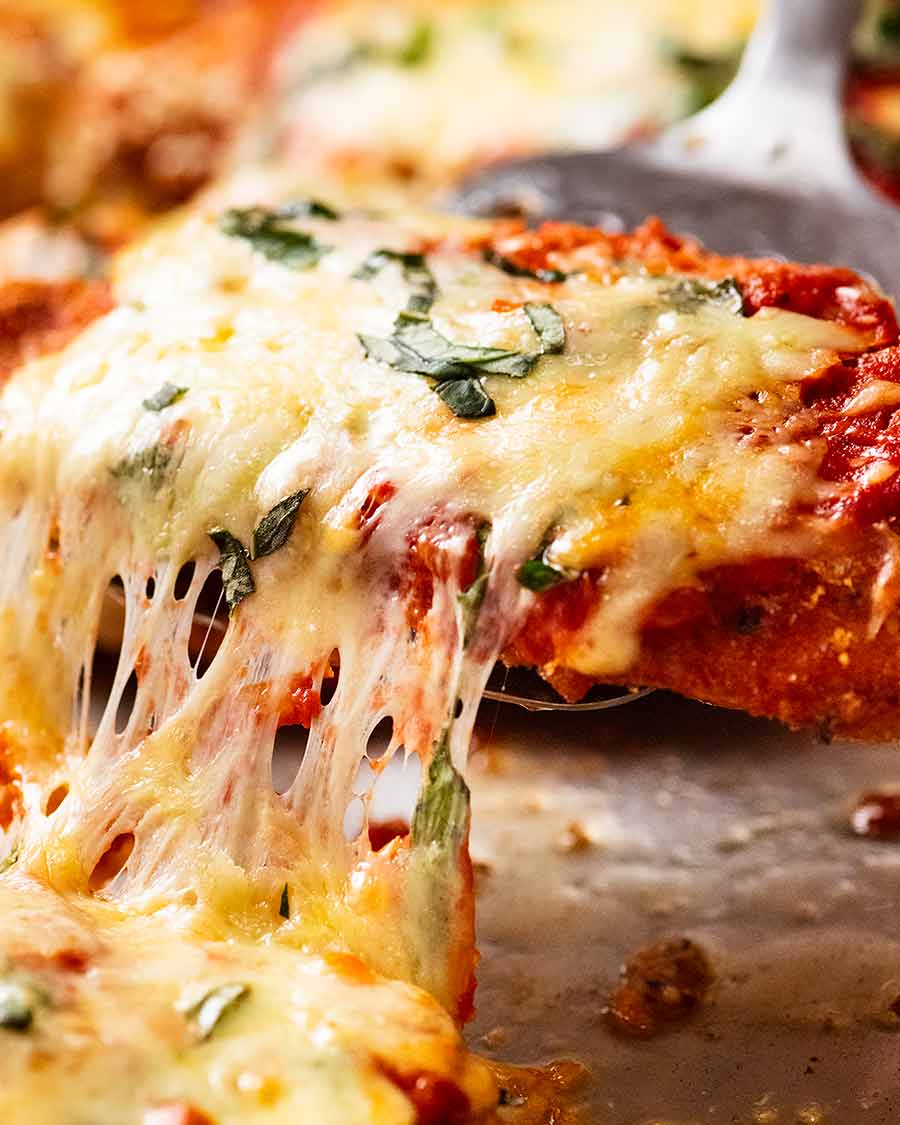
Chicken Parmigiana (or Chicken Parmesan) – the great pub favourite has finally landed! Pollo alla parmigiana in Italian, but affectionately referred by Aussies as Parma, Parmi or “a schnitty with tomato sauce and cheese”, you’ll love this homemade recipe with extra crispy schnitzel, best ever parmigiana sauce and juicy marinated chicken.
Abbreviate the name as much as you want. But don’t abbreviate the recipe!

Chicken Parmigiana
Aussies love good pub grub. But all too often, the standard pub Parmi comes with soggy crumbing, dry chicken, a sub-par tomato sauce and greasy melted cheese.
This homemade version puts those to shame. My secrets?
-
Layers upon layers of seasoning – on and in the chicken, the egg wash, the crumbing, and the sauce;
-
MARINADE the chicken to keep it juicy throughout the double cook;
-
Extra crispy schnitzel – nobody likes a soggy schnitzel!
-
Extra flavourful sauce thanks to a splash of white wine and chicken stock, finished with a sprinkle of fresh basil.
Are you ready for the best Chicken Parmigiana of your life?? Here we go!
(And guess what? This recipe includes a bonus NO FRY version. Impossibly golden and crunchy!)
Part 1: Dry brine marinade for chicken
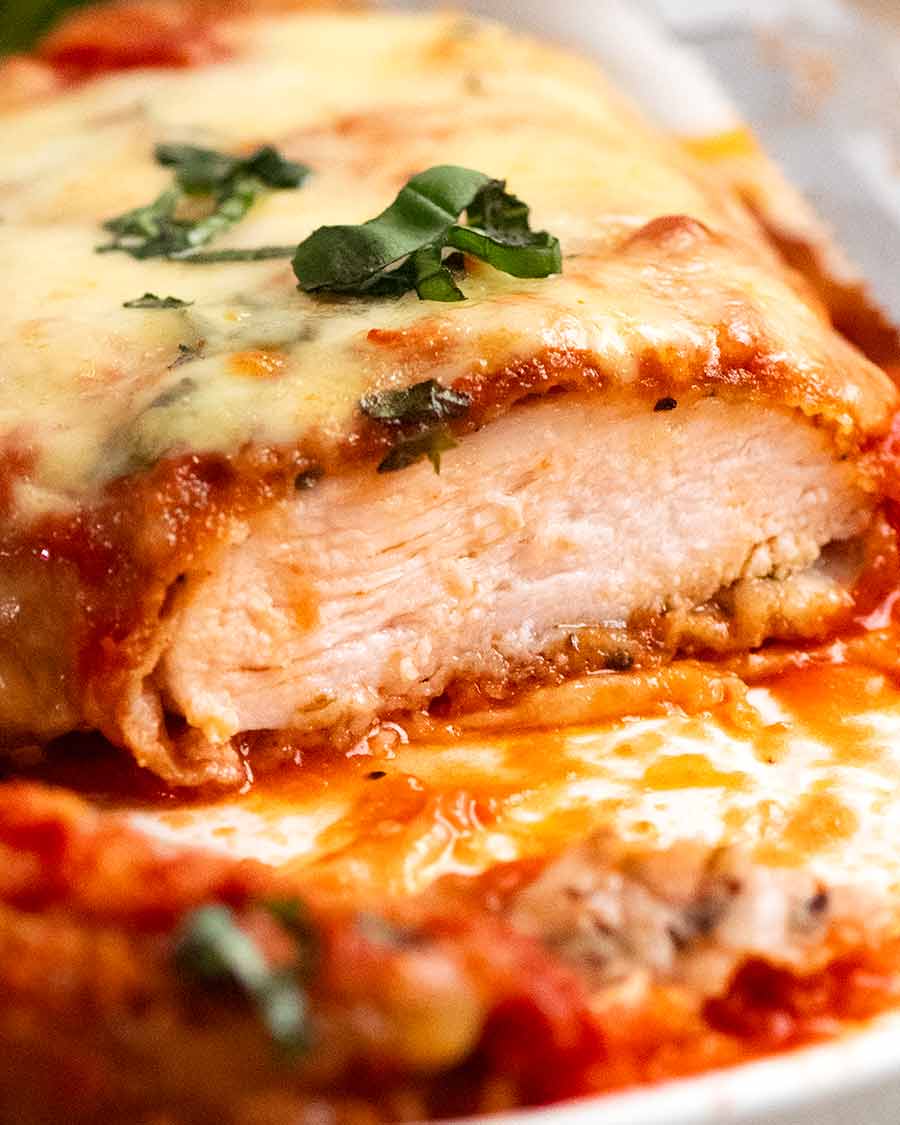
The first step is to make sure the chicken stays juicy after the double cook (fry + bake) because this essentially overcooks the chicken. Schnitzel-thin chicken take just 4 minutes to cook – we want to fry for 4 minutes THEN bake for 15 minutes to make that cheese molten!
So we’re using a simple dry brine that acts as a marinade to keep the chicken juicy. Dry brine is better than the typical liquid marinades because they will cause the chicken to leech liquid as it cooks, making the crumb soggy.
What you need for the dry brine
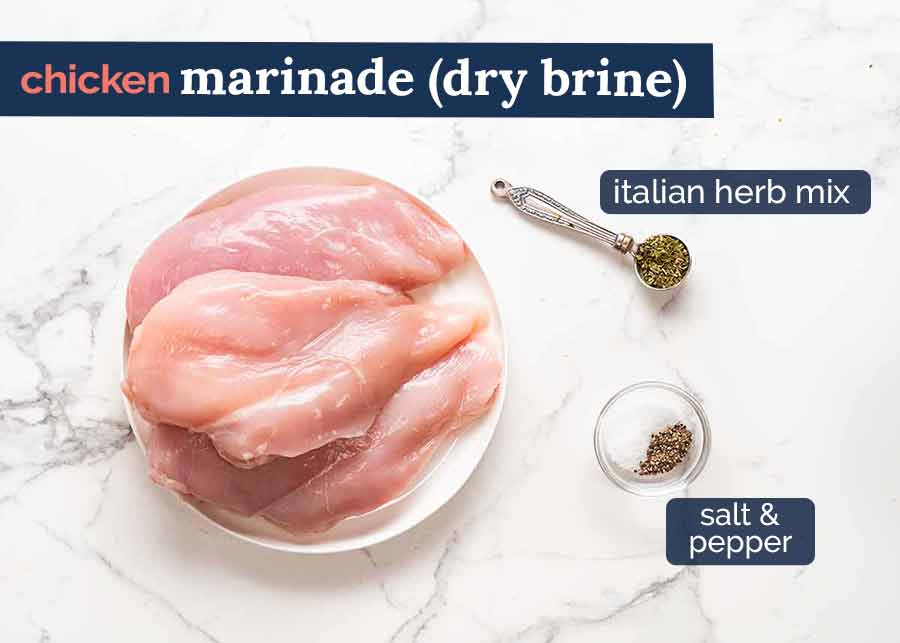
All you need for this dry brine is salt, pepper and an Italian herb mix. Nice and easy – and works like magic!
-
Chicken – I like to use breast for ease because once cut horizontally, it forms 2 perfect steaks even without pounding. Boneless thighs works just as well and is in fact juicier, but you’ll need to pound them so they’re even thickness all over;
-
Salt and pepper – the salt on the chicken acts like a typical chicken marinade, trapping moisture in the flesh so the chicken is extra juicy and moist once cooked. The pepper and herbs will infuse with subtle flavour; and
-
Italian Mixed Herbs – purchased pre mixed from any grocery store. See recipe for alternatives and substitutions. Not the end of the world to leave it out.
Dry brine is essential for juicy chicken parmigiana! It’s simple and quick, so don’t skip this step.
How to dry brine chicken
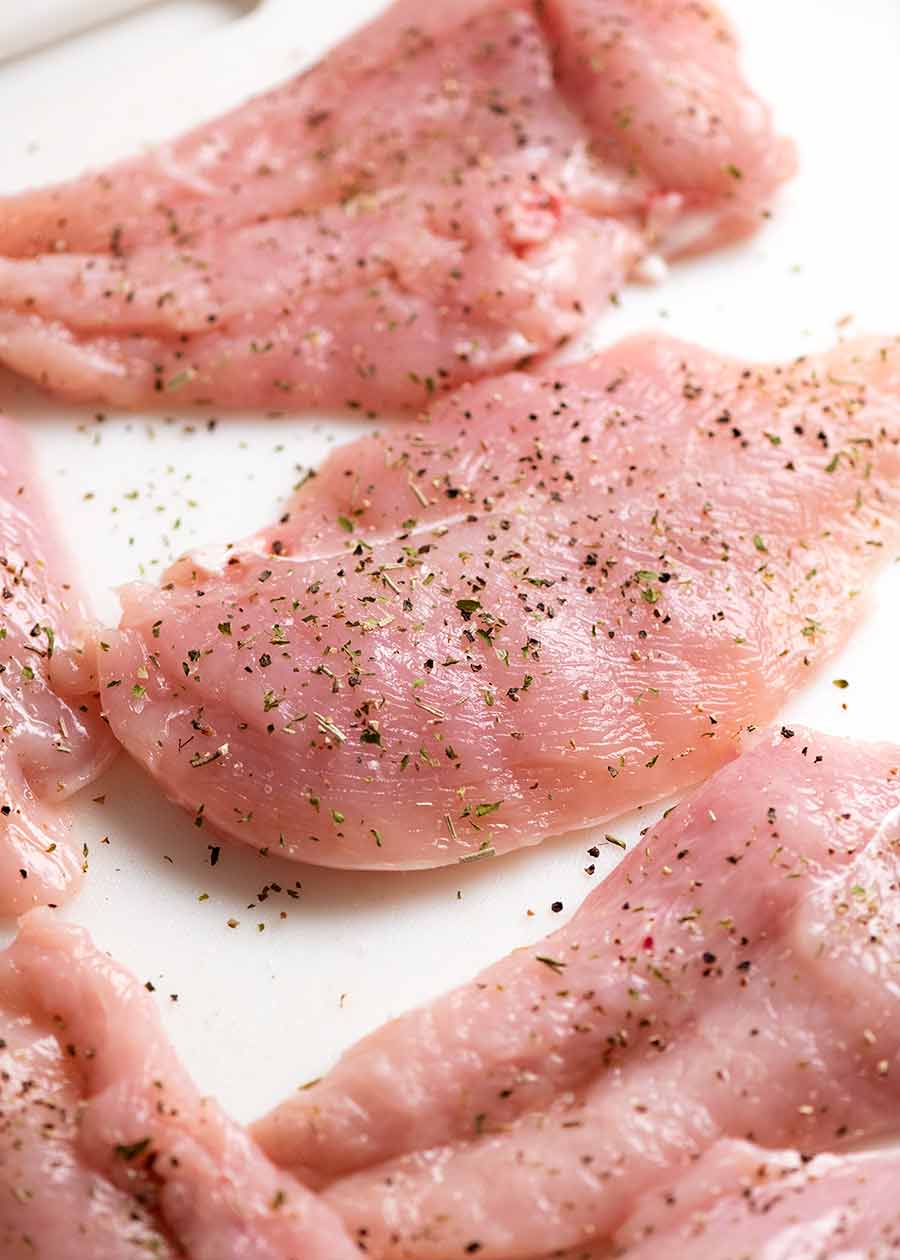
To dry brine the chicken, all you do is split chicken breast in half to form thin schnitzel steaks, sprinkle both sides with the salt, pepper and herbs, then set aside for a mere 30 minutes. It only takes 30 minutes because the chicken slices are so thin.

The Parmigiana tomato sauce is often an afterthought – or worse still, cheap jars of pasta sauce. Don’t fall into that trap!
Part 2: Parmigiana Sauce
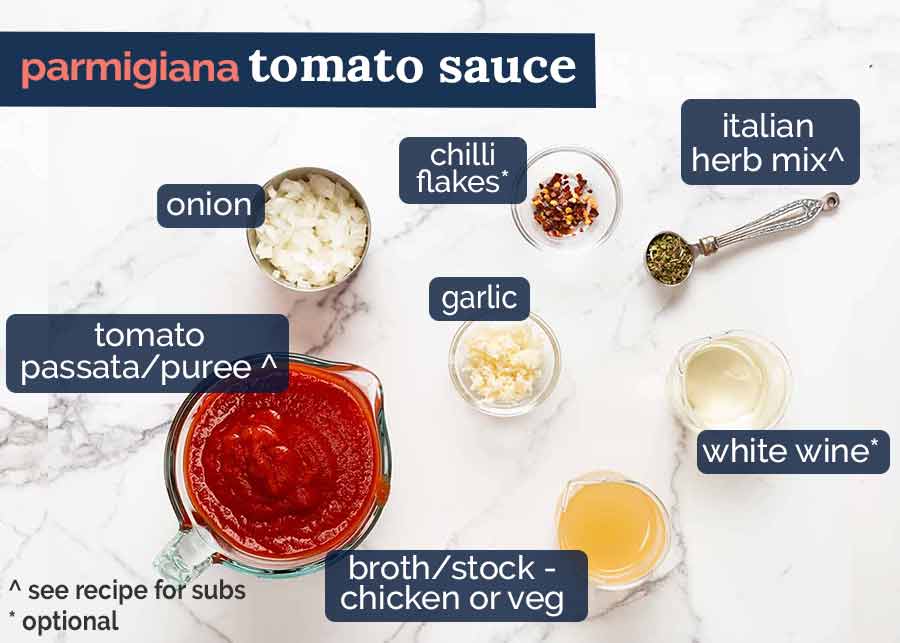
While the chicken is brining, make the sauce. I like to make the sauce extra flavourful with a splash of white wine (evaporated to remove alcohol and just leave flavour – no trace of winey taste at all) and chicken stock/broth.
-
Tomato passata – this is pureed, strained pure tomatoes, sometimes labelled Tomato Puree in the US (here’s a photo of Mutti Tomato Passata sold at Walmart). Readily available in Australian supermarkets nowadays, alongside pasta sauces. I prefer using tomato passata because it makes a perfect thick, smooth sauce – no need to cook crushed tomato for ages so it breaks down;
-
Garlic and onion – essential flavour base;
-
Italian mixed herbs – for a hint of herby flavour. See recipe for alternatives and substitutions;
-
White wine and chicken stock/broth – optional extras for extra flavour! For the white wine, we only use 1/4 cup so just use any white wine that you have open. If buying especially, opt for a discounted dry white wine like sauvignon blanc, pinot grigio, pinto gris, semillon or semillon sauvignon blanc. Avoid heavily wooded or very fruit, sweet wines (which some chardonnays and reislings can be, which is why for simplicity I keep them off my list); and
-
Chilli flakes (red pepper flakes) – for the slightest background hint of warmth! Entirely optional.
How to make Chicken Parmigiana Sauce
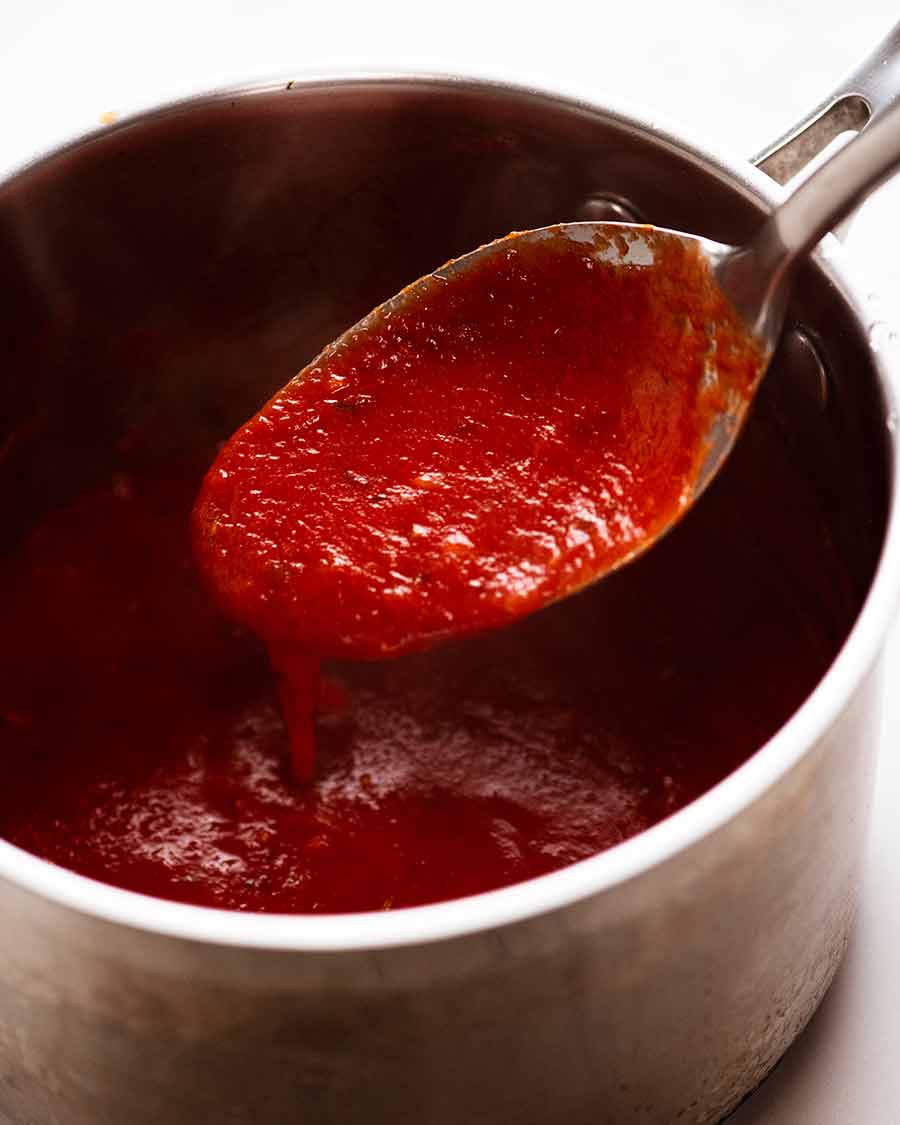
Nothing ground breaking in the method, but it’s worth noting that the sauce is a thick saucy consistency, not a stodgy dry dolloping consistency (which kind of defeats the purpose of having delicious tomato sauce smothered on our Parmi!).

This is what the sauce should look like:
Part 3: Crumbing!
Referred to as breading in the US – and given it’s called bread crumbs, I feel like both “crumbing” AND “breading” make sense!
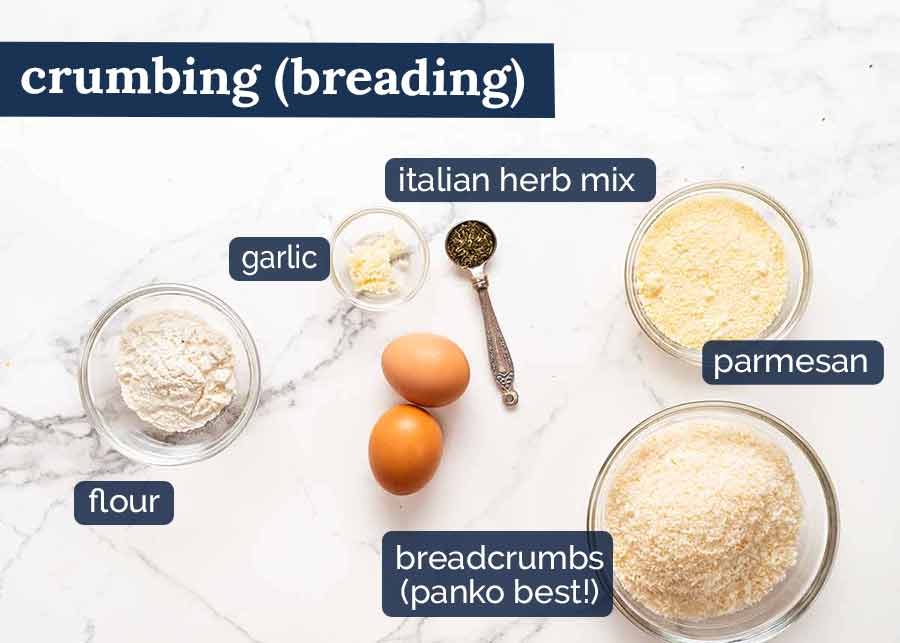
Here’s what you need for the crumbing. It’s a classic schnitzel…but with extra flavour from the parmesan, herbs and garlic!
-
Flour – for dusting. This first followed by egg = strong glue for the breadcrumbs;
-
Garlic and Italian dried herbs – to mix into the egg for extra subtle flavour. Layers upon layers of flavour, all throughout this parmi!
-
Panko breadcrumbs – Panko breadcrumbs are larger than normal breadcrumbs so your schnitzel will be crispier. Find it next to ordinary breadcrumbs or in the Asian aisle (pro tip: cheaper at Asian markets!);
-
Parmesan – I like using the sand-like store bought parmesan because the grains are bigger than grating your own which = more bold flavour. Parmesan in crumbing is a traditional Italian method for schnitzels. It adds sensational extra flavour into the schnitzel as well as making it more golden AND crispier. When parmesan is cooked, it is very crispy!
How to crumb Chicken Parmigiana
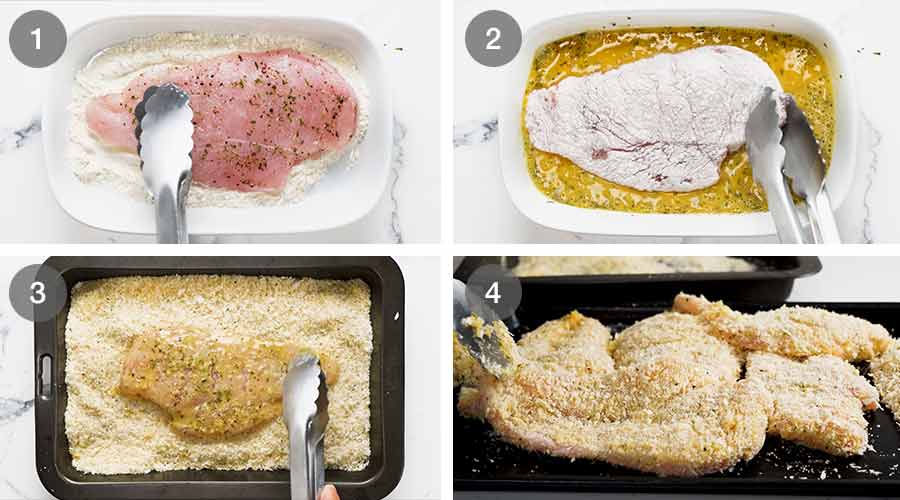
Here’s how the crumbing goes down – flour then egg then breadcrumbs. Pile them up, ready to fry! (Or BAKE!)
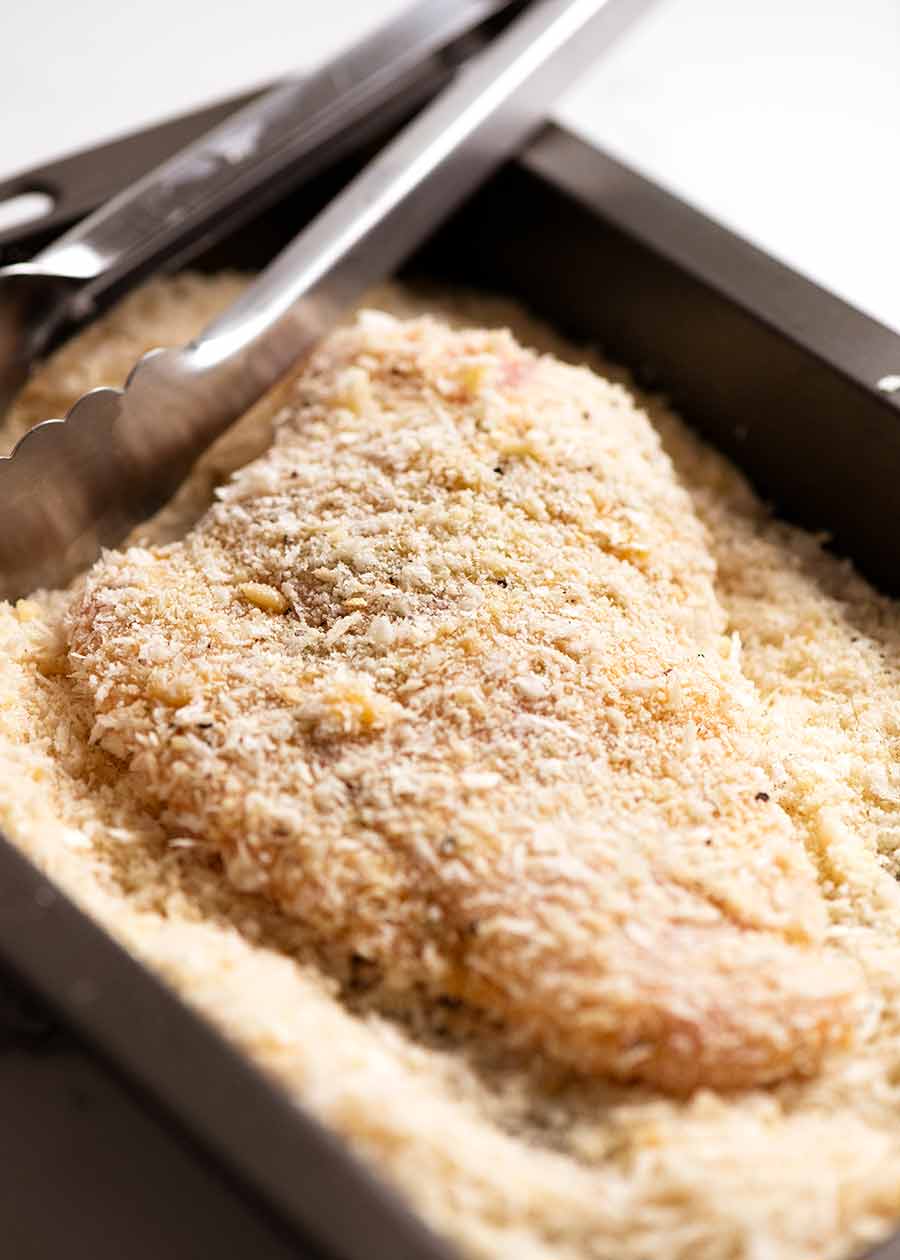
Part 4: Frying (or baking!)

Amount of oil to use
You don’t need to deep fry chicken parmigiana. Just shallow fry is fine – it doesn’t matter if you get some brown spots from the chicken touching the base of the skillet/pot because it gets covered in sauce.
You just need enough oil to get the breadcrumbs super crispy – you can get away with using as little as 1.5cm / 1/2″ of oil though 2cm / 3/4″ is ideal.
How long it takes to cook chicken parmigiana
Schnitzel thin chicken takes 4 minutes max to cook through so it’s golden and crispy on the outside, and just cooked on the inside. In fact, it doesn’t matter if it’s not cooked through because it will definitely finish cooking in the oven.
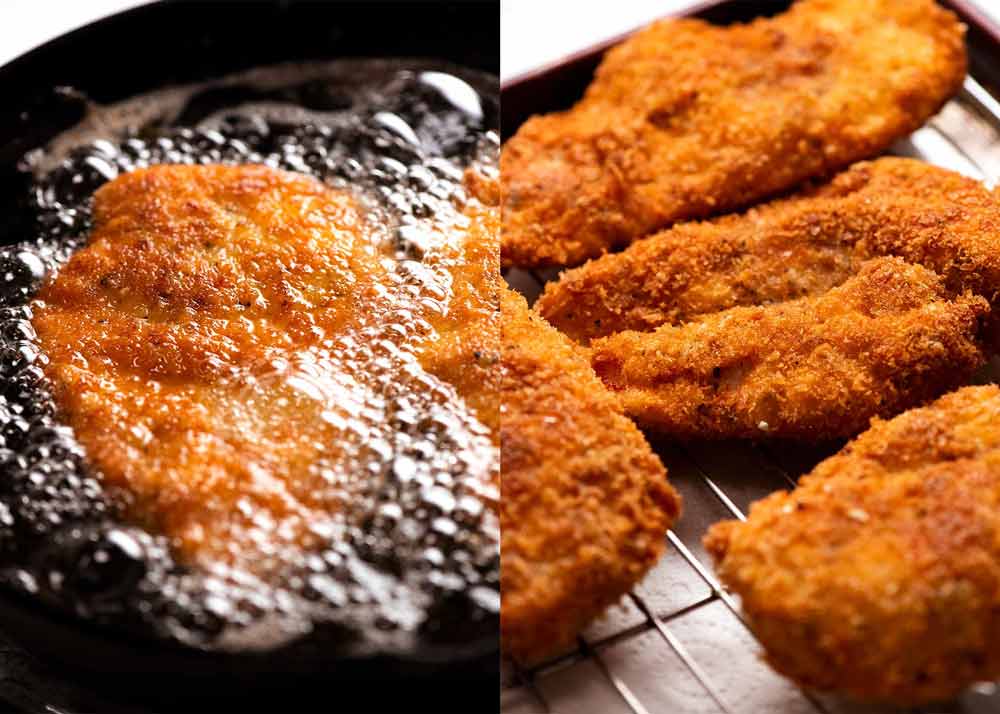
Heads up: Far too many Parmigiana recipes that tell you to fry chicken for closer to 10 minutes then bake for 20 minutes! That’s the surefire path to dry chicken breast. Don’t do it!
PRO TIP: Drain chicken on a RACK not on paper towels. It is extra insurance to keep the base super crispy!
How to BAKE rather than fry
For the most impossibly golden and crunchy BAKED chicken schnitzel, toast the breadcrumbs first per the Crunchy Baked Chicken Tenders recipe. Then crumb per this Chicken Parmigiana recipe, spray with oil and bake at 200°C/390°F for 15 minutes. It will look like this (these are the Chicken Tenders – breast will look the same on the outside):
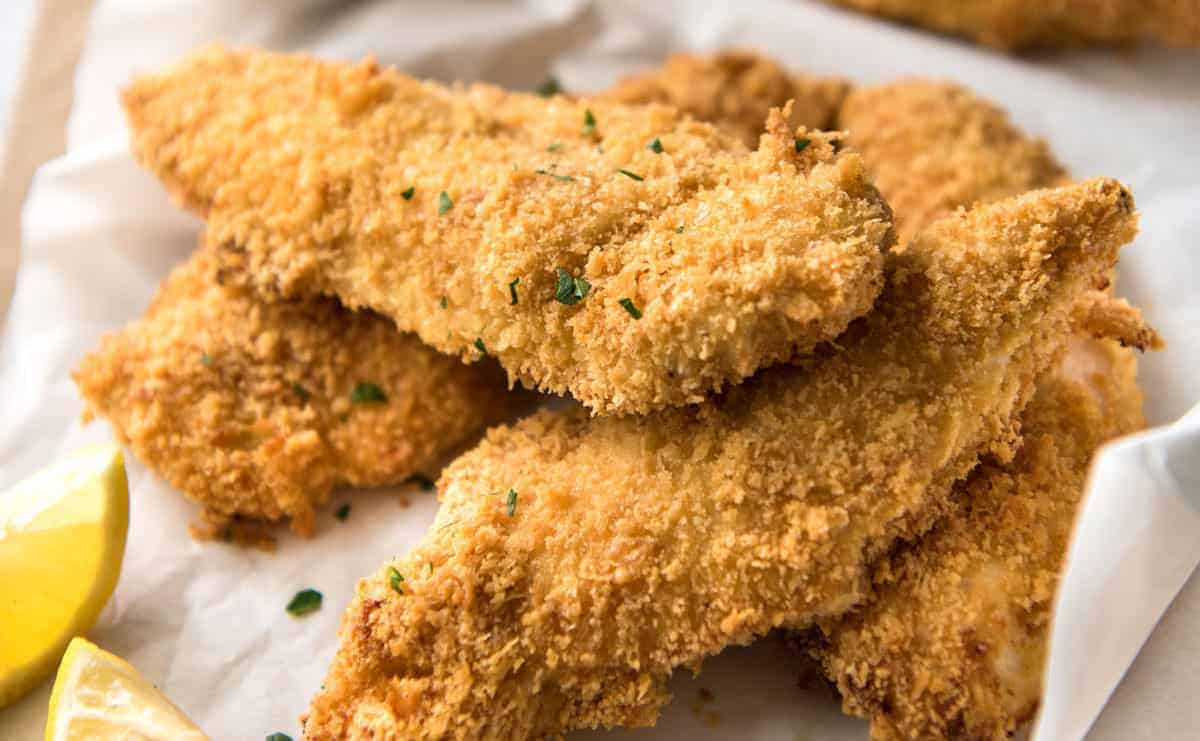
5. Smother and bake!
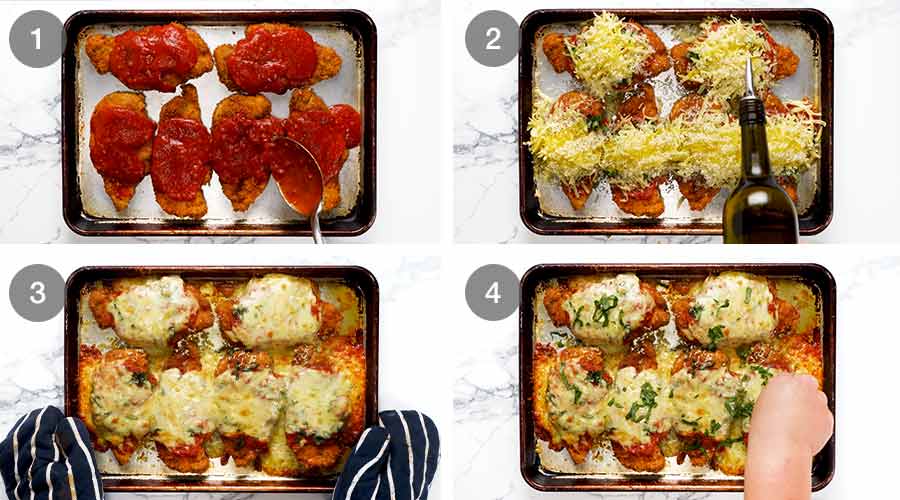
Alrighty – on the home stretch here!! Time to smother and bake:
-
Sauce – Top with sauce, covering about 80% of the surface (leaving some crunchy exposed bits!). At this stage, I also like to sprinkle with a bit of fresh basil;
-
Mozzarella AND parmesan – Pile mounds of mozzarella on top – I find that shredded melts more nicely than slices, but slices work too. Or fresh mozzarella (torn into pieces). Then sprinkle with parmesan (more flavour!) and drizzle with olive oil (to ensure parmesan melts nicely rather than crispy);
-
BAKE for a mere 15 minutes, just so the cheese melts and you get some small brown spots. Do not bake further than you need to – this leads to dry chicken (though you can sit back smugly with the knowledge that yours is brined so it’s extra juicy) AND makes the crust totally soggy under the sauce (quick 15 minutes bake = crumbing under sauce is still a bit crispy which is unheard of!)
-
Finish with a fresh sprinkle of basil then serve immediately!
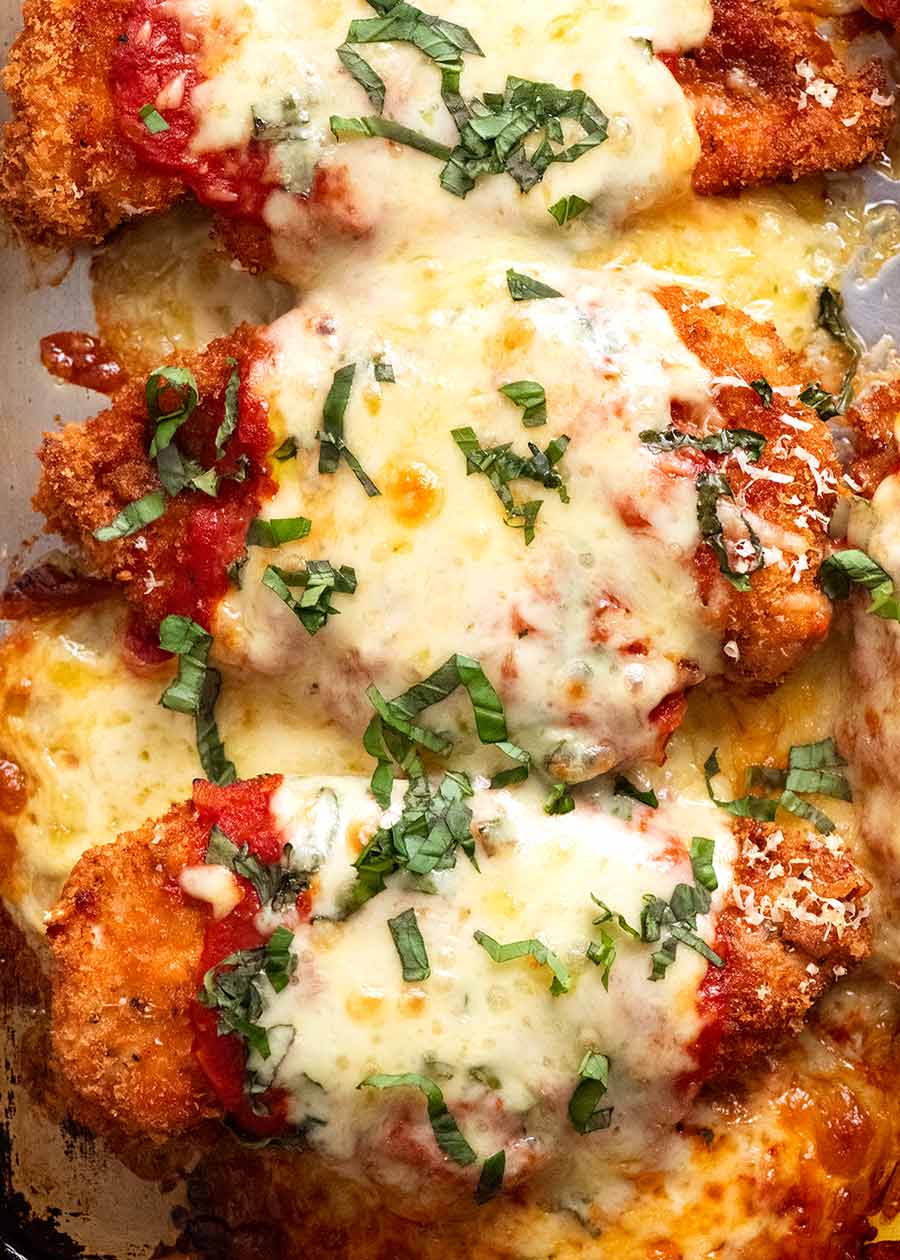
And there you have it. The best Chicken Parmigiana of your life, made in your very own kitchen!!
That moment when you cut through the molten melted cheese, then you see some tomato sauce squirting out the side, then your knife hits the chicken which you can instantly tell just by feel is so juicy, and that first bite……
UGH! I’m torturing myself describing this!!
What to serve with Chicken Parmigiana
With the cheesy tomatoey flavours going on here, I really enjoy serving this with a fairly plain leafy salad dressed with Balsamic Dressing. Otherwise, choose a Vegetable Side dish based on what you dig up after rummaging around in your fridge!
And for a blow-out Italian feast, don’t forget crusty-yet-moist Focaccia, or Garlic Bread…. then wrap it up with Tiramisu. Or if you’re after a more simple dessert, try one of these:
-
Warm and cosy – Apple Crumble, Strawberry Crumble, Chocolate or Butterscotch Self Saucing Pudding
-
Classic – Vanilla Cake, Chocolate Cake or Fudge Cake;
-
Quick and easy – Cinnamon Rice Pudding, Brownies
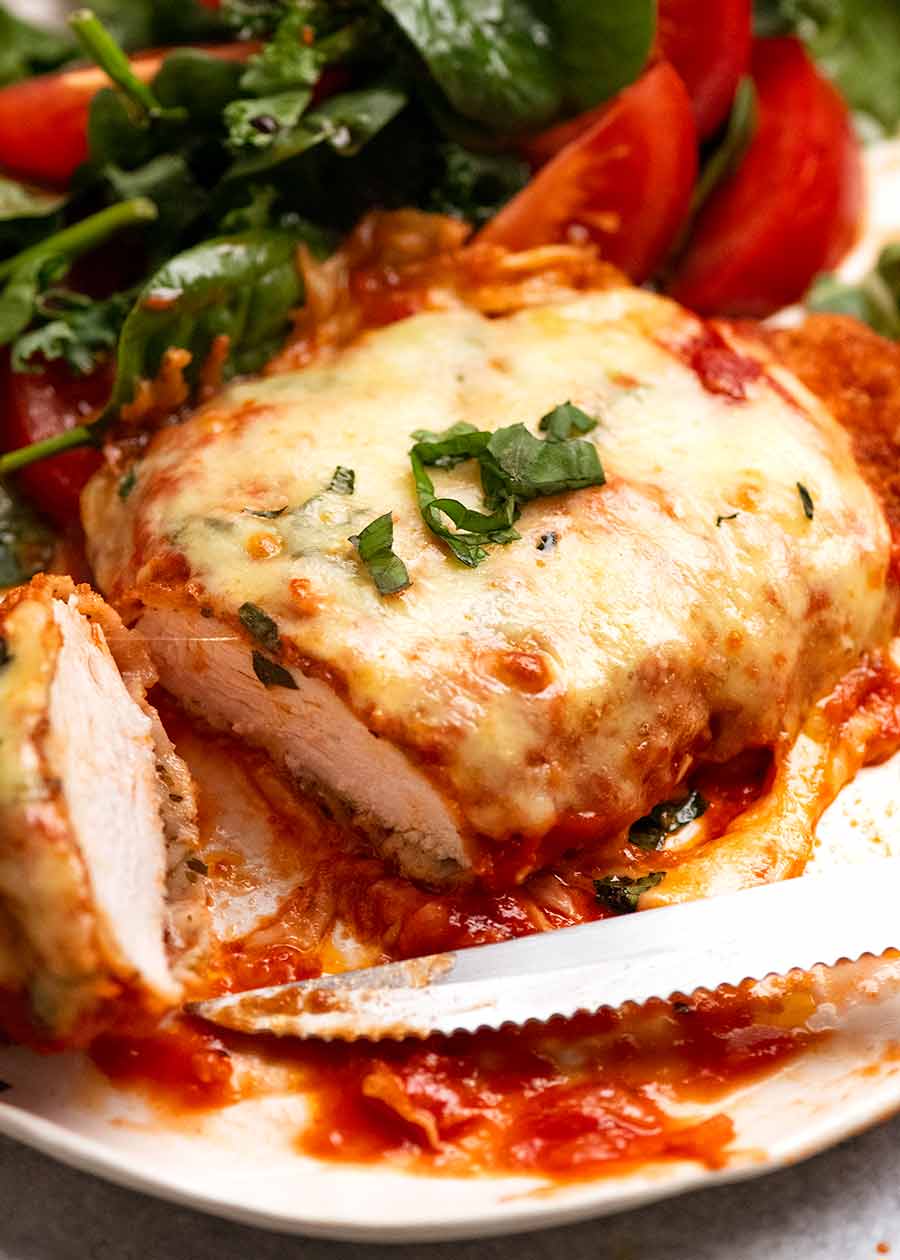
This Chicken Parmigiana is worth the effort.
I know Chicken Parmigiana requires more effort than the usual quick ‘n easy meals. But trust me, it is worth it.
This is better than your standard pub grub. The secret lies in the layers upon layers of flavour and seasoning which, individually, sound like nothing special but together make for a memorable Parmi. The parmesan in the crumbing. The pinch of dried herbs in the marinade, the egg wash and again in the sauce. The little sprinkle of fresh basil on the sauce.
Then add the extra little tips that elevates it to better than your run-of-the-mill recipes: using tomato passata instead of crushed tomato, mounds of shredded cheese instead of slices, and leaving the schnitzel edges clear of sauce so they stay 100% crispy…
It is these little things that collectively make for an epic eating experience, one that I dare say money-can’t-buy except perhaps at the very best old school Italian restaurants.
I hope you treasure this recipe as much as I do! – Nagi x
Watch how to make it
Hungry for more? Subscribe to my newsletter and follow along on Facebook, Pinterest and Instagram for all of the latest updates.
Chicken Parmigiana
Ingredients
Brined Chicken Marinade (Note 1):
- 3 chicken breasts (300g/10z each) , halved horizontally to form 6 pieces (Note 2)
- 1 tsp salt , cooking / kosher (or 3/4 tsp table salt, Note 3)
- 1/2 tsp black pepper
- 1/2 tsp Italian mixed herbs (Note 4)
Flour dusting:
- 1/3 cup flour , plain/all purpose
Egg Dredge:
- 2 eggs
- 1 garlic clove , minced using garlic press
- 1/4 tsp each salt and pepper
- 1/4 tsp Italian mixed herbs (Note 4)
Parmigiana Bread Crumbing:
- 1 1/2 cups panko breadcrumbs (sub normal, Note 5)
- 1/2 cup parmesan , finely grated (store bought sand-like is best) (Note 6)
- 1/2 tsp salt
- 1/4 tsp black pepper
Frying:
- 2 cups olive oil (or vegetable or canola)
Parmigiana Pasta Sauce:
- 1 tbsp olive oil
- 2 garlic cloves , finely minced
- 1/4 cup onion or eschallots , very finely chopped (Note 7)
- 1/4 tsp red pepper flakes (chilli flakes), optional
- 1/4 tsp Italian mixed herbs (Note 4)
- 1/4 cup white wine , anything (optional, Note 10)
- 400g / 14 oz tomato passata (aka tomato puree) (Note 8)
- 1/2 cup chicken stock/broth (or water)
- 1/4 tsp each salt and pepper
Layering:
- 10 basil leaves , roughly chopped (sub pinch of dried - or omit)
- 2 cups mozzarella cheese , shredded (or enough slices to cover)
- 3/4 cup parmesan , finely grated (best to grate your own, Note 6)
- 1 tbsp extra virgin olive oil
Garnish (optional)
- 5 basil leaves , roughly chopped
Instructions
Dry Brine Chicken:
- Sprinkle both sides of chicken with salt, pepper and Italian herbs. Refrigerate for 30 minutes.
Parmigiana Tomato Sauce:
- Heat oil in a saucepan over medium heat. Add garlic and onion, cook for 3 minutes until onion is translucent.
- Add red pepper flakes and herbs, stir for 15 seconds. Add wine, turn up heat and let it simmer rapidly until mostly evaporated and winey smell is gone.
- Add tomato, chicken stock, salt and pepper. Cover, then simmer 10 minutes on low until thickened. Cover and keep warm.
Crumbing:
- Preheat oven to 180°C/350°F.
- Crumbing set up: Spread flour out in a shallow bowl. Whisk Egg Dredge in a separate shallow bowl. Mix Crumbing ingredients in a third shallow bowl or pan.
- Dredge & crumb: Press both sides of chicken into flour, then shake off excess. Coat in egg, letting excess drip off, then place in Crumbing, pressing to adhere.
- Transfer to plate and repeat with remaining chicken.
Frying (Note 10 for baked option):
- Line a tray with paper towels and place rack on tray.
- Heat 1.5 - 2cm / 2/3" oil in a skillet over medium high heat to 180°C/350°F (Note 9).
- Carefully place 2 or 3 pieces of chicken in. Cook 2 minutes until underside is golden, then carefully turn and cook the other side for 1 1/2 minutes.
- Transfer to rack, then repeat with remaining chicken. (Note 12 - oil clean and reuse)
Assembling & baking:
- Place chicken on a tray. Spoon 1/3 cup sauce over the chicken - cover around 80% of the chicken, leave the ends crispy.
- Sprinkle sauce with basil, then mozzarella cheese (pile it on in mounds to use it all up), then sprinkle with parmesan. Drizzle oil over parmesan.
- Bake 15 minutes until cheese is melted and there's a few brown spots - no longer, otherwise chicken will overcook.
- Remove from oven, sprinkle with extra basil if desired. Serve immediately (with leftover Tomato Sauce, if you'd like!)
Recipe Notes:
- Crumbing - I like using the sand-like store bought grated parmesan (from the fridge, not aisle. If it ain't refrigerated, it ain't cheese! 😂). The grains are larger than finely grating your own at home so you get better flavour pops in the crumb. But grating your own works just as well.
- For topping - better finely grated yourself because it melts better - the sandy store bought stuff melts ok but will be a thicker layer and doesn't meld in as well with the mozzarella.
Nutrition Information:
More Italian chicken amore
Life of Dozer
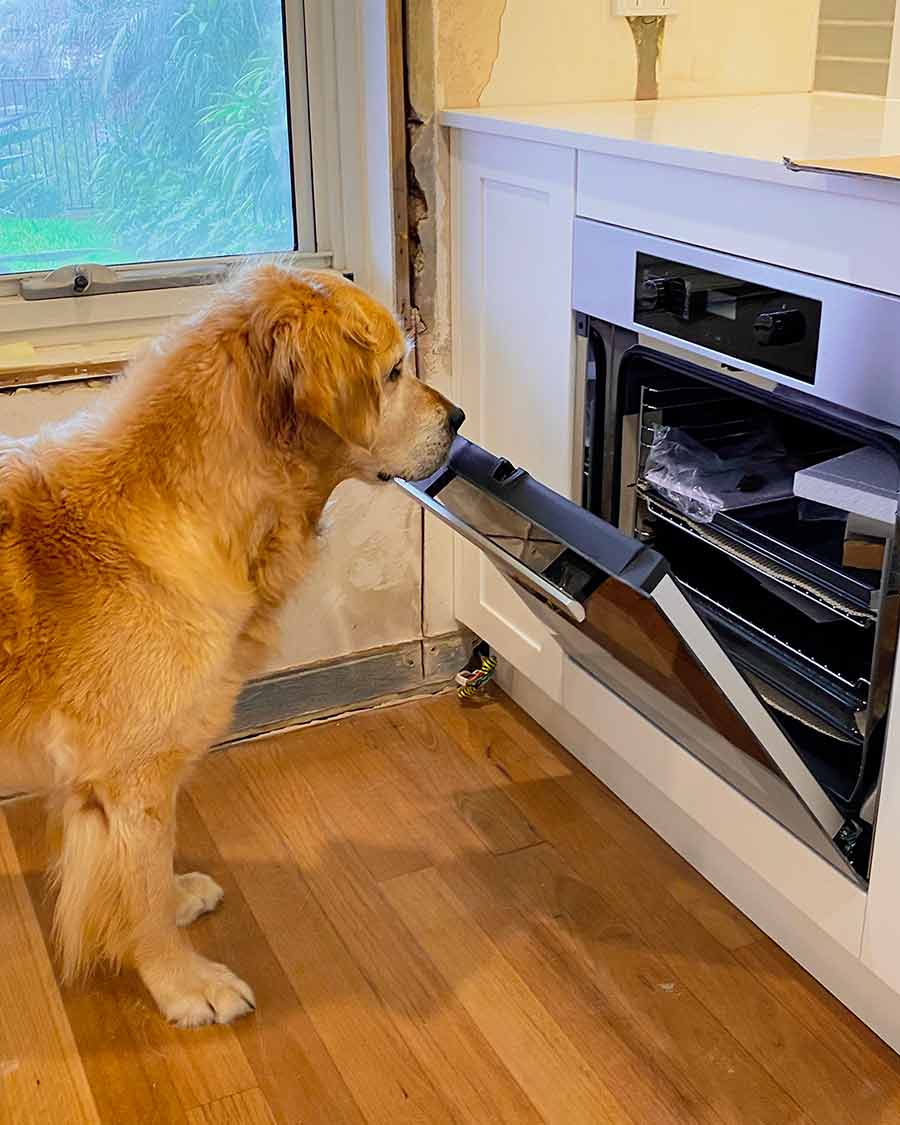
RTE “HQ” new kitchen is nearing completion! Dozer is confused – he is used to tasty things emerging from ovens. Not just packing and instruction manuals!!

Husband said best Parma ever and thank you Nagi
This is delicious! I baked the chicken breast and it was very moist and full of flavor. Definitely a keeper recipe.
What an excellent recipe!!! I made this as a snow day project so I didn’t have all the exact ingredients but because of how thorough the notes are, I knew what to do! I minced the shaved parm I had to sand consistency for the breading. I had jarred sauce but I cooked it with some broth and used the immersion blender to get it smooth. I topped each breast with a super thin provolone slice before adding the sauce and mozzarella. (This helps prevent soggy crust with leftovers.). I love all the recipes and I love the notes- I cook professionally and often use this site for the thorough and thoughtful notes. Always really good seasoning ideas.
Delicious! I didn’t do the wine and blended some fresh tomatoes since I was short of purée—turned out great! I also didn’t cut my chicken breasts in half and looking back I wish I did since it was kind of thick 😅 Also I baked instead of frying and the crust didn’t stick to the chicken like I expected. First time having chicken park and now I understand why people love it so much
Is there any non alcoholic sub for the white wine in this recipe? Or do I just leave it out?
I subbed for chicken broth. Could also use water
I used extra chicken broth as you suggested and it worked wonderfully!
I have never made Chicken Parm before but decided to because it’s my husband’s favorite from his childhood. We made it and it was a HOME RUN, best he has ever had. Thanks for your amazing details and tips and tricks, your recipe truly never fail.
Nom nom nom! Rave reviews all round.
I wasn’t sure about this recipe because it seemed overly complicated for Chicken Parm; however my god this recipe is so good! I think the 30 minute brine is really what makes it. Usually chicken in chicken parm barely has any flavor and the dish heavily relies on the sauce and cheese to give it something.
The chicken in this recipe was so delicious!!! I’m probably going to do it this way every time I make Chicken Parmigiana. Also I added some roast chicken seasoning to my chicken brine and kind of went with what I felt was an appropriate amount of salt.
Either way, wonderful recipe!
Amazing!! Will never pay for this in a restaurant again.
I have cooked chicken parm many times but decided to try your recipe. I not only loved the chicken but also learned so many tricks! Thank you so much!
A lot of work with many moving parts, but it’s the best chicken parmi we’ve ever had!
Can’t wait to have the leftovers tomorrow. Will definitely make again!
Had these for dinner the other night and wow, they are so good even my fussy husband liked them.
I want to make this with the baking version, but I want to be sure I understood this. Do I mix the flour, egg, seasoning, and garlic together for the batter like the chicken fingers? Then continue by dredging in batter then dredging in crumbs?
I’ve had chicken parm one other time and hated it. I made this today and loved it! My family also really liked it, thank you!!
Made this for my husband’s birthday and it was a hit! Definitely replacing the chicken parmigiana I used to make.
Wow Nagi, absolutely beautiful another 10/10. You never cease to amaze me with your recipe 👍😋
Hi Nagy! I made this recipe for the first time a few months ago and it was sooo good. I made it for a special dinner about a month later, to rave reviews. Love your recipe so much I bought your cookbook! Can’t say enough good things about the clarity, quality and deliciousness of your recipes. A special hello to Dozer from our Golden; Gracie and Indy.
Made this recipe using pork steaks.outstanding result.
Best parmigiana. My son said it was better than restaurant. Also made apple crumble which was great and easy.
I’ve made chicken parm in the past. But tonight I decided to try something different. So I decided to try this recipe. By far, it came out perfect. Mr girlfriend said she will never eat chicken parm again unless I make it. And her parents were highly impressed as well. The dry brining and the cook time I believe made a huge difference. I will never make it another way again. The crust was not soggy at all. It had a great crunch to it., and was very tender inside. Much better than most restaurants. I wish I could post a photo. Thank you Nagi. Great recipe. I now have it bookmarked on my phone.