
This is JB‘s recipe for a real Mille-Feuille, made the proper French patisserie way with thick layers of custard rather than little blobs sandwiched between puff pastry. It’s just not the same! It takes time to make but don’t be intimated, we’ll lead you through it step by step. There’s nothing here that a home cook can’t do, no speciality ingredients or equipment required. Truly great Mille-Feuille is so rare outside France, it really is worth making yourself. And imagine the bragging rights!
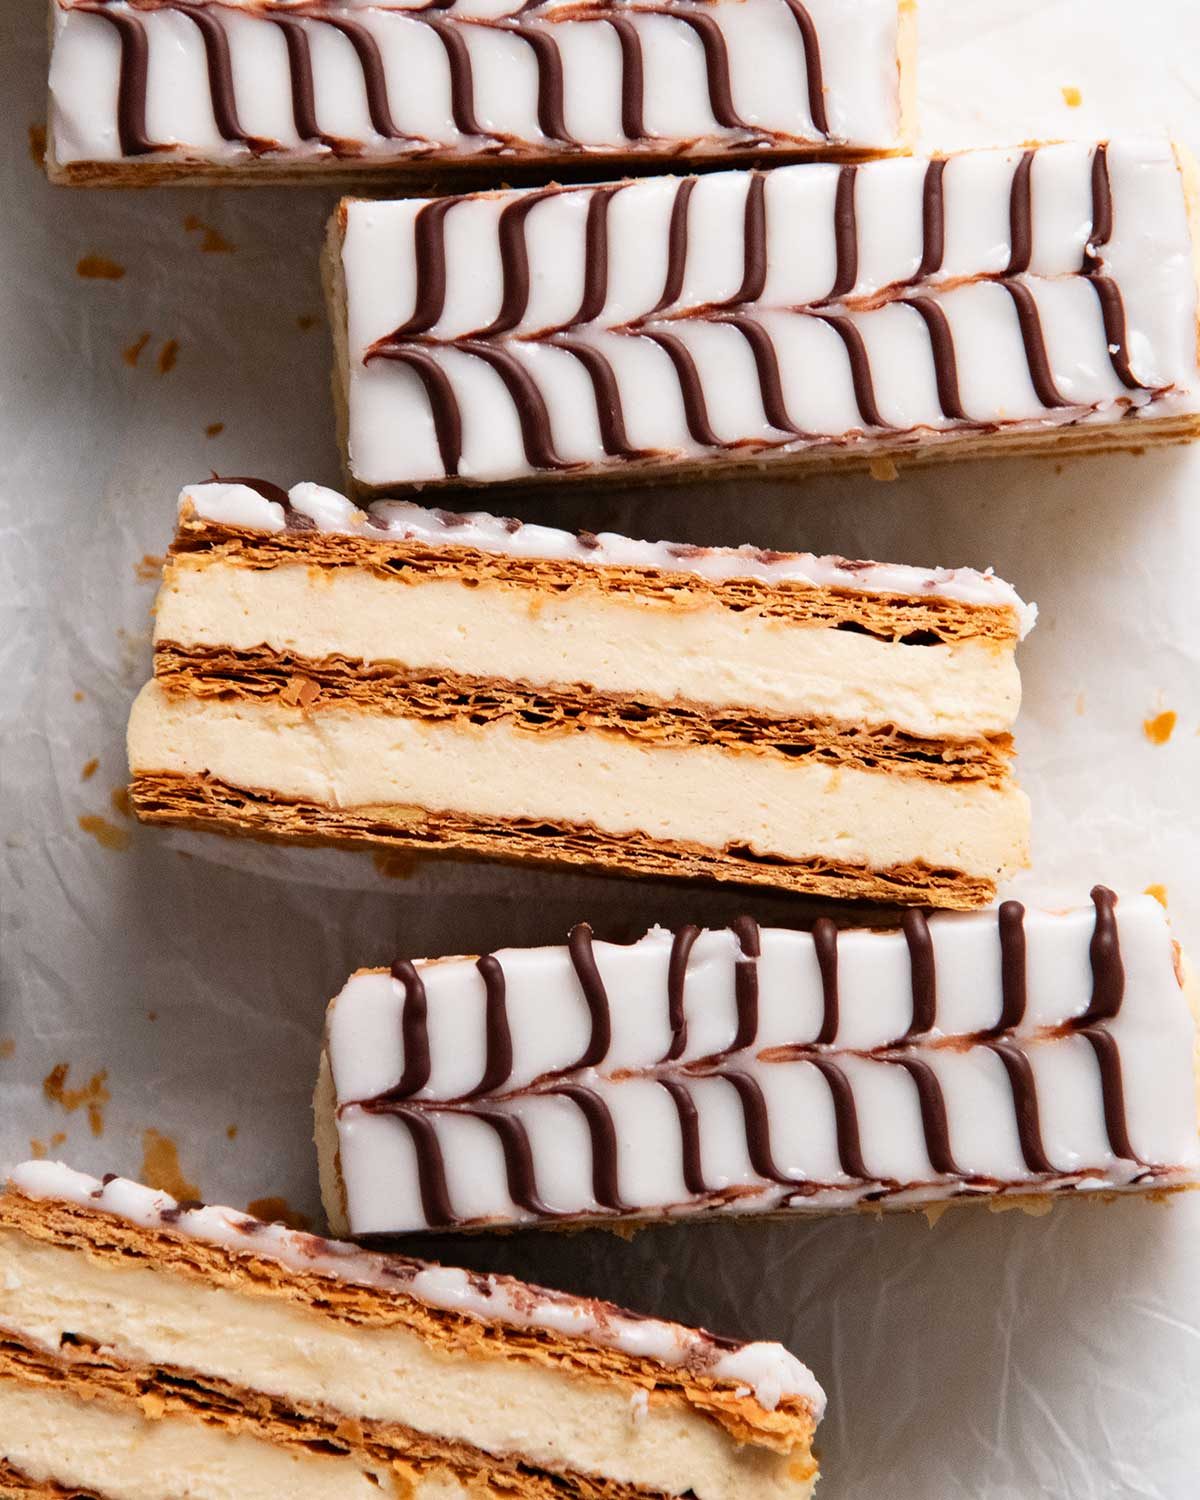
JB’s Mille-Feuille
This is JB’s recipe for a real Mille-Feuille, and it’s a masterpiece. Pronounced meel fuh-yuh, the literal translation is French is “a thousand leaves” which refers to the puff pastry layers.
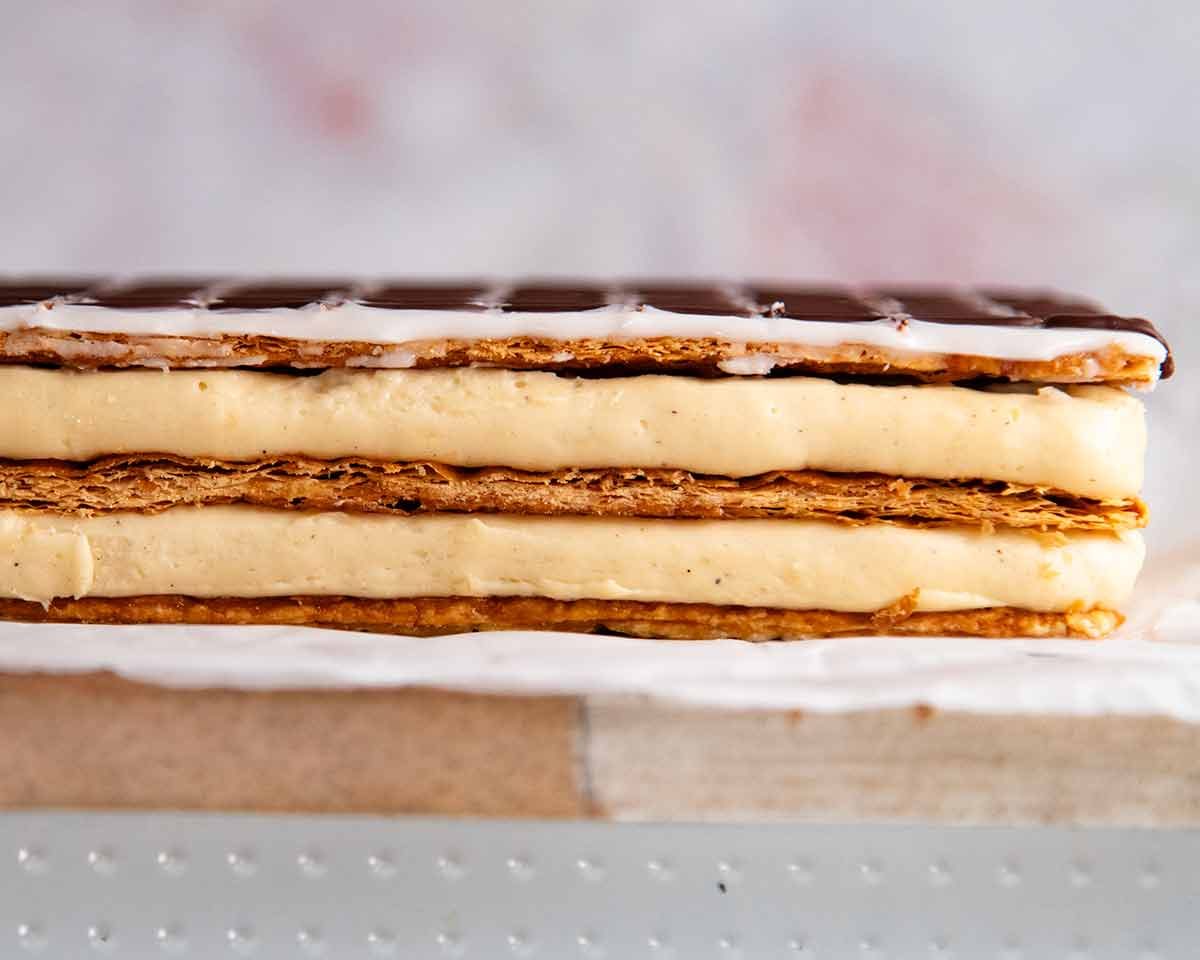
You’ll find plenty of basic versions online where blobs of custard are piped between puff pastry layers. But a recipe for a proper one assembled with thick layers of custard that is firm enough to hold its shape so it can be cut into bars, yet beautifully creamy when you eat it is much harder to find.
Well, I can tell you that JB never managed to find one – not online, not in (very!) serious French pastry cookbooks. “Non, non, non, this is all wrong!” “What is this? This is not custard! This is rubber!” (You are hearing all this in your head in a French accent, right?😂)

And so he ended up creating this from scratch himself, taking bits and pieces from the mountain of cookbooks he referenced, from Ferrandi to Escoffier to Phaidon, watching French pastry chefs on YouTube but mostly just figuring things out himself, then both of us figuring out easier ways to make trickier parts of the recipe more fail-safe.
This is not a quick one-bowl cake, and you will need to clear your morning to make it, and then you won’t even be able to sample it until evening, or the next day. But we have worked very hard to make this a recipe that even less experienced bakers’ can follow, and make with confidence.
And oh boy this is worth the effort! Real French pastry is very hard to come by these days, with cost pressures leading many bakeries to take shortcuts so custards taste watery and pastries are not buttery (oil is so much cheaper than butter). This is the real deal – shatteringly crisp, buttery pastry layered with rich vanilla custard that’s firm enough to slice yet melts in your mouth. The kind of Mille-Feuille you’d go out of your way to find in France, and now you can make it at home!
Ingredients in JB’s Mille-Feuille
It always amazes me how the French use such basic ingredients to make such iconic desserts! There’s no speciality ingredients, and you can get everything from any grocery store.
1. Puff pastry layers
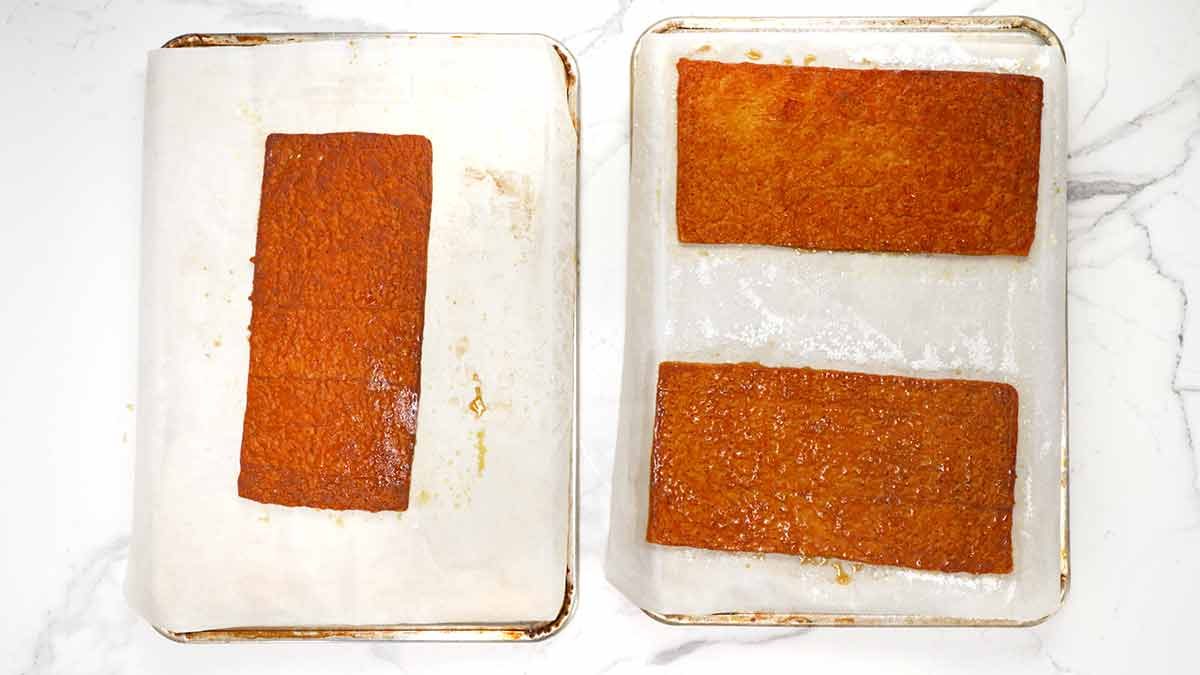
Store-bought sheets of puff pastry are baked between trays to weigh them down and prevent them from puffing up, so you get thin, flat, crisp layers that stack neatly and are easy to cut through.
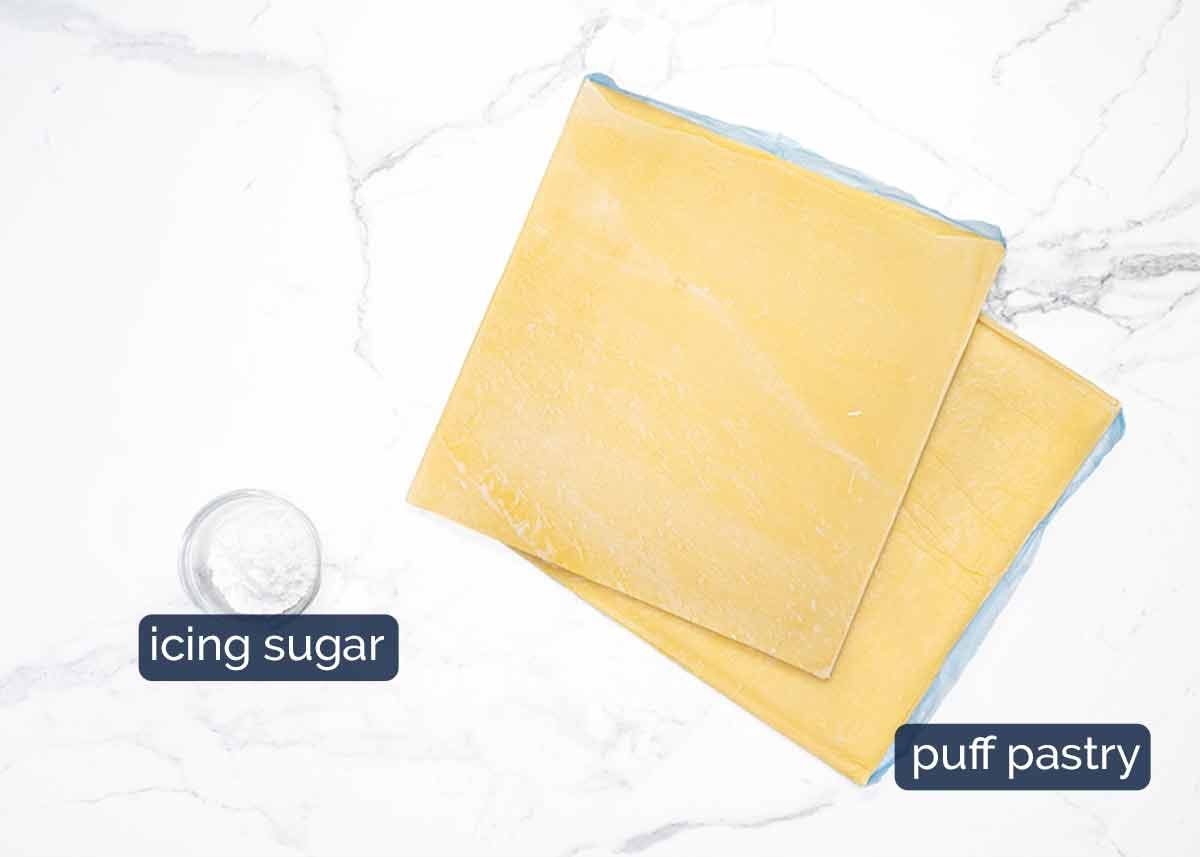
Puff pastry – Use puff pastry made with butter as it tastes better than puff that is made with flavourless oil. The packet will say “butter” on it and it costs a little more.
Size – This recipe calls for a 25cm / 10″ square of puff pastry which is the standard size here in Australia. If yours is larger, trim it.
Icing sugar / powdered sugar – This is used to dust the puff pastry to lightly sweeten it and make it extra crisp.
2. DIPLOMATE CREAM – thick vanilla custard filling
The custard sandwiched between the puff pastry layers is called Diplomat Cream. It’s made from crème pâtissière (French pastry cream which is a custard) lightened with whipped cream, giving it a beautiful, airy texture that melts in your mouth.
Cornflour/cornstarch, which is used to thicken the pastry cream, isn’t enough on its own to make the filling firm enough to slice neatly into bars. For that, we need gelatine, which sets the cream without making it heavy or stodgy.
There’s no getting around the gelatine if you want a Mille-Feuille with beautiful, clean-cut layers rather than the shortcut versions where soft custard is blobbed between sheets of puff pastry!
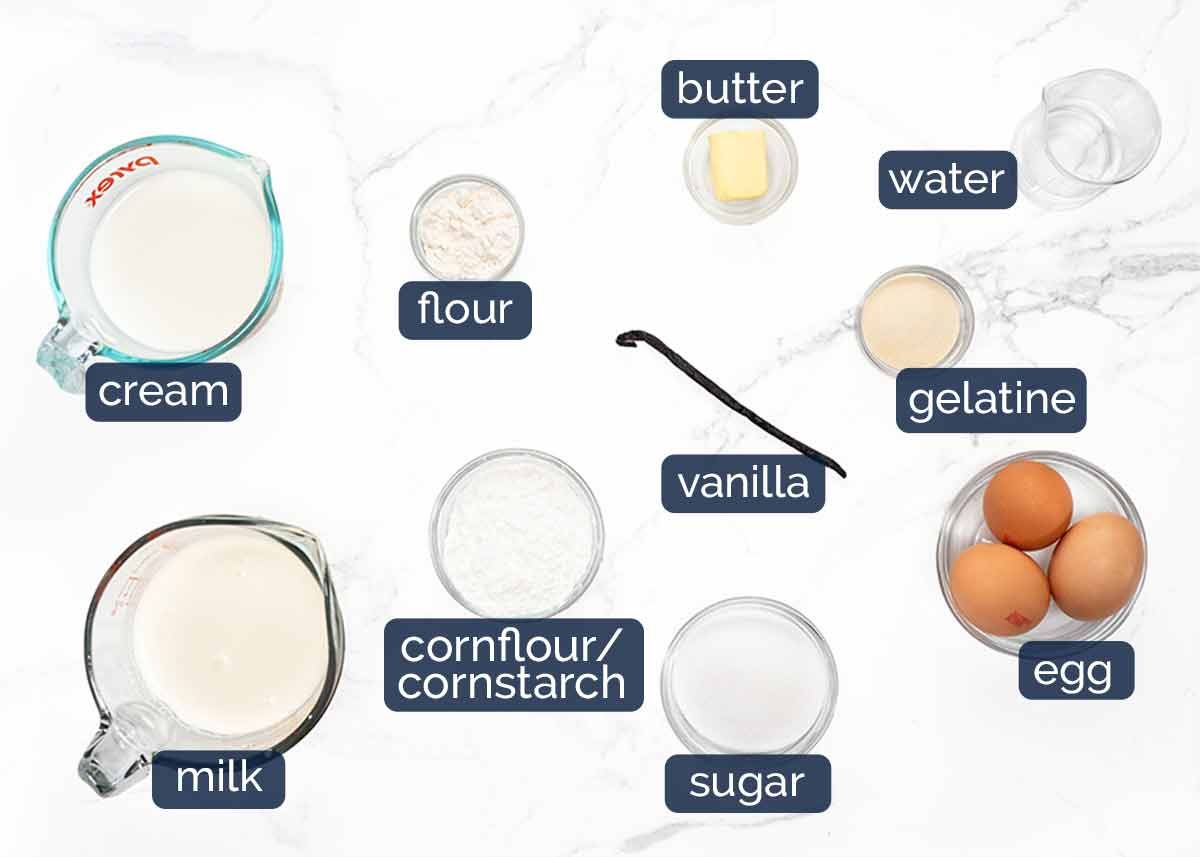
Egg yolks – You will need 3 egg yolks from large eggs, 50-55g/2oz each from egg cartons labelled “large eggs” (it’s an industry standard). Separate the yolks from the whites while they are fridge cold, it’s easier than when they are warm (not that the yolks have to be at room temperature for this recipe). Also, see here for ways to use the egg whites!
Milk – The primary liquid in crème pâtissière. Please use full fat, else the custard will lack the rich mouthfeel.
Cream – We use thickened cream / heavy cream (35% fat), but any full-fat cream suitable for whipping will work. Some goes into the custard, while the rest is whipped and folded through at the end to make it light and airy.
Gelatine powder – As noted above, this is what makes the custard set firmly enough to slice into neat bars, while still being beautifully soft and creamy when you eat it. Cornflour alone won’t do the job! Gelatine is inexpensive, you can find it at regular grocery stores, it’s easy to use, and you’re missing out on a big wide world of desserts if you avoid it – like no bake cheesecakes! Trifle!
Vanilla bean – For beautiful, real vanilla flavour and those lovely little black specks throughout the custard. You can substitute with vanilla bean paste (best alternative) or vanilla extract.
Sugar – To sweeten the custard. It’s not overly sweet! The French do not like sweet! 🙂
Cornflour / cornstarch – The traditional thickener for custard, this thickens the custard as it cooks, while gelatine helps it set firmly enough to slice.
Flour – Works with the cornflour to give the custard body and structure without making it too jelly-like.
Butter – Adds richness to the custard. This is stirred in at the end once the custard has thickened. Make sure to cut into small cubes so it incorporates properly. Dropping in a large block of butter can make the custard split (how do you think I know that? #LazyGirl).
3. mille-feuille Icing
Here’s what you need for the classic Mille-Feuille icing, with its signature feathered chocolate pattern. It’s a simple icing made with icing sugar and milk, with melted chocolate piped on top and dragged through with a toothpick to create that beautiful, authentic French patisserie-style finish!
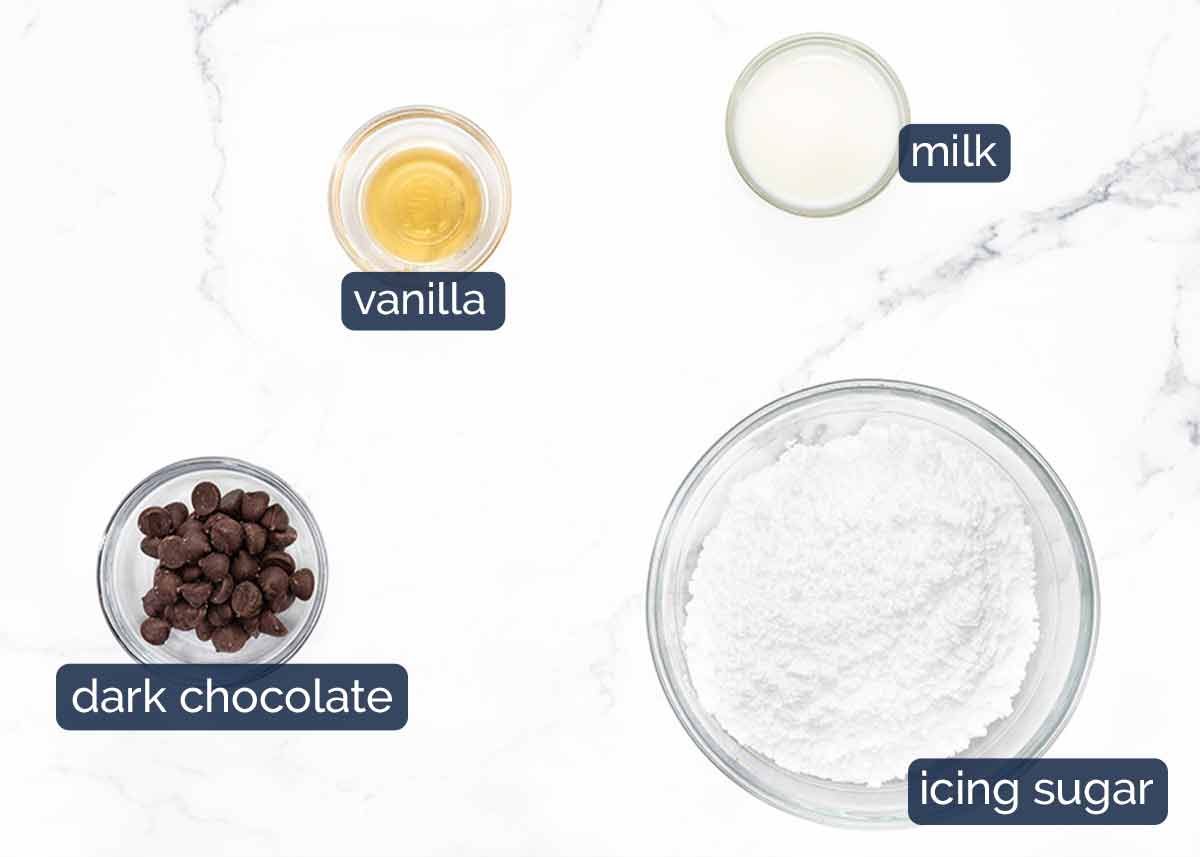
Icing sugar / powdered sugar – Australia, use soft icing sugar rather than pure icing sugar (if presented with the option). Pure icing sugar sets harder, like for royal icing. Soft icing sugar – and regular powdered sugar – will set with a light crust on the surface but be soft underneath, which is what we want for Mille-Feuille.
Milk – Just 4 teaspoons for 1 cup of icing sugar, which will make the icing thin enough to spread perfectly flat but keep it thick enough so it doesn’t run off the puff pastry.
Vanilla extract – For flavour.
Dark chocolate chips (US: semi-sweet chips) – We only need a very small amount, about 2 teaspoons, because the lines piped are thin. However, it is very difficult to melt such a small amount, so I use 2 tablespoons. I’m sure you can figure out what to do with the leftover melted chocolate. 🙂
Mille-Feuille workflow overview + stopping and starting
There’s a number of parts to making Mille-Feuille, so I thought it would be helpful to provide a summary outline of the workflow, so you have an overview and can plan your time. It’s a recipe that can be made across two days, if you want.
Bake puff pastry layers first (30 minutes baking + 30 minutes to cooling). These can be kept in an airtight container for 2 days before assembling, they will stay crisp.
Custard (crème pâtissière) (15 minutes cooking + 10 minutes steeping + 75 minutes cooling). Start this while the puff pastry is in the oven and cooling. Once made, this needs to be cooled and refrigerated for 1 hour 15 minutes (total). If you want, you can leave it in the fridge overnight and proceed with the recipe the next day.
Vanilla chocolate icing (5 minutes to make, 10 minutes to ice). Do this while the custard is cooling. Once iced, it takes 30 minutes to set, or it can stay in the fridge even for the whole day, until you’re ready to assemble. But once you mix up the icing, it needs to be spread on the pastry right away (else it will crust over in the bowl).
Diplomate cream (15 minutes prep and cook + 20 minute cooling) – Once the custard has been cooled, it then gets turned into diplomate cream by adding whipped cream, and we also add gelatine to make it set. Once made, this needs to be refrigerated ONLY for 20 minutes before piping, no longer, else the gelatine will set too much. So don’t start the diplomate cream unless you have time to finish assembling the Mille-Feuille.
Assembling (20 minutes assembling + 6 hours refrigerating). Once the diplomate cream is piped on and the Mille-Feuille assembled, it needs 6 hours to set before it can be sliced. We usually just leave it overnight, to be sure.
How To Make JB’s Mille-Feuille
This section is long because JB and I want you fully armed to tackle this recipe with confidence! Nothing needs rushing or extreme precision, so take your time.
My biggest tip is to be patient when cooking the custard, which is much thicker than usual. Too much heat can scramble the eggs. If you see lumps or curdling forming, immediately remove from the heat and whisk vigorously until smooth. Happens to me almost every time because I’m impatient, but whisking always saves it!
1. puff pastry layers
The puff pastry layers are baked with a tray placed on top to stop them from puffing up, so they bake into thin, crispy sheets with lots of lots of fine layers. You don’t need to weigh the tray down with anything heavy, just a regular tray is enough.
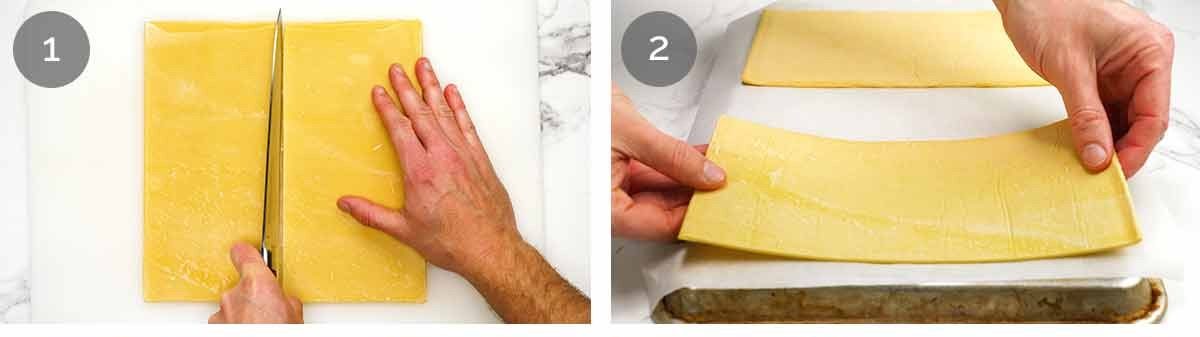
Cut – Let the puff pastry sheets partially thaw. They are much easier to handle than when fully thawed and floppy. Cut each pastry sheet in half. You’ll use 3 halves and pop the 4th back in the freezer for another day.
Different size puff pastry – Australian puff pastry sheets from grocery stores are 25cm / 10″ squares. If yours are not, cut three rectangles that are 12.5 x 25cm / 5 x 10″.
Inverted baking tray – You will need 4 baking trays to bake the puff pastry layers. Turn 2 baking trays upside down and line each with baking paper / parchment paper. Then put one puff pastry sheet on one tray and two on the other, spaced out as much as you can.
Notes
– We use four trays because ours only fit 2 pastry sheets each. If you have larger ones and an oven to fit them (US half-sheet or larger), you only need two. Invert the bottom trays so the rims don’t prevent full contact with the top trays. No need to invert if the top trays are smaller.
– If you don’t have four baking trays (I hope you have at least two!), bake the puff pastry layers in two batches.
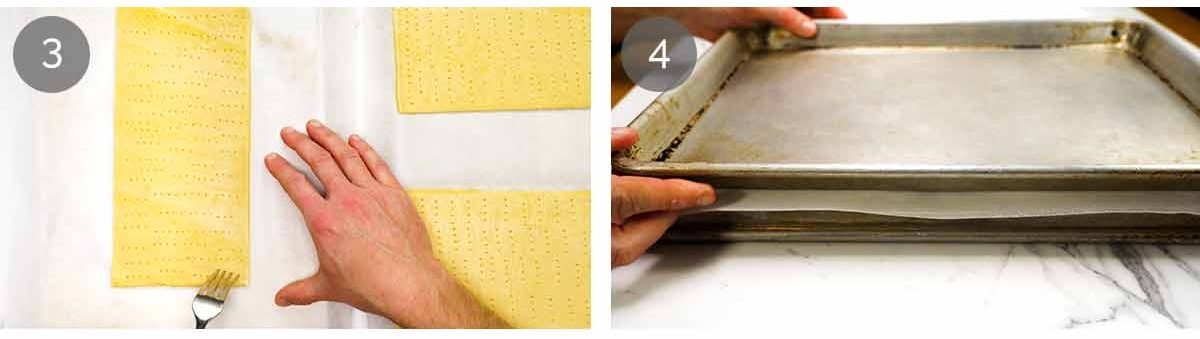
Prick and dust – Prick each sheet about 30 times using a fork – try not to go all the way through, but it’s ok if you accidentally do. Then dust all over with icing sugar using a sift.
Press with another baking tray – Cover the puff pastry with baking paper / parchment paper then place another tray on top.
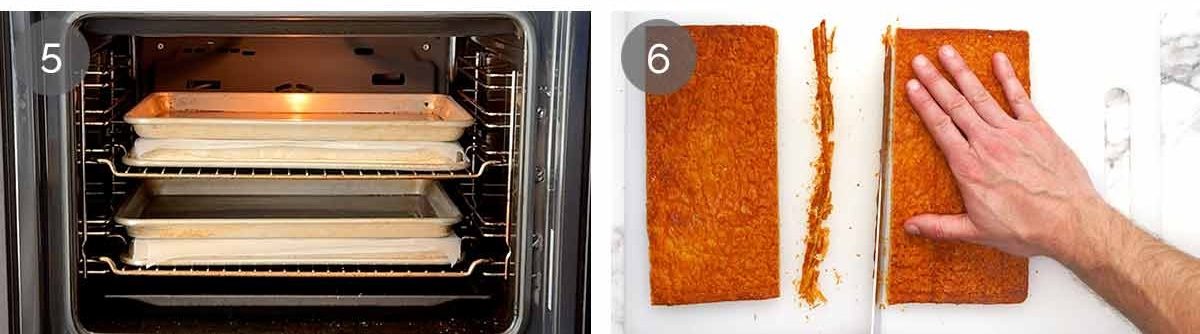
Bake for 30 minutes in a 180°C / 390°F (160°C fan-forced), swapping and turning the tray shelves halfway through, until each puff pastry sheet is golden and crisp. The one with two sheets on it might take up to 5 extra minutes, depending on the heat distribution of your oven and the thickness of your tray.
Once baked, they will be stiff but fragile – especially while hot, so handle with care! Place them on a wire rack and cool completely, about 30 minutes.
Trim each puff pastry sheets to make them all the same size using a sharp serrated knife. You can either use a ruler or stack them, using one as the master template.
2. MAKING THE VANILLA CUSTARD
The filling of Mille-Feuille is called a diplomate cream which is a thick vanilla custard (crème pâtissière) lightened with whipped cream then set with gelatine so we can slice it, while keeping it beautifully soft and creamy to eat.
The first step is to make the custard. Then when the custard is cooled, we will turn it into Diplomate Cream.
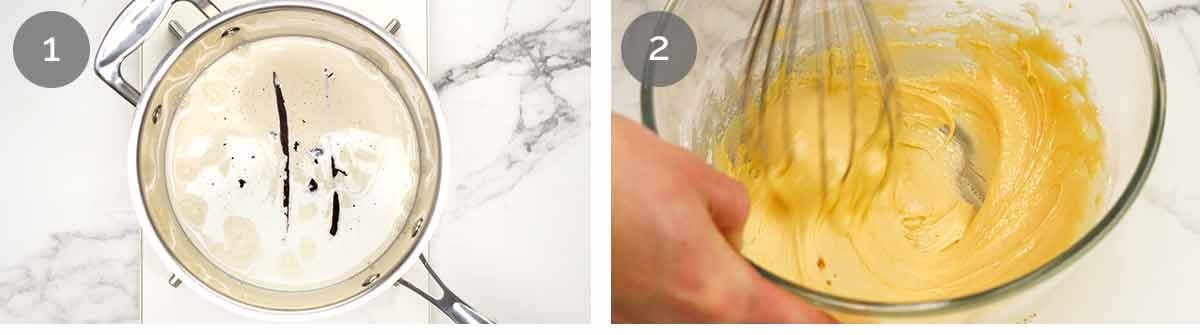
Infuse with vanilla flavour – Put the milk, cream, vanilla bean seeds and used vanilla bean into a large saucepan (~20 cm/8″ wide). Heat over medium heat until just below boiling. Remove from heat, cover, and let sit 10 minutes to let the vanilla flavour infuse into the milk.
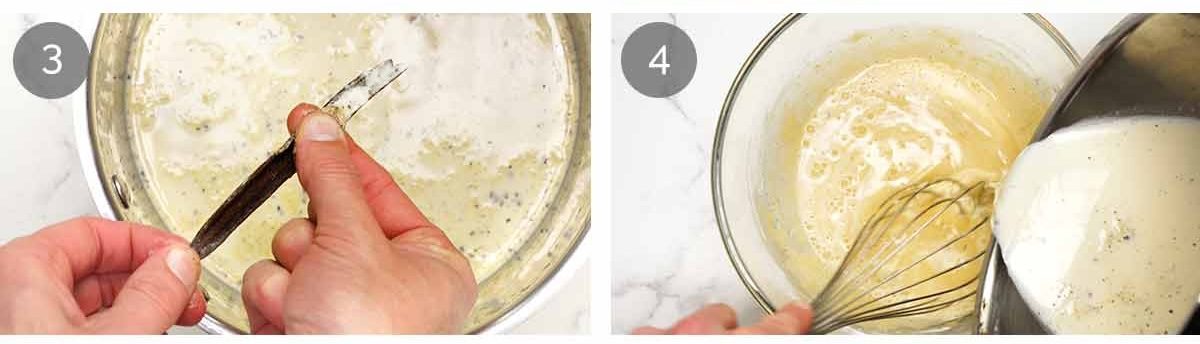
Whisk yolks – Meanwhile, in a medium size bowl, whisk egg yolks and sugar. It will become like wet sand at first, but keep whisking and it will turn liquidy and smooth – about 15 seconds of whisking. Add cornflour and flour, whisk until smooth – it will be like a thick cake batter.
Remove vanilla bean from the milk and use your fingers to squeeze all the milk out into the saucepan. Discard used bean.
Temper eggs – While whisking constantly (put a wet cloth under the bowl to stop it from moving), slowly pour half the vanilla milk mixture into the yolk bowl. Whisk vigorously to properly combine the milk and the eggs.
This is called tempering – gradually warming the eggs so they don’t scramble when added to the hot milk.
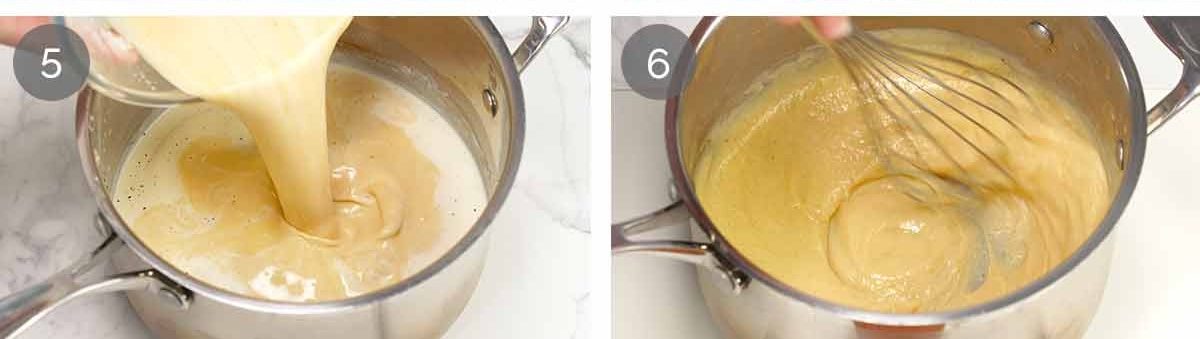
Pour into saucepan – Once combined, pour the mixture into the saucepan with the remaining milk and whisk to combine.
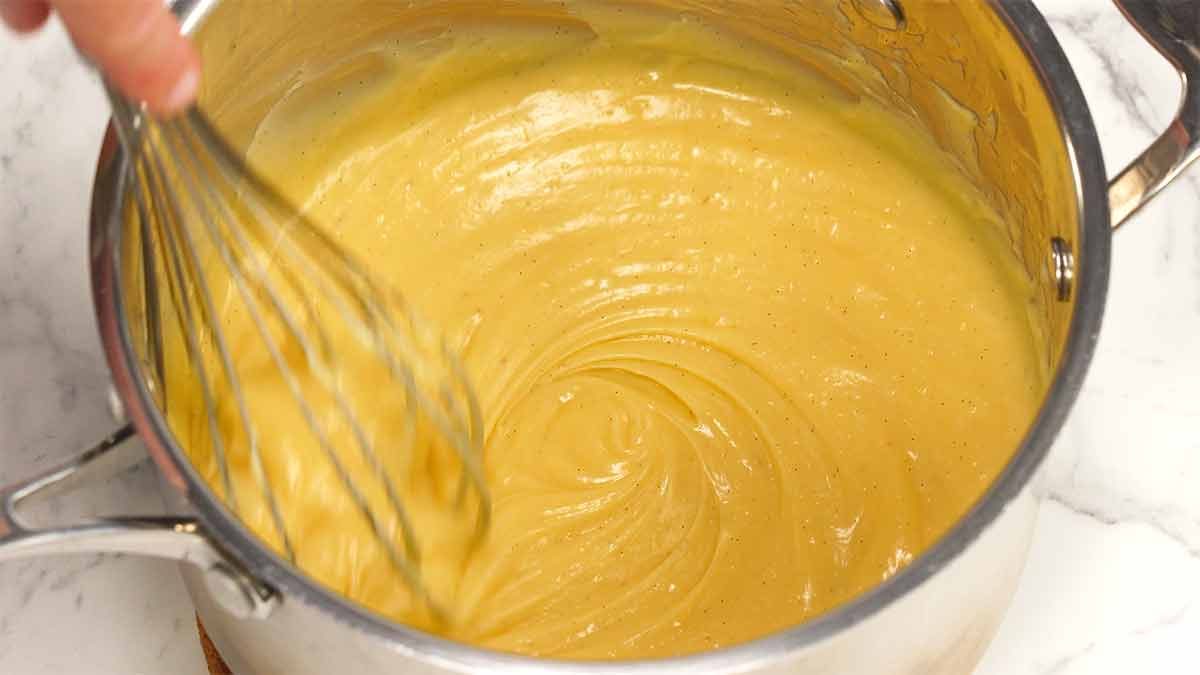
Thicken custard – Return the saucepan on medium heat (or medium low if you have a strong burner). Whisk constantly – leisurely at first, then more briskly as the mixture starts to heat up at which point it will start to thicken into a thick custard – around 7 to 10 minutes, even longer if using a very low heat to be safe.
Lump alert! If you see lumps like scrambled eggs – which can happen if the heat is a little too high, it can all of a sudden go from liquidy to a thick custard – move it off the heat straight away and whisk them out vigorously until smooth then return to the stove. It will take about 15 seconds of brisk whisking, but it will go smooth again.
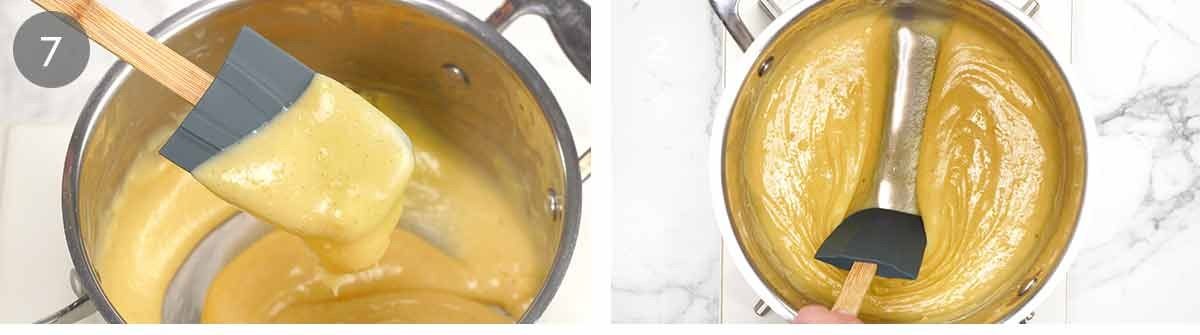
Custard goal thickness – The custard is ready when it is very thick dolloping consistency (see video at 2.20 minutes). You should be able to draw a path across the base of the pan and the pan base stays visible.
Note: This custard is thicker than usual so you cannot rely on the standard “bubble” test that you see with crème pâtissière and custard recipes which indicates the custard is ready. It’s so thick, it doesn’t bubble.
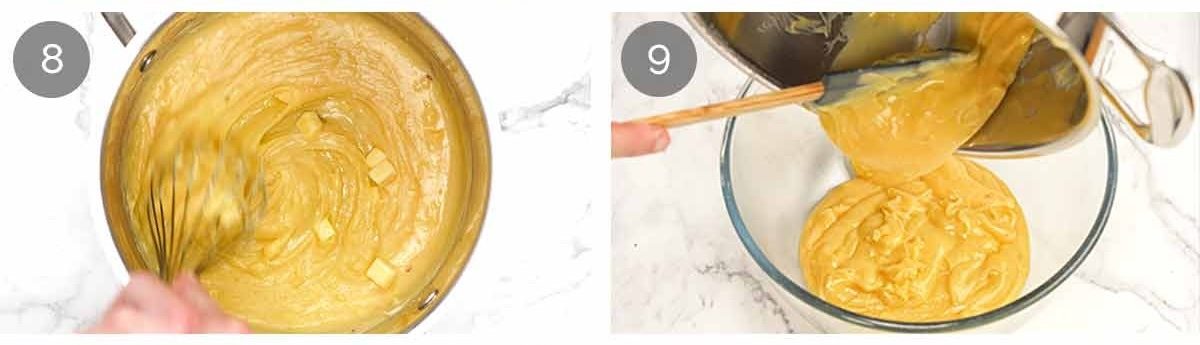
Finish – Remove from the stove. Whisk in the cold butter cubes until incorporated (the butter must be cold, not room temperature softened else the custard may split).
Cover – Immediately pour into a large bowl, smooth surface, then cover with cling wrap touching the surface to prevent a skin from forming.
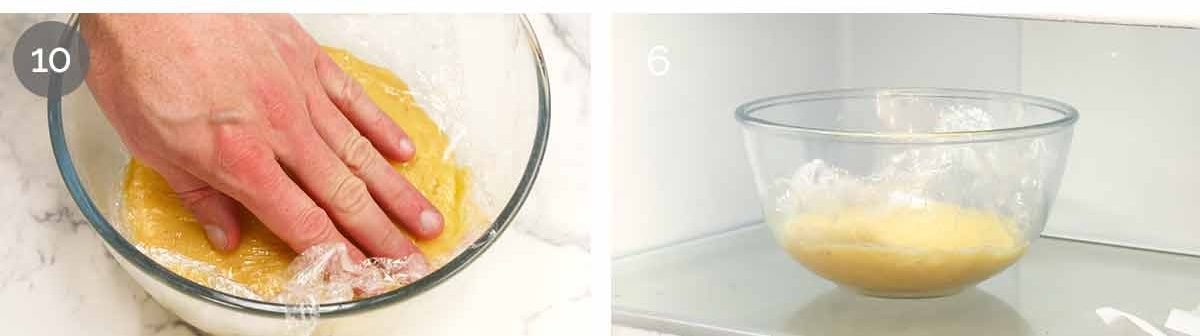
Cool on the counter for 30 minutes, then refrigerate for 45 minutes or until it is cool and firms up to a soft rubber-like consistency. (You can even leave it overnight at this stage).
3. mille-feuille icing pattern
The part everybody wants to see!
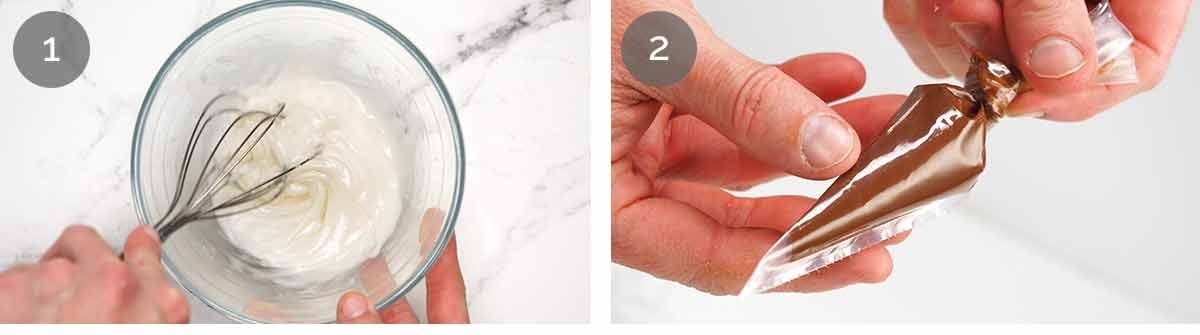
Vanilla icing – In a small bowl, whisk icing sugar, vanilla, and milk until smooth. Note: Don’t make this ahead as it will crust over.
Melted chocolate – Place the chocolate chips in a microwave-safe bowl and melt over (3 × 20-second microwave bursts), stirring between each. Transfer to a small piping bag or zip-lock bag. Snip a 2 mm hole (1/6″).
Notes: Only melt chocolate just prior to using to ensure it remains fluid. We only use a small amount of the chocolate, but it is tricky to melt less. Drizzled leftovers over strawberries and pop them in the fridge for a little treat!
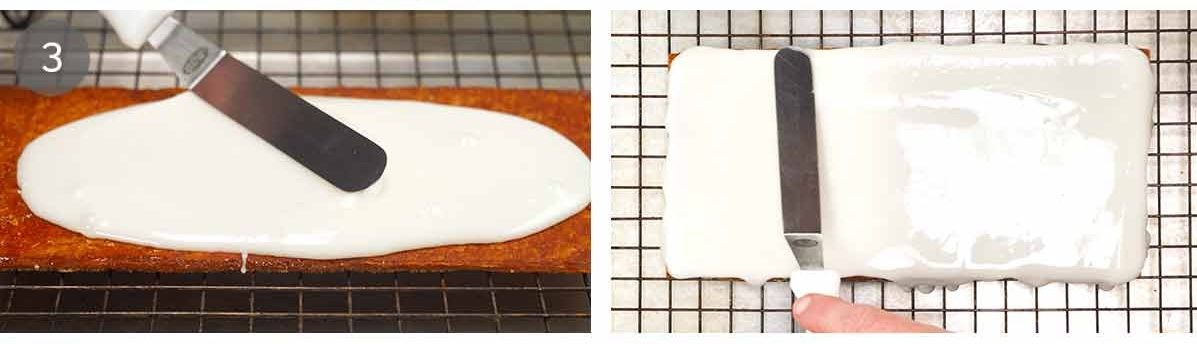
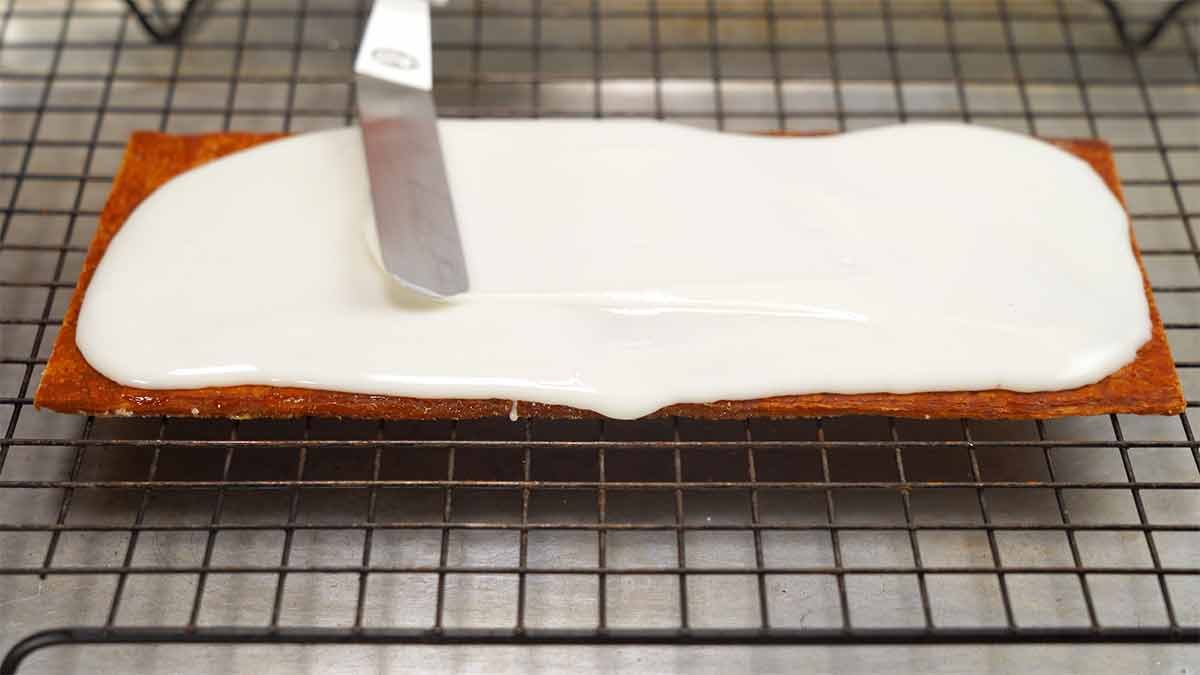
Mille-Feuille icing pattern – Watch the video, it’s helpful! Put one piece of pastry on a rack set on a tray to catch drips. Spread evenly with vanilla icing from edge to edge. It’s thin enough that it will spread smoothly.
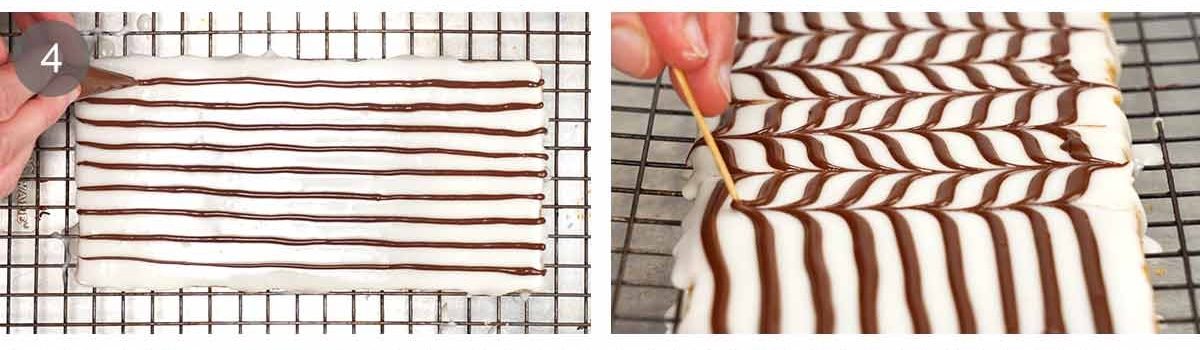
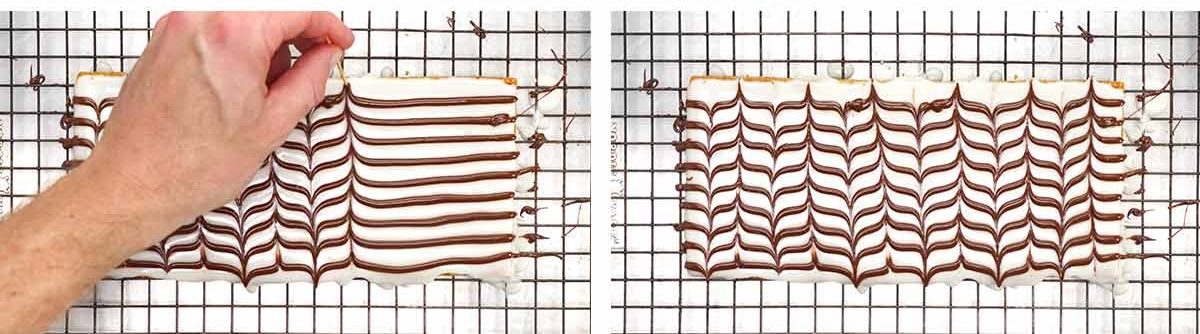
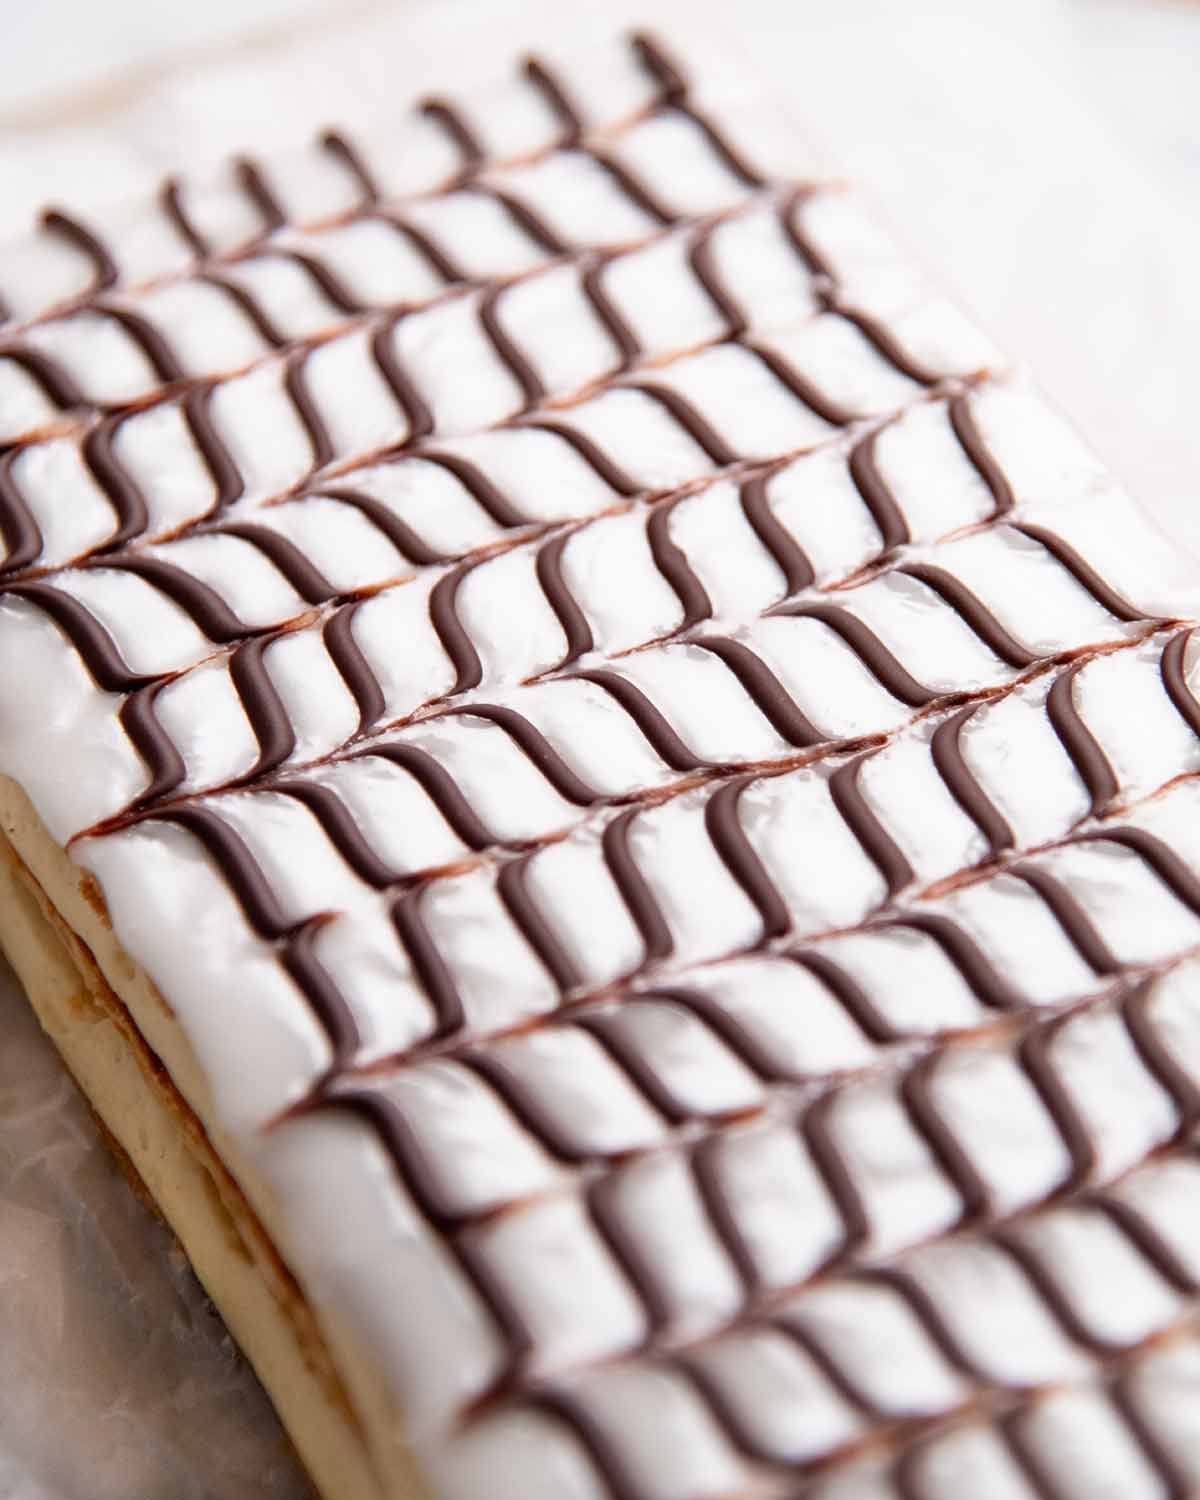
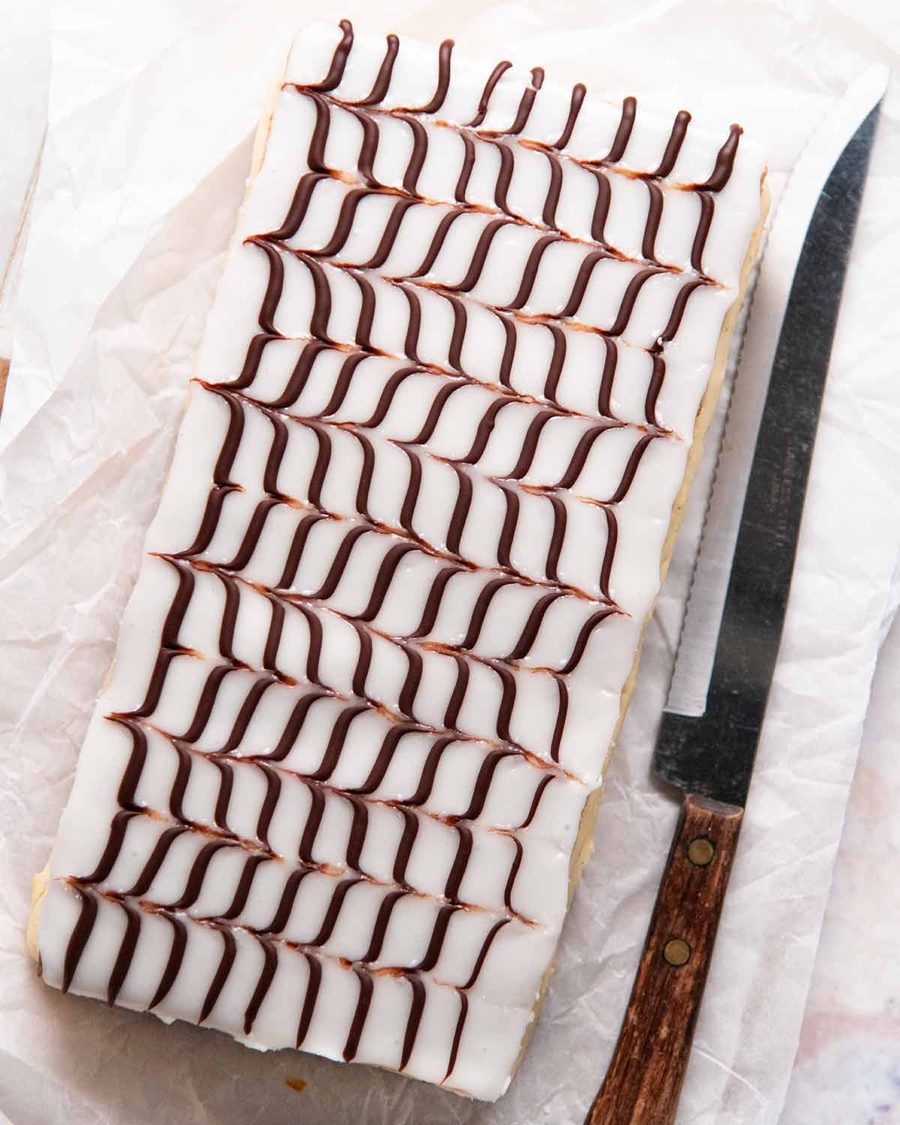
Chocolate lines – You need to work quickly here as the chocolate sets, it will start to set from the moment you pipe it onto the icing. Pipe on thin lines of the chocolate icing lengthways, making the lines 1 cm / 0.4″ apart. Then use a toothpick to drag through the lines (1.5 cm / 0.6″ apart), alternating one way and then the other, to make the classic mille-feuille pattern.
TIPS: I always practice chocolate piping on a plate before doing the real thing, also to check that the hole is the right size and not too small or large, which you can gauge by the thickness of the chocolate that comes out. There is enough chocolate to spare for practicing! Use a steady hand to pipe straight lines. But if you make a few bloopers, don’t stress. Just aim to do the toothpick drag through those points to disguise them. Basically I do the toothpick drag through those parts first then work outwards from there to space the feathering out evenly.
Fridge 30 minutes – Place in the fridge for at least 30 minutes to let it set. It can stay for longer, until you’re ready to assemble.
4. making diplomate cream
Once the custard has firm up in the fridge, it’s now time to turn it into diplomate cream. These steps might seem unnecessarily fiddly, with all the softening, warming and mixing in stages. But we designed them this way because we found this was the trickiest part of the recipe, especially for people new to making custard or working with gelatine. Nobody wants a gazillion gelatine lumps littered throughout their Mille-Feuille! So please follow the steps and trust the process – we’ve done the trial and error so you don’t have to.
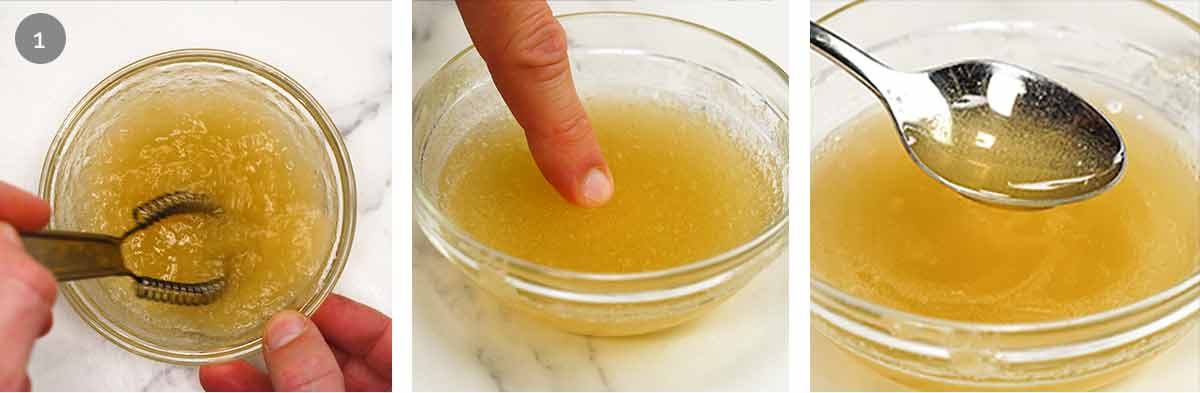
Bloom gelatine – Place the cold water in a small heatproof bowl and sprinkle the gelatine evenly over the surface. Whisk to combine, then leave for 3 minutes until firm and rubbery (this is called “blooming”). Microwave for 15 seconds until melted (do not boil), then cool for 5 minutes. It must still be fluid when you pour it in.
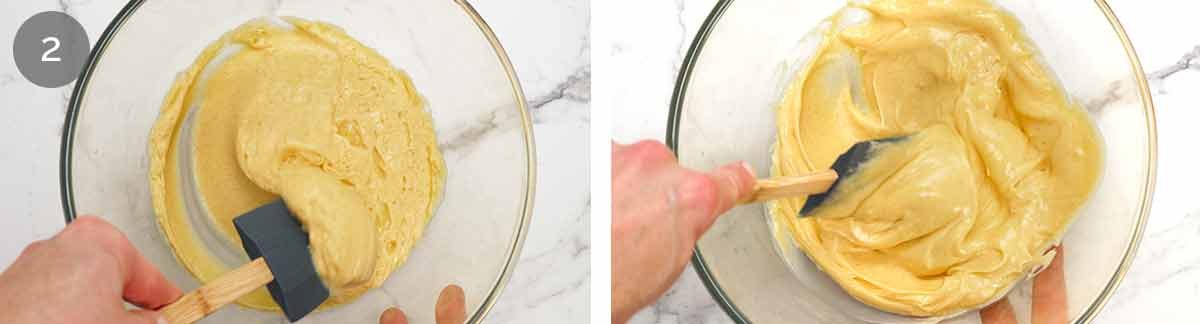
Loosen custard – Remove the chilled custard from the fridge, it will have firmed up into a soft rubber. Then use a rubber spatula to soften the custard as best you can, I just sort of smear it. It won’t become soft creamy, it will be like a soft mushy paste.
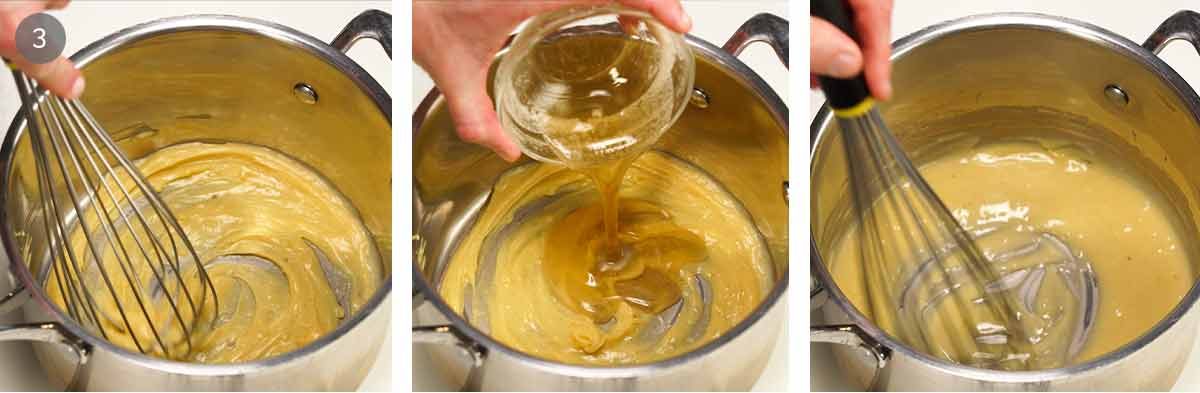
Combine custard and gelatine – Transfer a 1/4 of the custard into a large saucepan (~20 cm/8″ wide) and warm it over low heat, whisking, until it softens a bit more. It won’t become fluid but it will be a very soft paste. Still on the stove, add gelatine and whisk until smooth, it will be like a thick batter consistency.
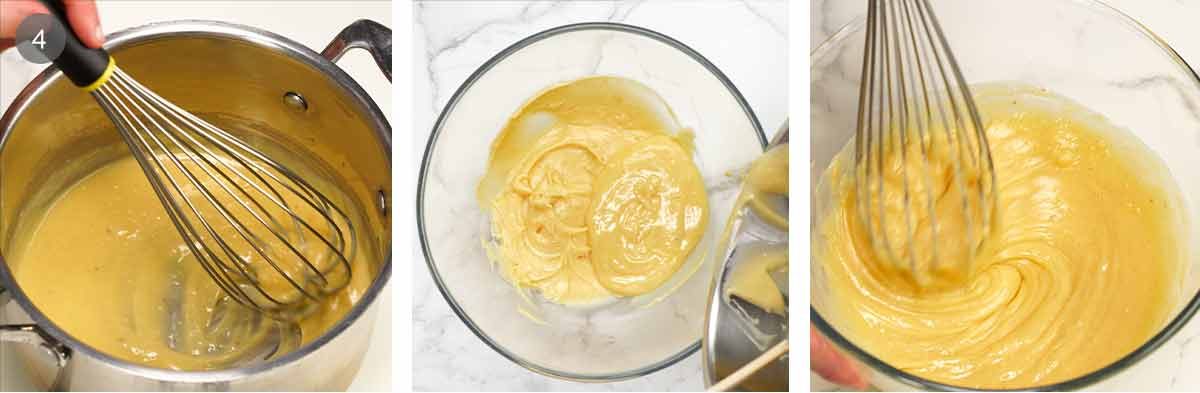
Combine with rest of custard – Whisk in another 1/4 of the custard until smooth, then remove from the stove and pour that mixture into the custard bowl. Whisk vigorously until smooth. Set aside to cool slightly while you whip the cream.
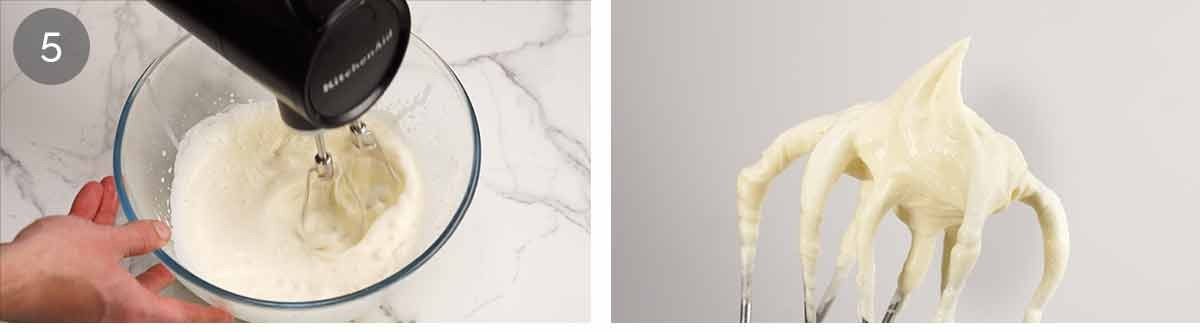
Whip cream into firm peaks – Beat the cream using an electric beater or stand mixer fitted with the whisk attachment until stiff peaks form (upright peaks, not floppy elf hats which is softly whipped).
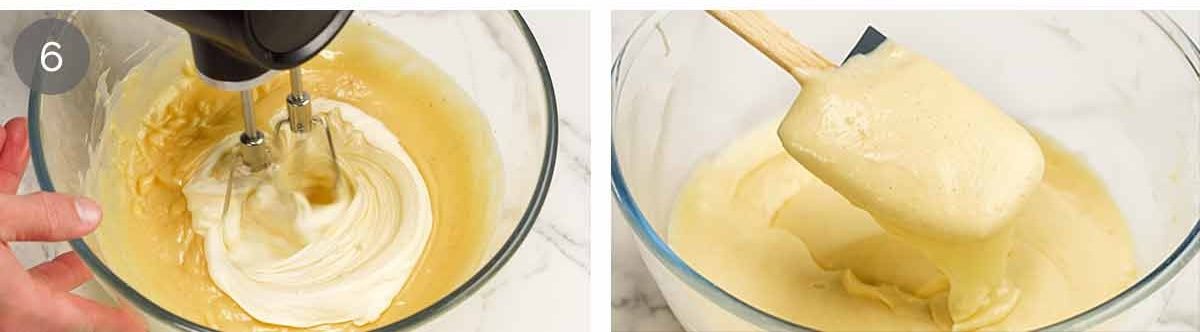
Beat into custard – Put a quarter of the cream into the custard, then beat it in with the electric beater. Add remaining cream then beat again until smooth. Congratulations, you’ve made diplomate cream!
Note – Traditionally, whipped cream is folded in by hand for diplomate cream, but our extra-thick Mille-Feuille custard makes this difficult without leaving little cream lumps. We found an electric beater works far better, and though you’d think it beats the air out of the cream, we actually found the custard was just as light!
Fridge 20 min only – Cover the bowl and refrigerate for 20 minutes so it firms up enough to pipe, but still creamy enough to scoop. Do not refrigerate longer else the gelatine will make the custard set. If you accidentally do this, gently warm to soften, mix until smooth then refrigerate again.
5. assembling
Time to put our Mille-Feuille together!
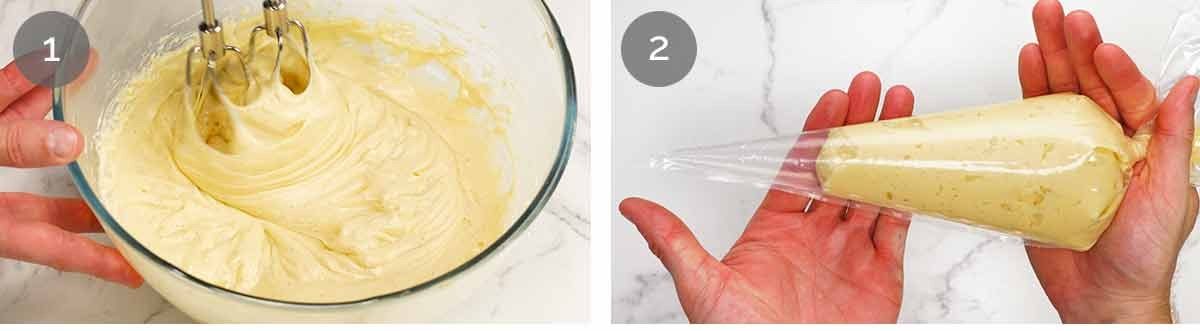
Beat smooth – Remove the diplomate cream from the fridge. It will be like a block of soft rubber. Using an electric beater, beat on high for 30 seconds or until the custard is loosened and smooth.
Piping bag – Transfer half the custard into a large piping bag and snip the tip of the bag so you have a 1 cm / 0.4″ round hole (or use a round nozzle).
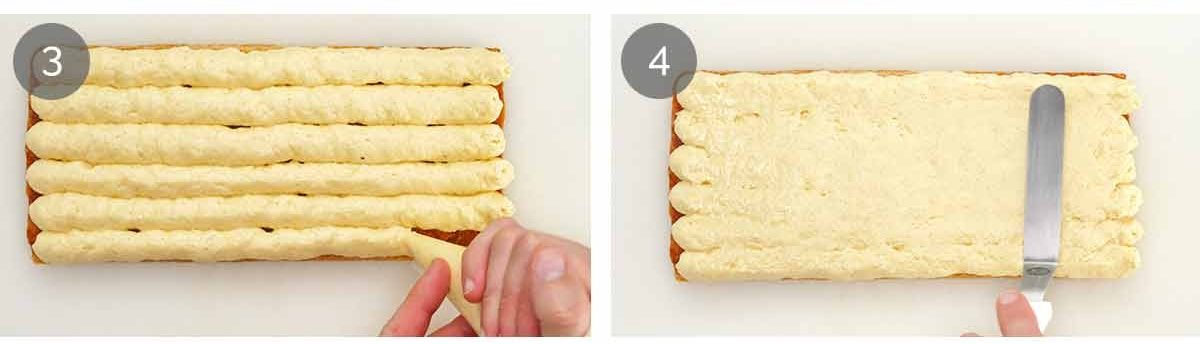
Layer 1 – Place one cooked pastry sheet on a cutting board. Pipe lengthways on the pastry sheet – I do 6 rows – to cover all the pastry with diplomate cream, aiming to use all the diplomate cream. Pipe the custard snugly up against each other to avoid gaps, so when you cut the Mille-Feuille you don’t have unsightly air bubbles.
Smooth – Dip an offset spatula in warm water then gently smooth the top.
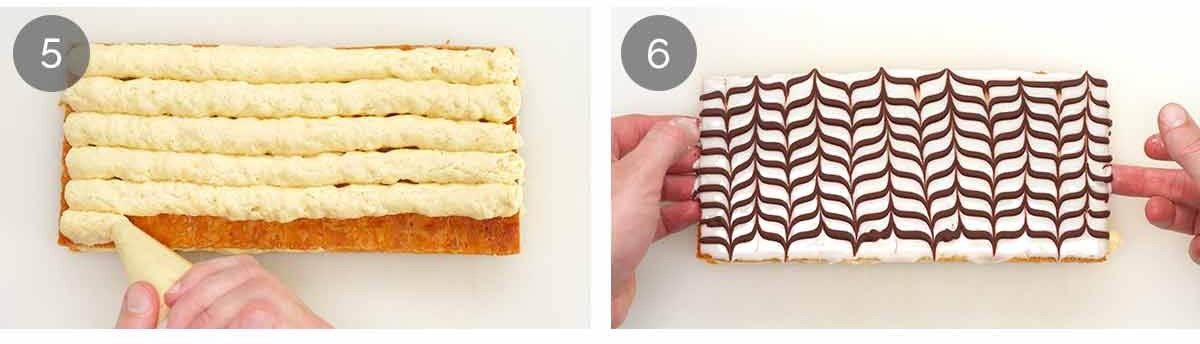
Layer 2 – Place the second pastry sheet on top, press lightly. Fill the piping bag with the remaining diplomate cream and repeat the piping. Smooth the top again.
Layer 3 – Gently place the iced pastry on top, icing facing up (I’m not sure I needed to specify this but just to be clear!! Imagine the tears if you planted the lid icing side down! 😂).
Use any leftover diplomate cream to pipe along the short edges to fill any gaps in the custard and use the offset spatula to smooth it.
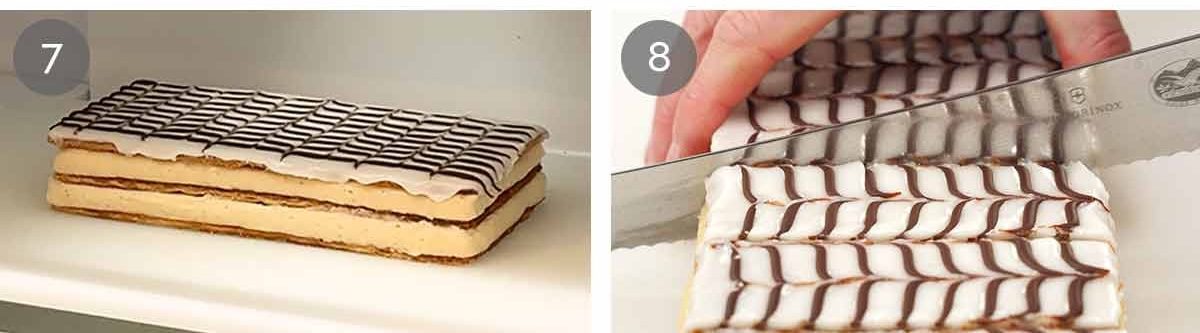
Chill – Refrigerate at least 6 hours to set (I usually refrigerate overnight, to be sure).
Slice – Use a sharp serrated knife to cut into 6 pieces, wiping the blade between each slice.
CONGRATULATIONS – you have just made a real proper Mille-Feuille from scratch! Take a bow, bask in the praise, do a victory lap around the kitchen – you’ve earned it!!
How to EAT Mille-Feuille!!
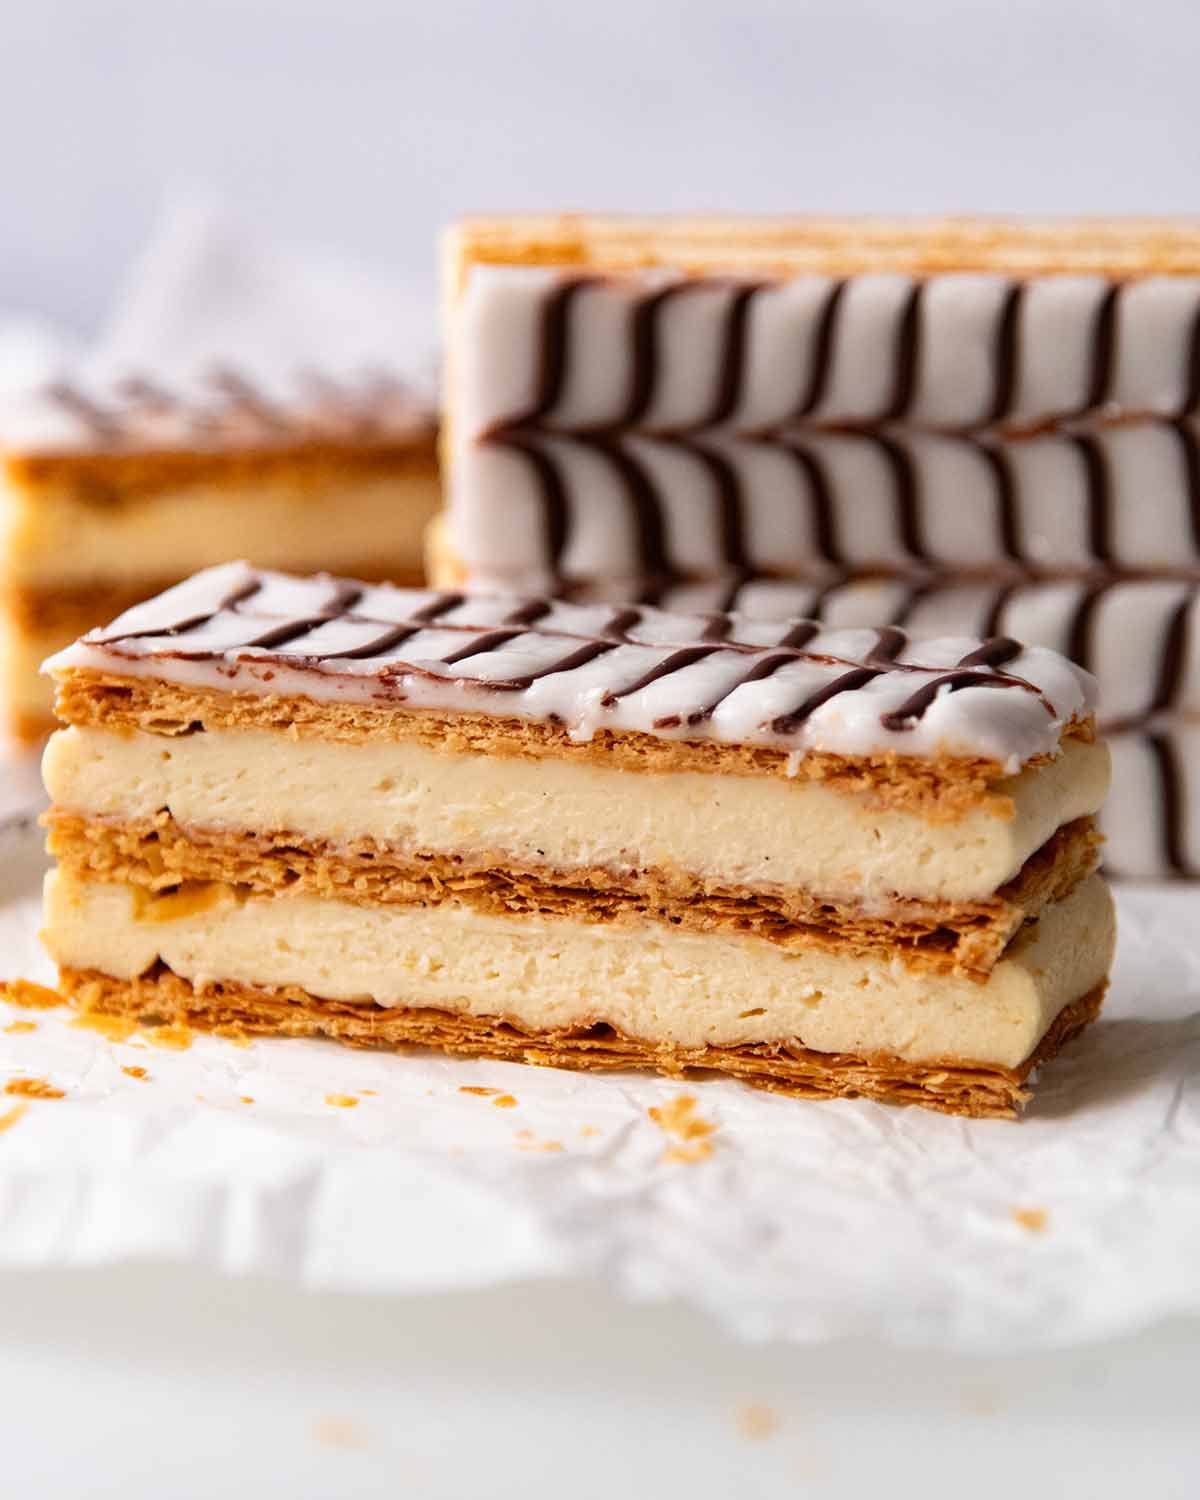
After all that work, JB is very insistent that I explain the PROPER way to eat Mille-Feuille! To be honest, I have never given it much thought and would hold it upright, take a giant mouthful and anticipate the custard that comes squirting out each side.
Apparently, the right way to eat it is on its side, so when you bite down, above described custard squirt is avoided! Like THIS:

Not the most flattering photos of him. But sacrifices must be made in the name of pastry-eating education!! 😂
Now, what I really want to know. Who is up for mastering the art of Mille-Feuille?! – Nagi x
Watch How To Make It
Watch JB make his Mille-Feuille!
Hungry for more? Subscribe to my newsletter and follow along on Facebook, Pinterest and Instagram for all of the latest updates.
Mille-Feuille
Ingredients
For puff pastry layers
- 2 sheets frozen butter puff pastry , 25cm / 10" squares (185g/6oz each), just thawed (Note 1)
- 1 1/2 tbsp soft icing sugar / powdered sugar
Vanilla custard (pastry cream / diplomat cream)
- 1 cup full fat milk (low-fat works too)
- 1/2 cup thickened cream / heavy cream , or other whipping cream
- 1 vanilla bean , split lengthways and seeds scraped out, or 1 tsp vanilla bean paste (Note 2)
- 3 egg yolks from large eggs (50 – 55g/2oz each in shell) – see here for using egg whites
- 1/2 cup caster sugar / superfine sugar , substitute regular / granulated white sugar
- 1/3 cup cornflour / cornstarch
- 1 tbsp plain flour / all-purpose flour
- 1 tbsp / 15g unsalted butter , cold, cut into small 0.7cm / 1/4" cubes
To finish custard
- 3/4 cup thickened cream / heavy cream , or other whipping cream (not double cream)
- 1 tbsp gelatine powder (Note 3)
- 3 tbsp water , just cold tap water
Mille-Feuille Decorative Icing
- 1 cup soft icing sugar / powdered sugar , sifted
- 4 tsp full fat milk (low-fat works too)
- 3/4 tsp vanilla extract
- 2 tbsp dark chocolate chips / US: semi-sweet chips (Note 4)
Instructions
ABBREVIATED RECIPE
- Bake puff pastry pressed between sheets. Spread with vanilla icing, pipe chocolate lines then use a toothpick to make the Mille Feuille pattern. Make custard the usual way – it is extra thick. Cool then incorporate gelatine and whipped cream – the whipped cream lightens it and the gelatine makes the Mille Feuille sliceable. Pipe between puff pastry layers, chill 6 hours to properly set before slicing.
FULL RECIPE
Puff Pastry Layers
- Preheat oven to 180°C / 390°F (160°C fan-forced).
- Cut each pastry sheet in half, you’ll use 3 halves and pop the 4th back in the freezer for another day.
- Prick and dust – Turn 2 baking trays upside down and cover with a sheet of baking paper / parchment paper (Note 5). Place one puff pastry sheet on one tray and two on the other, spaced out as much as you can. Prick all over with a fork (about 30 pricks on each piece). Dust all over with icing sugar using a sifter.
- Weigh down – Cover each pastry with another sheet of baking paper / parchment paper and place another tray on top to keep them from puffing up as they bake.
- Bake 30 minutes, swapping and turning the trays halfway through, until deep golden and crisp. (The one with 2 sheets on it might take a few extra minutes). Place them on a wire rack and cool completely.
- Trim each puff pastry sheets to make them all the same size using a sharp serrated knife. You can either use a ruler or stack them, using one as the master template.
Vanilla Custard Filling (Pastry Cream)
- Infuse milk – Put the milk, cream, vanilla bean seeds and used vanilla bean into a large saucepan (~20 cm/8" wide). Heat over medium heat until just below boiling. Remove from heat, cover, and let sit 10 minutes to steep.
- Whisk yolks – In a medium size bowl, whisk egg yolks and sugar. It will become like wet sand at first, then will turn liquidy and smooth. Add cornflour and flour, whisk until smooth – it will be like a thick cake batter.
- Remove vanilla bean from the milk and use your fingers to squeeze all the milk out into the saucepan. Discard used bean.
- Temper eggs – While whisking constantly, slowly pour half the vanilla milk mixture into the yolk bowl. Once combined, pour the mixture into the saucepan with the remaining milk and whisk to combine.
- Thicken custard – Return the saucepan on medium heat (or medium low if you have a strong burner). Whisk constantly – leisurely at first, then more briskly as the mixture starts to heat up at which point it will start to thicken into a thick custard – around 7 to 10 minutes, even longer if using a very low heat to be safe. If you see lumps like scrambled eggs, move it off the heat straight away and whisk them out vigorously until smooth then return to the stove.
- Custard goal thickness – The custard is ready when it is very thick dolloping consistency (see video at 2.20 minutes). You should be able to draw a path across the base of the pan and the pan base stays visible. This custard is thicker than usual so you cannot rely on the "bubble" test.
- Finish – Remove from the stove. Whisk in the cold butter cubes until incorporated (the butter must be cold, not room temperature else custard may split). Immediately pour into a large bowl, smooth surface, then cover with cling wrap touching the surface to prevent a skin from forming.
- Cool on the counter for 30 minutes, then refrigerate for 45 minutes or until it is cool and firms up to a soft rubber-like consistency. (You can even leave it overnight).
Vanilla & Chocolate Icing
- Vanilla icing – In a small bowl, whisk icing sugar, vanilla, and milk until smooth. (Don't make this ahead as it will crust over).
- Melted chocolate – Place the chocolate chips in a microwave-safe bowl and melt over (3 × 20-second microwave bursts), stirring between each. Transfer to a small piping bag or zip-lock bag. Snip a 2 mm hole (1/6"). (Only melt chocolate just prior to using to ensure it remains fluid).
- Mille Feuille icing pattern (see video at 3.58 minutes and step photos) – Place one piece of puff pastry on a rack set on a tray (to catch drips). Spread evenly with the vanilla icing. Pipe on thin lines of the chocolate icing lengthways, making the lines 1 cm / 0.4" apart. Working quickly before the chocolate sets, use a toothpick to drag through the lines (1.5 cm / 0.6" apart), alternating one way and then the other, to make the classic mille-feuille pattern.
- Fridge 30 minutes – Place in the fridge for at least 30 minutes to let it set. It can stay for longer, until you're ready to assemble.
Turn Pastry Cream into Diplomate Cream
- Bloom gelatine – Place the cold water in a small heatproof bowl and sprinkle the gelatine evenly over the surface. Whisk to combine, then leave for 3 minutes until firm and rubbery (this is called "blooming"). Microwave for 15 seconds until melted (do not boil), then cool for 5 minutes.
- Loosen custard – Remove the chilled custard from the fridge, it will have firmed up into a soft rubber. Then use a rubber spatula to soften the custard as best you can, I just sort of smear it. It won't become soft creamy, it will be like a soft mushy paste.
- Combine custard and gelatine – Transfer a 1/4 of the custard into a large saucepan (~20 cm/8" wide) and warm it over low heat, whisking, until it softens a bit more. It won't become fluid but it will be a very soft paste. Still on the stove, add gelatine and whisk until smooth, it will be like a thick batter consistency. Whisk in another 1/4 of the custard until smooth, then remove from the stove and pour that mixture into the custard bowl. Whisk vigorously until smooth. Set aside to cool slightly while you whip the cream.
- Whisk in whipped cream – Beat the cream using an electric beater or stand mixer fitted with the whisk attachment until stiff peaks form (upright peaks). Put a quarter of the cream into the custard, then beat it in with the electric beater. Add remaining cream then beat again until smooth. Congratulations, you've made diplomate cream!
- Fridge 20 min only – Cover the bowl and refrigerate for 20 minutes so it firms up enough to pipe, but still creamy enough to scoop. Do not refrigerate longer else the gelatine will make the custard set. If you accidentally do this, gently warm to soften then refrigerate again.
Assemble the Mille-feuille
- Beat smooth – Remove the diplomate cream from the fridge. It will be like a block of soft rubber. Using an electric beater, beat on high for 30 seconds or until the custard is loosened and smooth. Transfer half the custard into a large piping bag and snip the tip of the bag so you have a 1cm / 0.4" round hole (or use a round nozzle).
- Layer 1 – Place one cooked pastry sheet on a cutting board. Pipe lengthways on the pastry sheet – I do 6 rows – to cover all the pastry with diplomate cream, aiming to use all the diplomate cream. Dip an offset spatula in warm water then gently smooth the top.
- Layer 2 – Place the second pastry sheet on top, press lightly. Fill the piping bag with the remaining diplomate cream and repeat the piping. Smooth the top again.
- Layer 3 – Gently place the iced pastry on top, icing facing up. Use any leftover diplomate cream to pipe along the short edges to fill any gaps in the custard and use the offset spatula to smooth it.
- Chill – Refrigerate at least 6 hours to set (I usually refrigerate overnight, to be sure).
- Slice – Use a sharp serrated knife to cut into 6 pieces, wiping the blade between each slice. If you can, wait another 30 minutes before eating as the custard is even nicer if it's not fridge-cold!
Recipe Notes:
Nutrition Information:
Life Of Jaffle
Jaffle and Charlie are struggling to understand why we’d make something so magnificent then put it on the floor and firmly tell them leave it!! I know, so mean! Look how unimpressed Charlie looks. 🤣 Meanwhile Jaffle still looks on hopefully!!

The Mille Feuille would take me three days to make, never mind a morning lol 😂
I’ m not a famous Chef like you guys 🙋🏻♀️ Looks delicious
Looks delicious & wondering if I can use Agar Agar instead of the gelatine powder?
I can’t wait to make this! Nagi, you are my Australian sister. I love your recipes and we both lost our dogs around the same time. My sister was laughing when you gave Jaffle a cheeseburger because I gave my new girl Gracie one the same day. Love all your work and passion! Thanks for inspiring us all!
Nagi and JB, this sounds exactly like I used to be able to get as a young adult living in Budapest, Hungary. It was also staple in my grandmother’ house. I have not had a decent vanilla slice since came to Australia back in the late 70’s. I love this country but vanilla slice here is not something I would recommend to anyone. I am not a natural baker, but will give it a go!
Just a suggestion – have you thought about using a tracing wheel to dock the pastry? You can pick one up from Spotlight for $4.00.
Where does Charlie the dog come in or have I missed something. He to looks a delight lol
Please provide instructions on how to eat this without getting it all over my shirt!
Once again YUM! Can this be made egg free or with an egg substitute? Family with egg allergies
I am commenting a second time, sorry… I need to know what brand of puff pastry you use? I have trouble finding one that I actually like… I make my own for la galette des rois but if you have a brand you can recommend JB, I would be so happy haha.
Thank you again for this recipe!
YUM! I WILL try this, perhaps not this month. But this will now be haunting my mind and I won’t be free ’till I make it! The best thing about France is : pastry and any dessert!!!!! (Swoon!)
Oof, I will have to give this a try but not today. Thanks for this, I have my daughter’s graduation coming up so I think that this will work.
Looks easy.
I prefer admirer from afar. My sister would, Angela, would be great at this.
OMG! That looks SO good! So happy to see the pastry done properly between trays. I’ll definitely be giving this a go!
Ah lets get real here, chocolate icing is so much more than vanilla, reverse the amounts on the decorative so its all chocolate with vanilla stripes. Or better still just ditch the vanilla and give it heaps of chocolate 😉
Merci JB !!
As a French expat in Oz, I have been looking everywhere for a good mille-feuille (and been disappointed so many times by “vanilla slices”). It is simply amazing to think I will be able to make my own thanks to your recipe! Please, keep sharing more recipes 🙏 et merci beaucoup !
Yea don’t be fooled mate, the snot block is Australian as it comes and king of vanilla desserts as long as you get a good one. Some just do not rate. Whenever I travel, I always do some advance searches for the bakery that has the best pies and snot blocks.
My goodness, this takes me back 60 years! When I was a teenager walking past a particular bakery on my way to Otahuhu College in Otahuhu, South Auckland (for the NZer’s reading), I was allowed to occasionally buy one of these take to school. They were as light as a feather and the custard definitely had gelatine in it. They were called Napoleon Squares back then. The custard filling was quite white though. I’ll have to find a reason to make some and have a taste test.
Actually, I think they were called Cream Napoleons. They definitely had a completely different taste to custard squares.
Ooh la la!! How wonderful. People cannot fathom my love of proper French pastries until they’ve tried proper French ones—then they get it. In France, we used to eat a box a day. So good. So merci beaucoup for this recipe. It looks perfect.
I did laugh at the “use pastry made with butter not oil.” I’m sorry—what? Who would use oil pastry. Non! JB must have grizzled to have to even write that caveat. Aloha and merci. Meg.
Thanks JB, your crepe recipe overcome my fear of making them, so armed with that experience I’ll give your Mille-Feuille a go.
Although in our low-brow household vanilla slices are known as “snot blocks” due to the unfortunate colour & consistency of the custard … I bet that would sound ever so much better in french!
Ooohhh I’m so excited to try this! Thank you JB, this is my favourite pastry and I’ve been missing out for too long.