Party food you can make ahead, freeze and can even be reheated in the microwave! Every piece of bread you pull out of Pull Apart Pizza Bread is like a mini pizza!
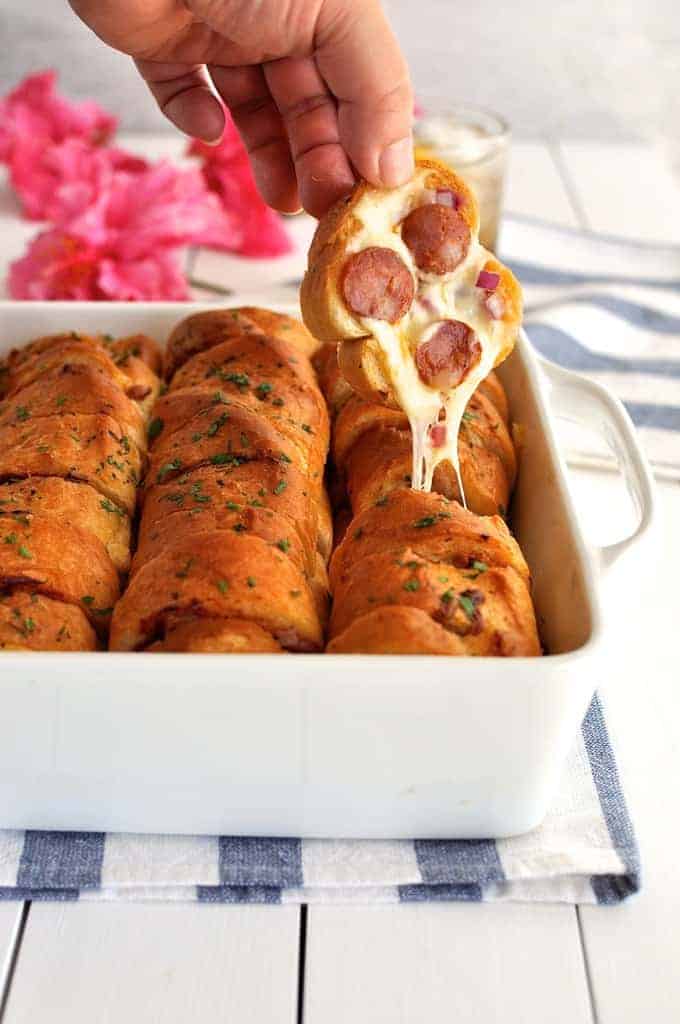
Have you ever seen such small, pudgy hands on a fully grown person? Well, I say “fully grown” but I must admit I’m rather vertically challenged. I like to say I’ve been standing in a hole since I was 7. 🙂
Having “Baby Hands” (which is what my friends call me!) is the bane of my life as a food blogger because I love doing “action shots”. I make a conscious effort to try to position my fingers to make them look more elongated in photos (I sort of stretch them out, and I try to get a flattering light on them), but sometimes I’m too flustered to remember.
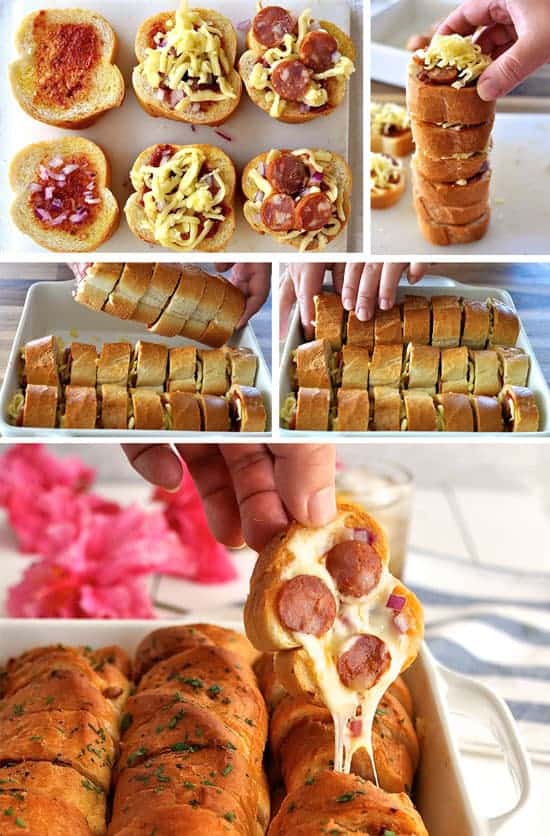
Like capturing this stretchy cheese shot while the cheese was still warm.
So there you have it. My Baby Hands on full display for you to see and have a giggle over.
“Every piece of bread you pull out is like a mini pizza!”
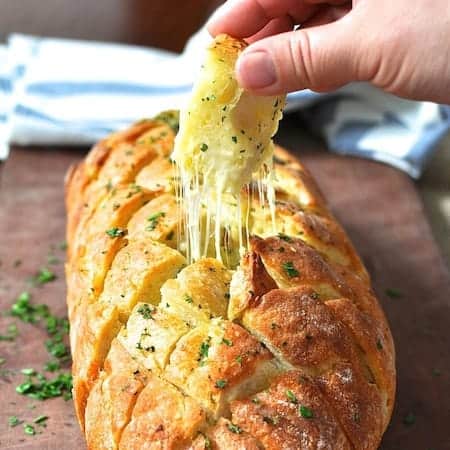
I seriously considered calling this Crack Bread #2. Because it was inspired by my Cheese and Garlic Crack Bread (“Crack Bread”) and is almost as addictive. I say almost, because I consider Crack Bread to be the original and the best!
Actually, the idea for this pizza version came about from a reader who asked if they could add pizza sauce to Crack Bread. I said it could definitely be done but thought it might be a bit hard to spread the sauce into all the cracks. Another reader suggested using a squeezer bottle which is a great idea!
I considered making a pizza version of Crack Bread but the concern I had was that because the bread used for Crack Bread is a full size loaf, the “cracks” are quite deep so most of the cheese and pepperoni would slide to the bottom.
Don’t get me wrong. It would still be delicious! But I thought that using baguettes / french sticks would be a little more practical for a pizza version. Every piece of bread is like a mini pizza!

As with Crack Bread, this reheats really well, not just in the oven, but also in the microwave! The crust stays nice and crunchy because it gets a thick crunchy crust when it is baked. A key tip is to make sure that you don’t swap out the mozzarella cheese. Because mozzarella re-melts well, unlike many other cheeses.
So you can assemble this, then refrigerate or freeze it and bake when ready. OR you can bake it then refrigerate or freeze it and bake or microwave it to reheat.
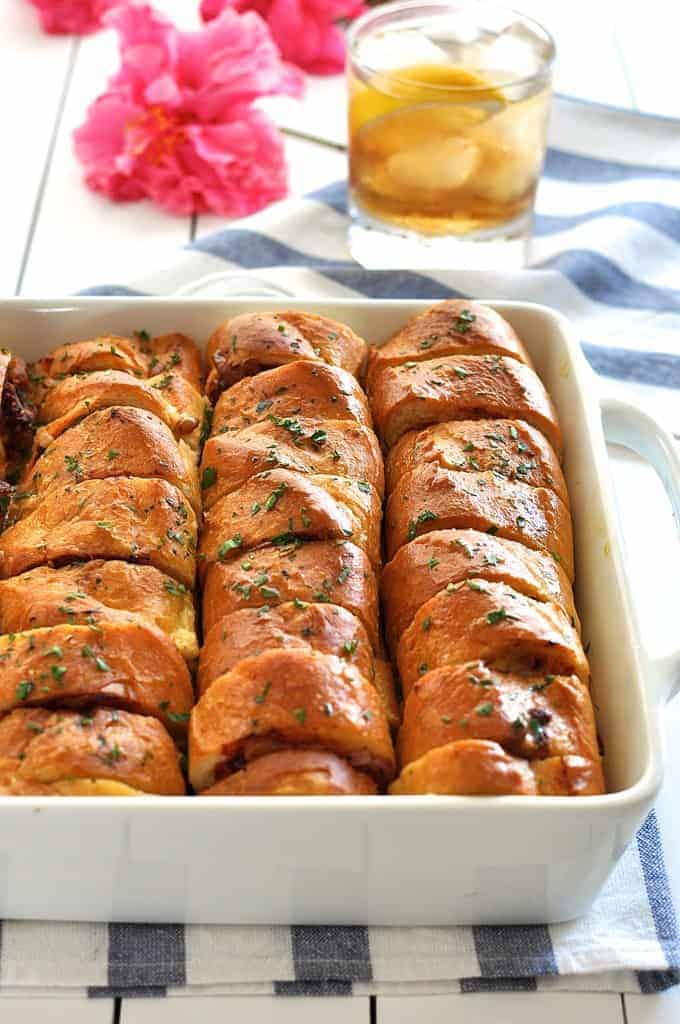
It looks innocent enough when you first pull it out of the oven….
….until you start getting stuck into it! (And there you go, my Baby Hands again. Go on, have another giggle!).
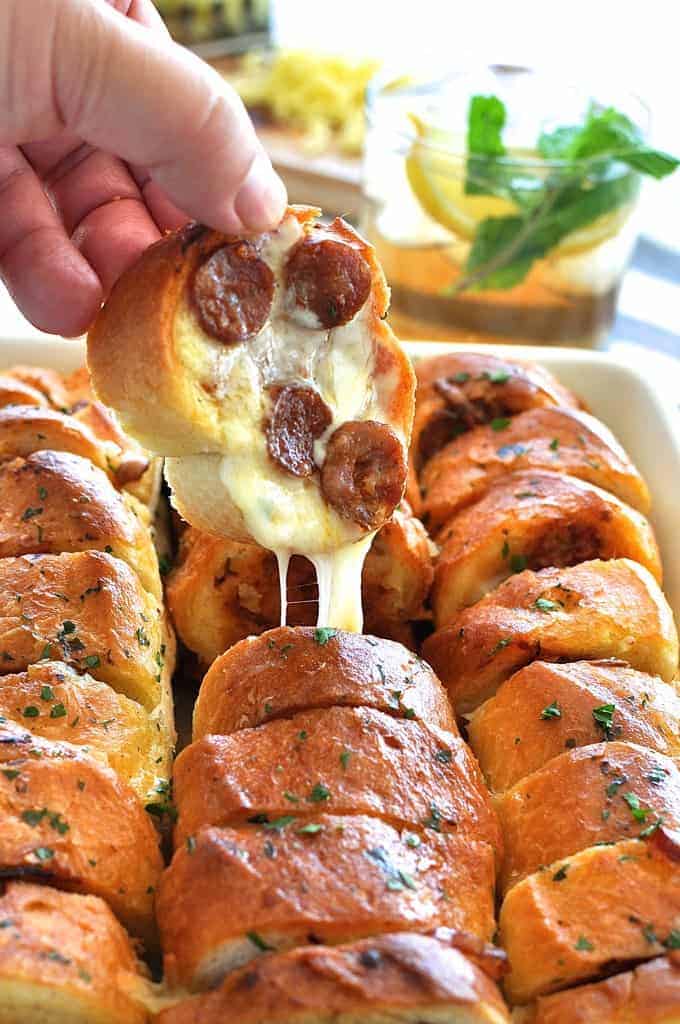
If Crack Bread is the head-honcho of the crack bread family, then this Pizza Pull Apart Bread must be his son!
So what do you think of Crack Bread‘s son? How does he compare to the original??
– Nagi
PS I made this bread numerous times to try to come up with the “best” way. I’ve included my thoughts on each way I tried below the recipe. 🙂
Everything Pizza!
And more party appetisers using bread!
Hungry for more? Subscribe to my newsletter and follow along on Facebook, Pinterest and Instagram for all of the latest updates.

Pull Apart Pizza Bread
Ingredients
- 1/3 cup salted butter
- 1 garlic clove , minced (or 2 if you like really garlicky)
- 1 baguette / french , 60cm / 2 feet long (or multiple short ones)
- 1/3 cup pizza sauce
- 1 1/4 to 1 1/2 cups grated mozzarella cheese (Notes 1 and 2)
- 4 oz / 120g pepperoni , sliced or diced (I used mini pepperoni)
- 1/4 red onion , finely diced (optional)
- 1/2 tbsp fresh parsley , finely diced (optional)
Instructions
- Preheat oven to 180C/350F.
- Melt butter with the garlic in it.
- Cut the french stick into 1.5 - 2 cm / 3/5" - 4/5" thick slices (about 25 slices, including ends) and lay them out on a work surface.
- Brush butter on each slice, ensuring to dab some garlic on. Use most but not all the butter.
- Spread a small dab of pizza sauce on each piece of bread, top with onion, cheese then pepperoni (in this order).
- Stack 6 or 7 pieces of bread on top of each other. Then pick up the stack (hold the top and bottom pieces) and place it in a 22cm / 8" square baking dish. (See photos below) (Note 3)
- Brush the top of the bread with the remaining butter.
- Cover with foil and bake for 15 minutes, or until cheese is mostly melted. Then remove the foil and bake for 10 minutes or until golden brown and crusty (to your liking).
- Remove from oven, sprinkle with parsley (if using) and serve immediately!
Recipe Notes:
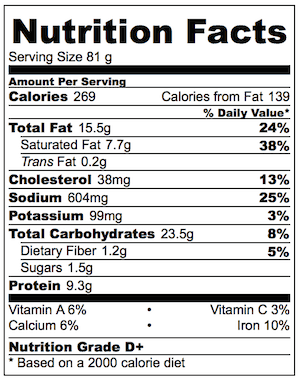
Nutrition Information:
Ways I tried making this:
-
“Hasselback” style (almost cutting through to base, drizzling butter, pizza sauce then stuffing it) – because the bread isn’t “compressed” together as much, the cheese pooled in the base and also the bread “bowed” because of the stuffing in the cracks. Didn’t work so great.
-
Using slices instead of grated cheese – easier and neater to assemble but the cheese tended to slide to the base and actually, I thought there was too much cheese so when pieces of bread were pulled out, the cheese and pepperoni would often remain in the baking dish (stuck to the dish or another piece of bread). Grated cheese gave a much better “spread” and light enough so it stays on (most) pieces of bread as you pull it out!
-
The order you put the toppings on matters! I found that putting pepperoni on top of the cheese instead of under it makes the cheese stick to the bread better (i.e. the side with the pizza sauce on it). It took me a few goes to figure that out. If you put pepperoni under the cheese, then quite often the cheese sticks to the adjacent piece of bread, taking the pepperoni with it. Still tastes great! But it means each slice doesn’t look like a mini pizza – you end up with pizza sauce on one side, and cheese + pepperoni on the other side! My other tip is to just scrape the pizza sauce on. Too much pizza sauce prevents the cheese from attaching to the bread.


We ordered pizza and made these instead of getting breadsticks. So easy and good!
Was so interested in recipe that would have never noticed your hands till you brought it up, made garlic bread was fantastic. Next one will be pizza bread when grandkids comes over.
Ha! Love hearing that Dave!
This looks amazing and I can’t wait to try it out!! One question… what do you put it in to freeze it if you want to prepare it and then freeze it to pull it out later to cook?
Hi Loni! I’d wrap in cling wrap then put it in a bag or container 🙂 N xx
This looks delicious. After reading through comments I think I’ll try with the Texas toast, layer them with the goodies, stack them in shorter stacks and stand them up on sprayed foil. Wrap tight then put them in the oven that way. Maybe put them in a roasting pan so the stacks don’t fall over. Going to have to try them this week. Thx.
Looking forward to hearing what you think! N x
OMG. I’ve just spend at least an hour looking and copying these recipes. How much do you weigh, LOL.
I feel like I’m gaining weight just reading them, ha ha ha. This is my new favorite recipe site. I can’t weight to start making some of these recipes. Thank you so much for taking the time to post them all. They all look FANTASTIC
My job is a hazard to my health!!!! But actually, while I do the occasional crazy recipe like this, most of my meals are < 500 calories. So I try to keep a balance!!! N x
Hello you awesome cook!
I have a tip to elongate your fingers, because I do it too!
NAILS.
Either grow your nails if they are strong enough and just keep them looking nice, or get fake ones.
I have naturally strong and long nails, its easy for me to grow.
Give them a nice nude nailpolish, they would look so pretty in the shots.
It makes your fingers look longer and slimmer.
(im not a girly girl at all but I do with my nails, hope it helps!
Btw im deffo trying this recipe xx
I used to do that in my corporate days!!!! It’s just that now that I’m in the kitchen most days, long nails get in the way! 🙁 PS So jealous of you and your slimmer-looking hands with pretty long nails!!! 🙂
Such an amazing blog! Will definitely look forward to trying this recipe!!!
Thank you Jade! Hope you do try it!
Super messy to prepare, but worked out perfectly! Great recipe!
YAY! I’m so glad you enjoyed it!! N x
Can’t wait to make this! One thing is holding me up. To my husband, it’s not pizza without mushrooms, but I’m concerned they might make the bread soggy when their liquid is cooked out of them. Have you tried this, or do you have any suggestions for adding them? Love your recipes, and your dainty hands are lovely and so very gifted.
Dainty hands?! No one has EVER called my hands dainty! Ha ha!! Mushrooms will work fabulously, the only thing is that to avoid the soggy problem – because you are right, it will make it a bit soggy – is to pan fry them quickly before hand. 🙂 Hope you try it!! Hubby will love it, promise 🙂 (WITH mushrooms!)
ABSOLUTELY AMAZING! Hands down a party stopper!
YES IT IS!! Hope you LOVE it!! 🙂
LOVE everything about the ppost, the stretchy cheese,pepperoni n the baby hands!! :* so so adorable!
definitely trying this out soon.. weekend with friends seems perfect!
Love,
HA HA!! The baby hands…..how I hate them!! 🙂
Hey Nagi!
When i saw this recipe i completely fell in love with it. But alas it was not meant to be, because i dont have an oven! 🙁
Is it possible to do it using a convection oven and tinfoil?
But if i use tinfoil will it go soggy? 🙁
I really need an oven…
Hi Fiona! I’m sorry, I’ve never tried it in a convection oven toaster. If yours has different heat levels – mine only has one and so mine would be too strong – then I think it could work! I would double wrap it in foil rather than putting it in a baking dish (which wouldn’t fit in my toaster oven!). Wish I could be of more help!
How about an outside grill? Use one burner for heat and keep the bread as far away as possible?.
Okay Thanks! 🙂
P.s id rather have your hands than mine… mine are all thin long and spidery, my hands sorta freak me out… your hands are perfect just the way they are! 🙂
You had me giggling right out loud!! No way, no day – enjoy your long elegant fingers and thank the higher power you have those instead of short pudgy ones! 🙂
This bread is so lovely. Made it as part of a starter for an informal dinner party, and it was such a hit! Easy to make but my guests were so impressed, and so they should be.
Thank you Nagi, I love your site and will use other recipes in the near future. Diane xx
Hi Diane! I am SO GLAD you enjoyed this bread! It’s fun, isn’t it?! People always ask me for this recipe!! I make it often because KIDS love it so much!
It’s in the oven!!!!!
Hoping you love it!! 🙂
This looks so delicious! My mouth was watering just looking at it. I plan to make this very soon, but I was wondering if it would be possible to make using frozen ready made garlic bread slices? Or would the moisture of the frozen bread not work for this? My family loves a local brand of frozen garlic bread, so I’m just wondering if I can substitute the baguette for their favorite.
Hi Katie – absolutely! That will work very well 🙂 And faster to make too!
Congrats, Nagi on such a FINE recipe and post! This pizza bread could go by any one of a number of names, but here at home we are calling it incredibly delicious, and just in time for Super Bowl weekend! Many thanks for this great idea!
Thanks very much Dan! I hope you get to try it soon! 🙂
I think that your recipes are wonderful…I am chef too… Just in my own kitchen. People with small hands handle themselves very well in the cooking dept…..I have small hands as well! LOL!
Hearing all these supportive comments about small hands is making me feel much better!! I agree about small hands being useful in the kitchen….many kitchen tools were NOT made for giant man hands!! Thanks Tia 🙂
Ok, this looks cool and all that. One question though… besides being able to fit more slices in the pan, how is this better than just making conventional French bread pizzas? It seems like it takes a lot of finesse to get the toppings to stay on correctly, so why not just lay them out with the toppings on top… you know? They’re called toppings fir a reason 😛
Hey Seth! Well, couple of things going for it compared to just laying out bread – 1) it’s more FUN than traditional! and 2) the toppings stay WARMER for LONGER than when they are just laid out! 🙂
Good answer. Besides it’s more fun to make.
23 carbs must be per slice. As a diabetic I can still enjoy 1 slice. LOL
Hi Gene – yes, it is per slice 🙂 And YES it is more fun to make – AND eat!! 🙂
Seriously wouldn’t of noticed your hands till you pointed it out. Can’t wait to try this
Thank you Shaunna! I have such a complex about them, I figure it’s better to laugh at my flaws than be shy about them – and besides, hey, gotta show off the food! 🙂
This looks gorgeous and I will be making it for sisters 18th birthday party! Can it be made without garlic butter for those that don’t like garlic?
Absolutely Laurie!! Plenty of flavour without garlic 🙂
Hi Nagi, this really looks awesome and am sure it tastes delicious as well. I would just like to say a huge “THANK YOU” to yourself, Mira, Helen Janette, Maggie, Kathleen & Meggan for such a wonderful giveaway. What a lovely start to the year!!!! I enjoy reading & trying all your recipes!!!!
Thank you Mayeshree! I’m so thrilled that one of my readers won!! Thank you for reading, and I am so glad you enjoy our recipes!! 🙂