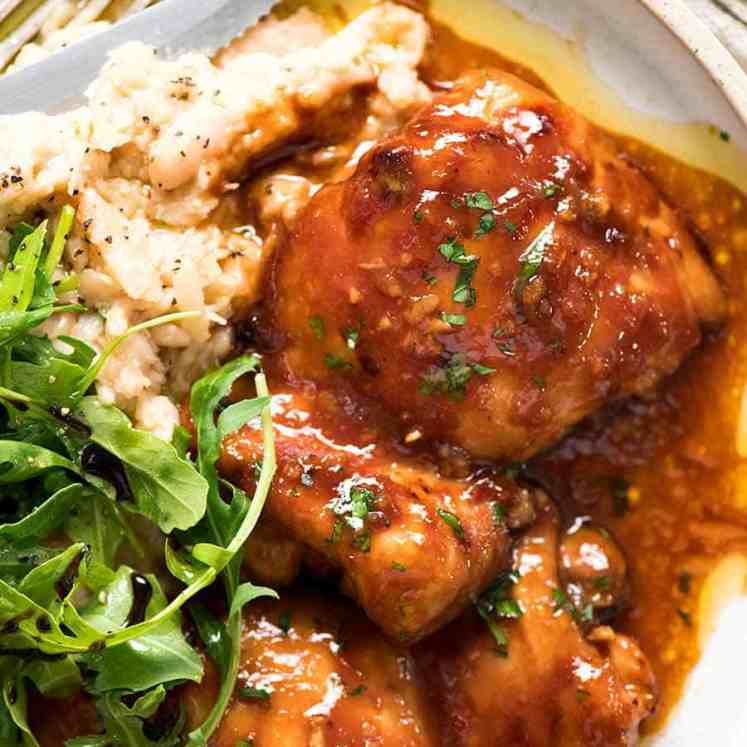
Honey Soy Baked Chicken is a good one for busy weeknights and lazy Sundays. Just mix up a simple honey-soy-garlic sauce, pour it over chicken and bake in the oven. Out comes a sweet, salty, sticky chicken dinner – just the sort of flavours everybody loves!
Quick-to-prepare baked chicken recipes like Balsamic Chicken, Honey Mustard Chicken and this sticky soy chicken are great back pocket recipes because they’re just made with pantry staples. Finger licking good!
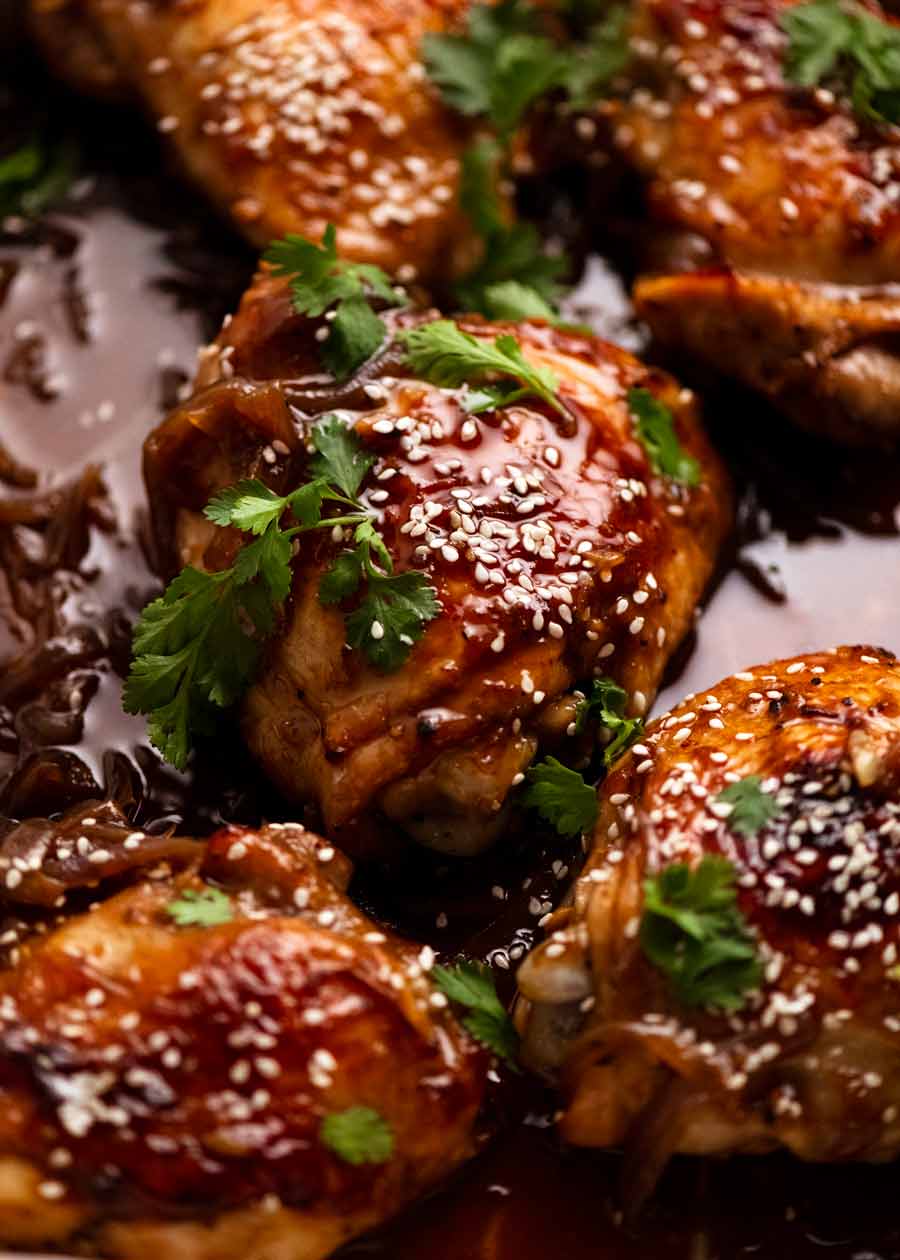
Easy Baked Honey Soy Chicken
The best way to make Honey Soy Chicken is to marinate it for 24 – 48 hours, followed by constant basting while cooking on the stove or BBQ and serving it with a glossy honey soy garlic sauce. And here’s the recipe for how to make it that way – if you have the time!
This recipe is the baked version that’s effortless, with completely hands-off cooking. It’s ever-so slightly adapted from this Baked Sticky Honey Soy Sesame Chicken by Claire from Sprinkles and Sprouts, a fellow Australian food blogger.
The glaze is perfect. Strong in flavour, but there’s not an overwhelming amount of it – just enough to coat the chicken which is all you need. And it’s because the glaze has such great flavour that you don’t even need to marinate the chicken.
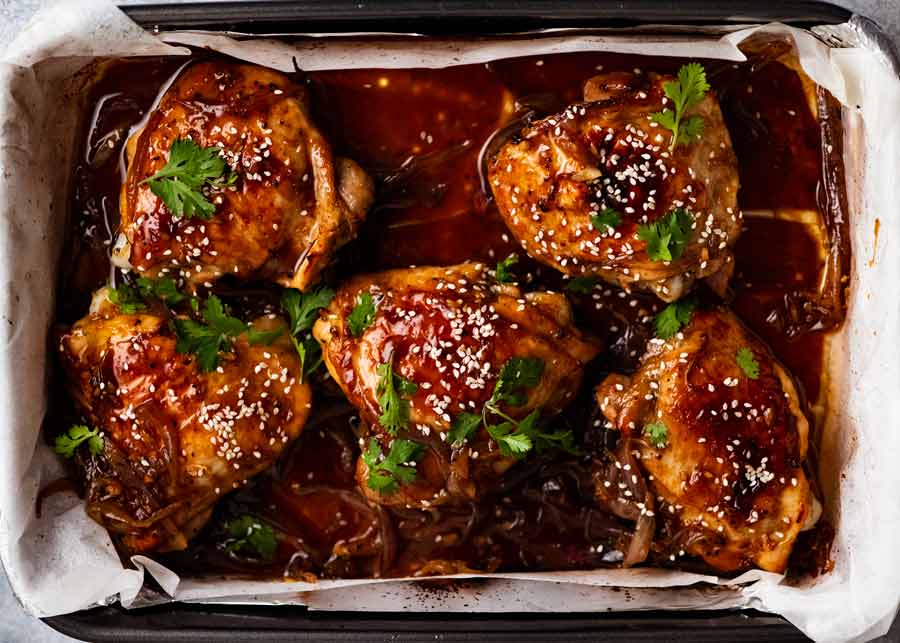
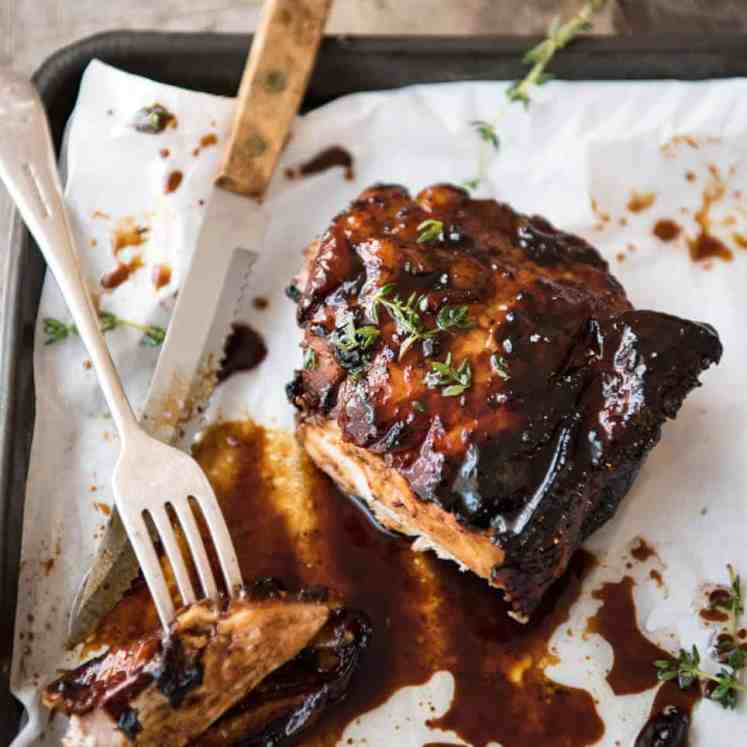
Just throw a handful of ingredients in a pan, bake it, and this is what you get:
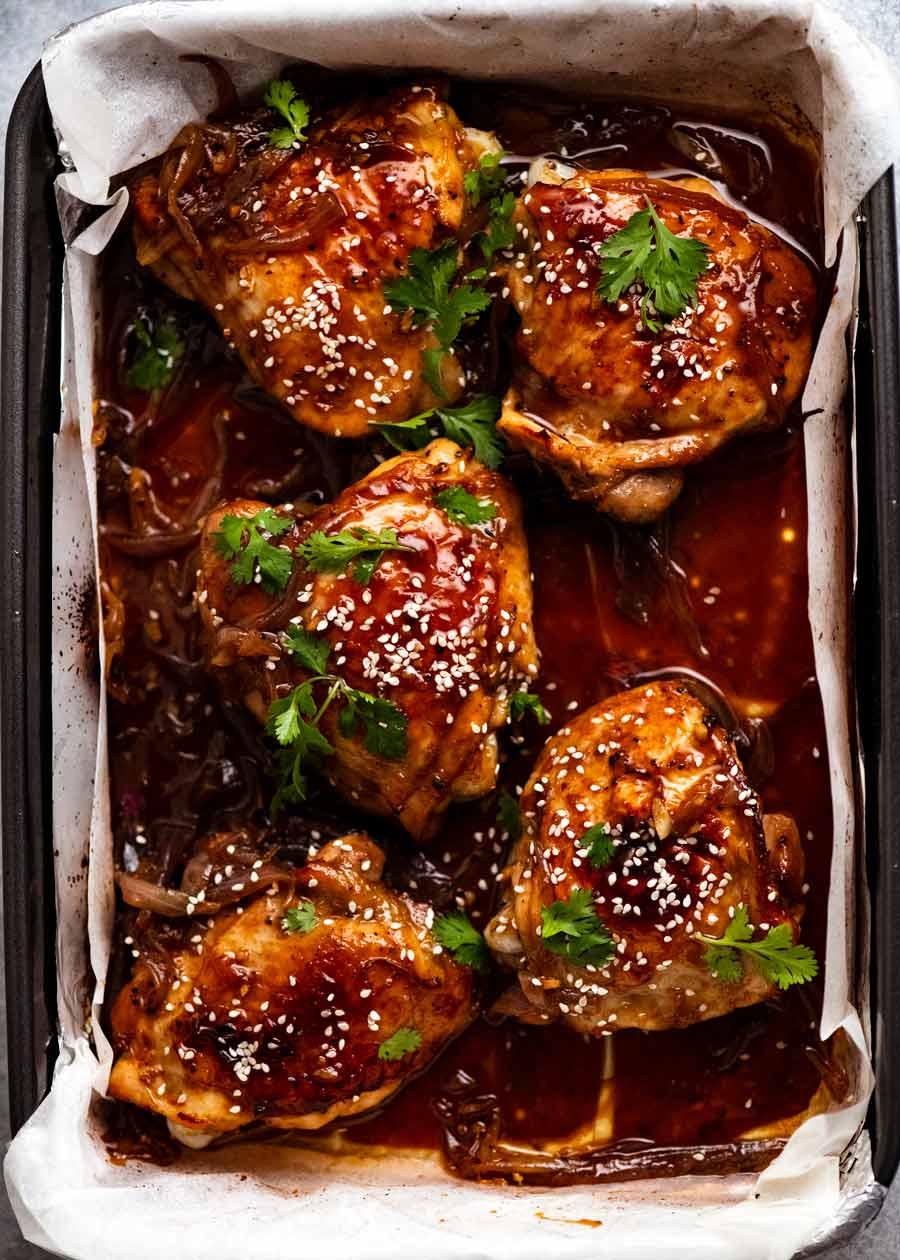
What you need to make Baked Honey Soy Chicken
Here’s what you need to make this dish:
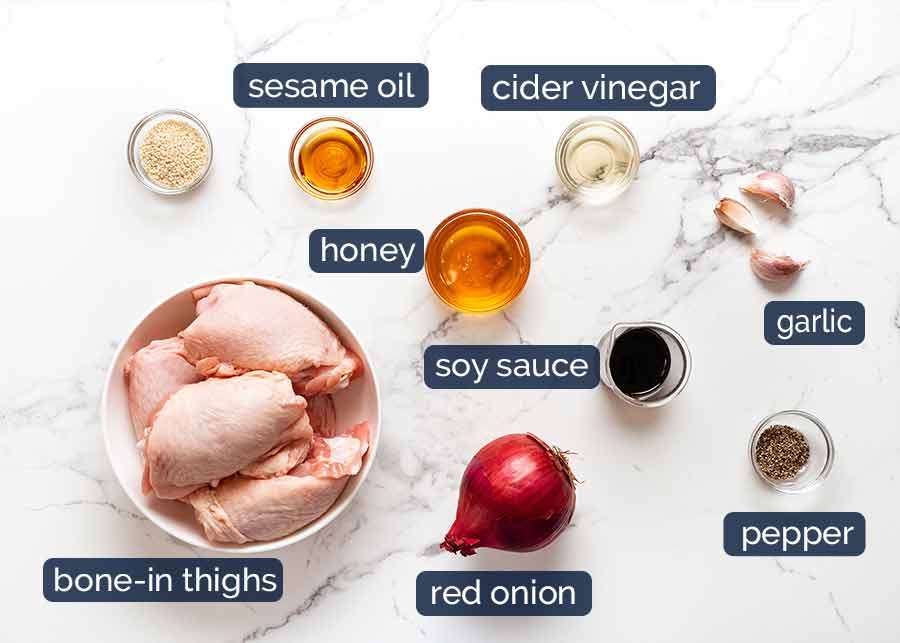
Chicken thighs – This recipe calls for bone-in, skin-on thighs so they can be in the oven for the 50 to 60 minutes required for the sauce to reduce down and caramelise.
It can also be made with drumsticks and chicken marylands without altering the recipe.
For boneless thighs and breasts, the chicken will be in the oven for substantially less time so I’d give the sauce a head start in the oven first to start reducing before adding the chicken.
Red onion – This is cut into wedges and used as the bed on which the chicken is baked. The onion adds an extra element of flavour into the sauce, much like the way so many savoury recipes start by sautéing onion.
Garlic – Flavour! We are a huge fan of garlic in (almost!) everything savoury!
Honey – This is the sweetness in the sauce which makes it a glaze that coats the chicken.
Soy sauce – This is the salt in the sauce. The recipe calls for all purpose soy sauce, but light soy sauce can be used too. DO NOT use dark soy sauce (flavour is far too intense) or sweet soy sauce like kecap manis (too sweet and too strong). See here for more on different soy sauces, and when you can interchange.
Cider vinegar – Essential to balance out the sweet and savoury.
Sesame oil – I adore sesame oil for the flavour it adds to anything it’s used in, whether a dressing (like this Asian Sesame Dressing) or into soups (like Hot & Sour Soup).
How to make Honey Soy Baked Chicken
Mix the sauce > pour over chicken > bake.
Anything else you need to know?? 😂 (Just joking!!)
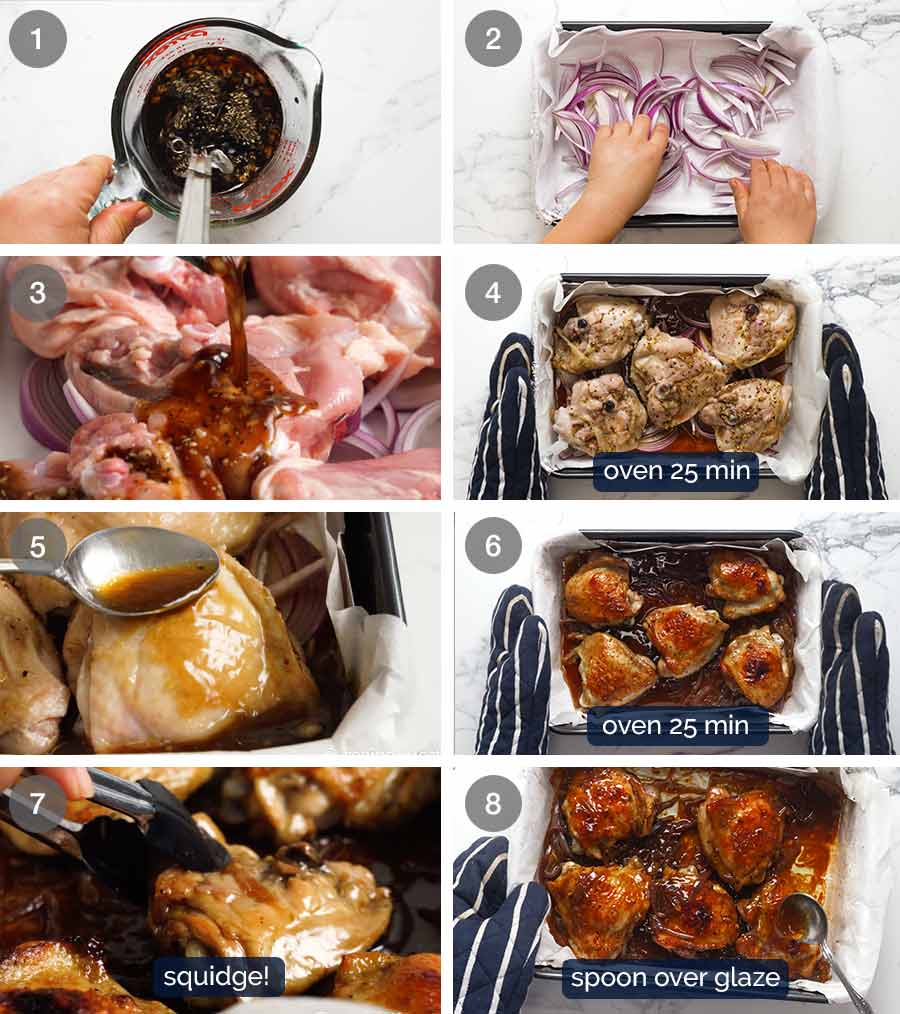
Sauce – Mix the honey, soy sauce, garlic, vinegar, sesame oil and pepper.
Line pan – Line a pan with both foil AND baking paper (parchment paper). This is a jammy glaze we have here, and if you just use baking paper, you’ll be suffering through a serious scrubbing session like I did!
Then spread the onion out in the pan.
Pour sauce over chicken – Top with chicken upside down (ie skin side down) and pour the sauce over. We start with the skin side down to get a bit of colour on the underside (because colour = flavour) otherwise the underside is just stewing in the sauce the whole time.
Bake 25 minutes – Bake the chicken for 25 minutes at 200°C / 390°F (180°C fan).
Turn and baste – Turn the chicken and spoon the pan juices over the chicken.
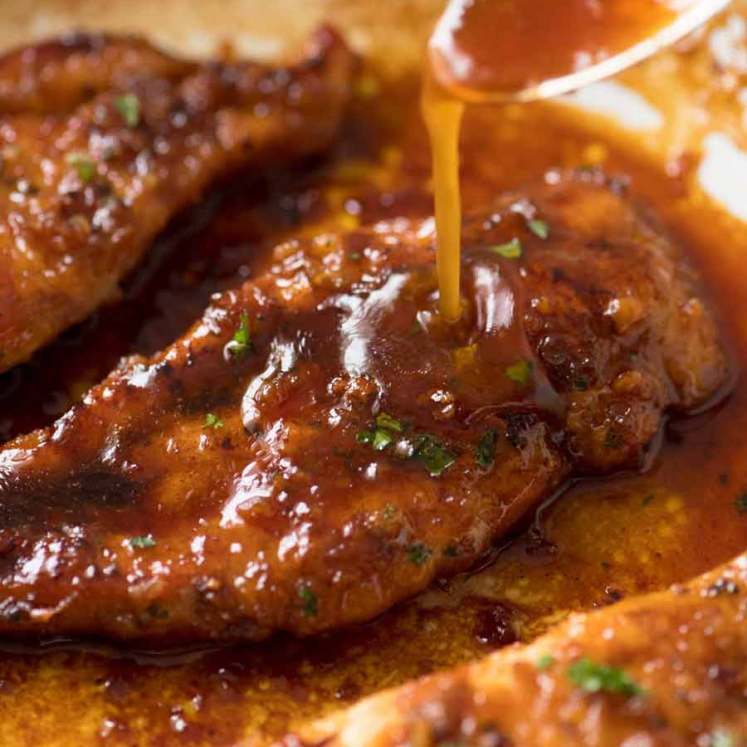
Bake 25 – 35 minutes – Bake for a further 25 to 35 minutes until the chicken is nicely browned. Hopefully, the sauce will be reduced down to a syrup and require no adjustment, but sometimes it will still be too thin. If it’s too thin, it’s an easy fix: remove chicken to a plate, pop pan back into oven. It will thicken quite quickly.
The reason it’s hard to say whether your sauce will be perfectly syrupy straight of the the oven is due to varying factors such as pan size (more space around chicken = faster reduction), juiciness of chicken (juicier = leaches more water = thins sauce more), if the chicken was frozen (tends to drop more water) and how evenly head circulates in the oven.
Squidge! Turn the chicken over and squidge the chicken skin into the syrupy sauce. And yes, “squidge” is a real word. See?

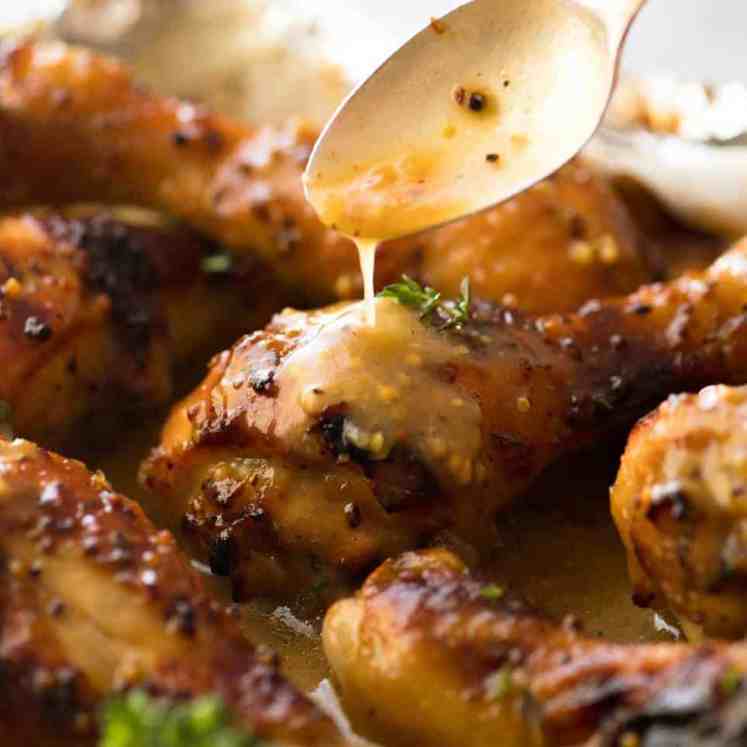
Baste – Spoon the sauce over the chicken to coat it more. Sprinkle with sesame seeds and something green if you want to pretty it up a touch (coriander/cilantro leaves, green onion, parsley, chives). And serve!
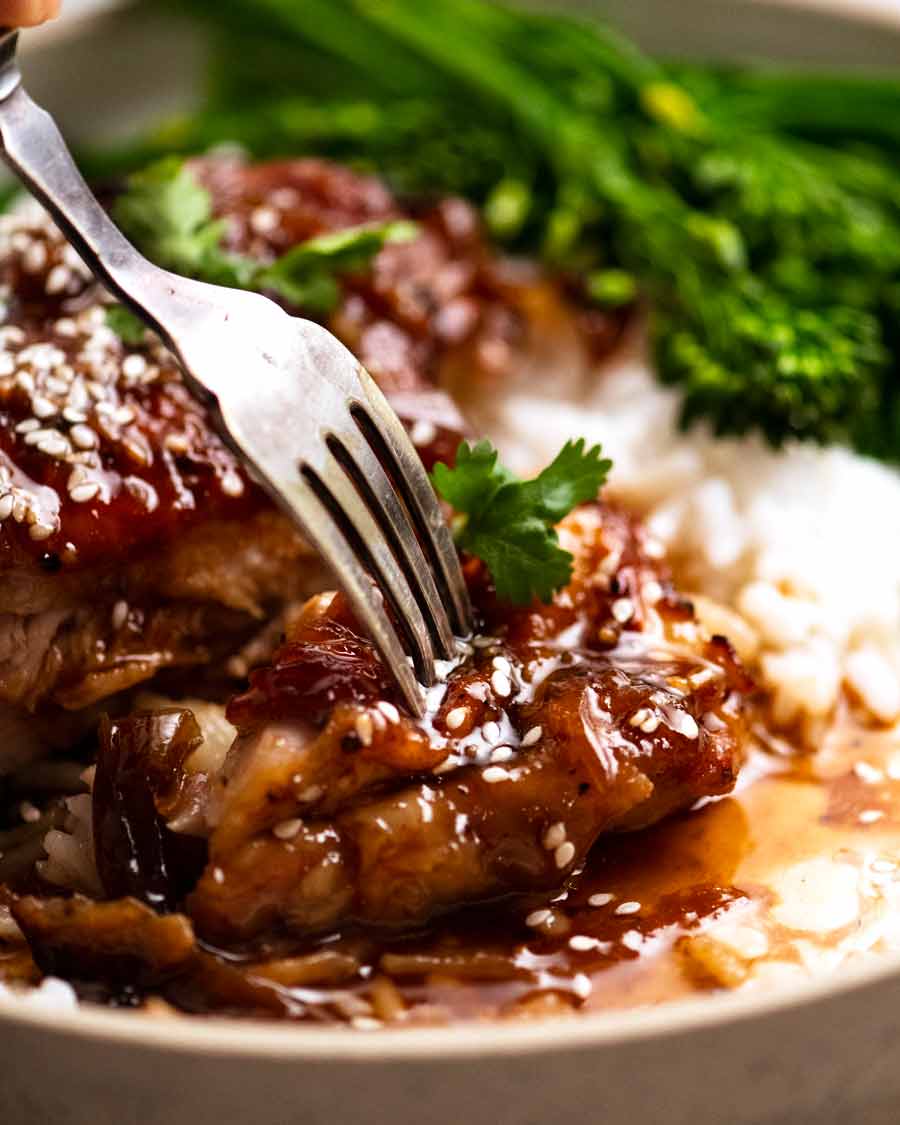
What to serve with Baked Honey Soy Chicken
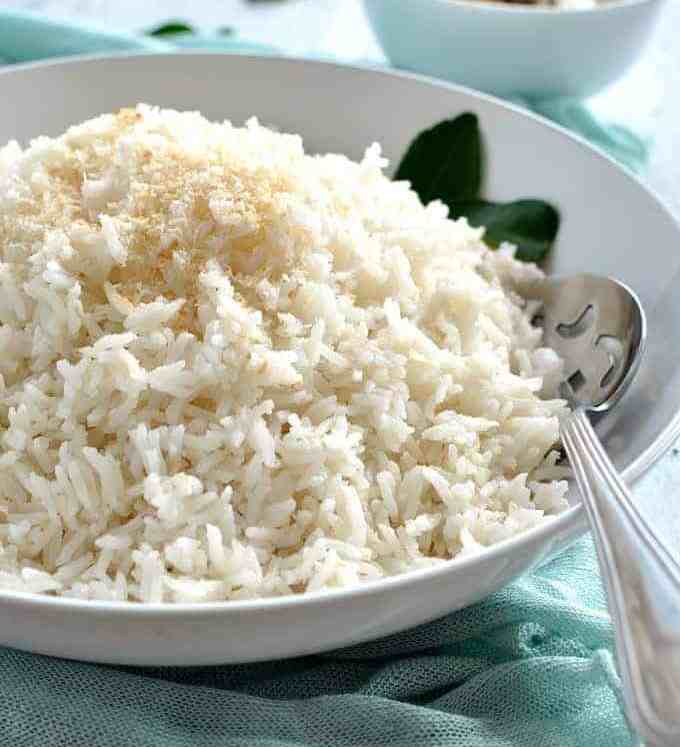
In the photo above, the chicken is pictured with plain rice. Even though there’s not a ton of sauce, what you do have has a fairly intense flavour so a little goes a long way when mixed through rice.
Choose from: white rice, jasmine, basmati, brown rice or (just in case you’re doing the low carb thing) try cauliflower rice. Actually, this is a good one for cauliflower rice because the sauce flavour is quite strong so it will disguise any remnant of cauliflower flavour!
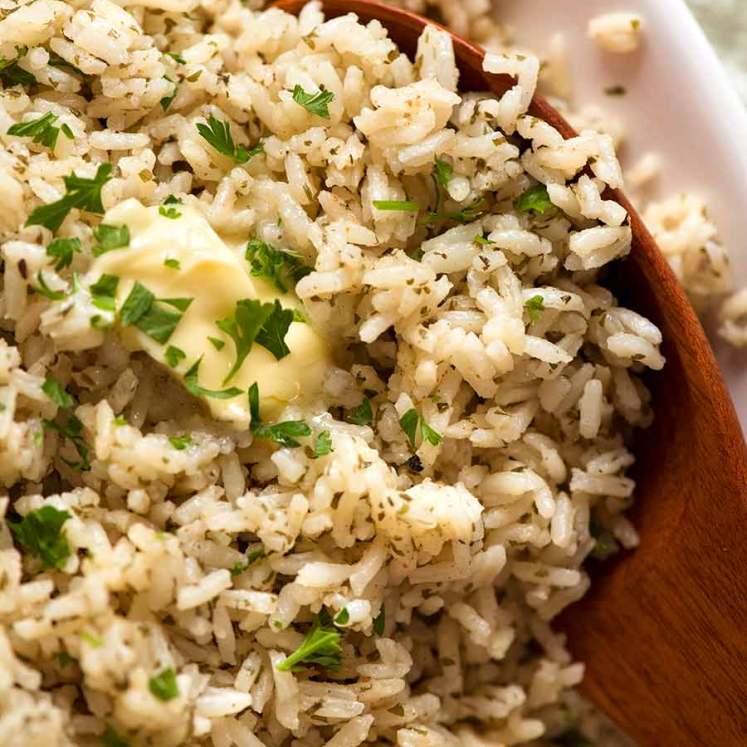
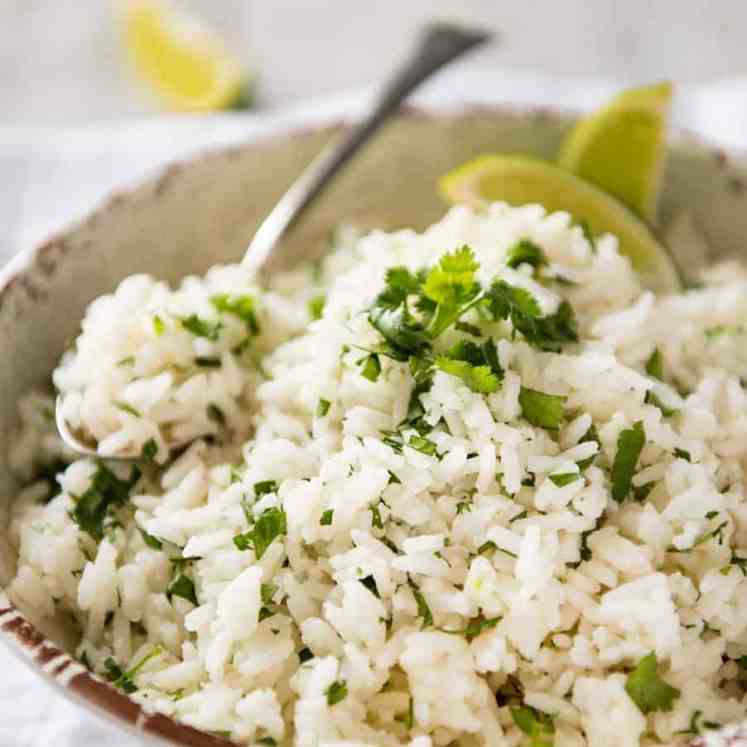
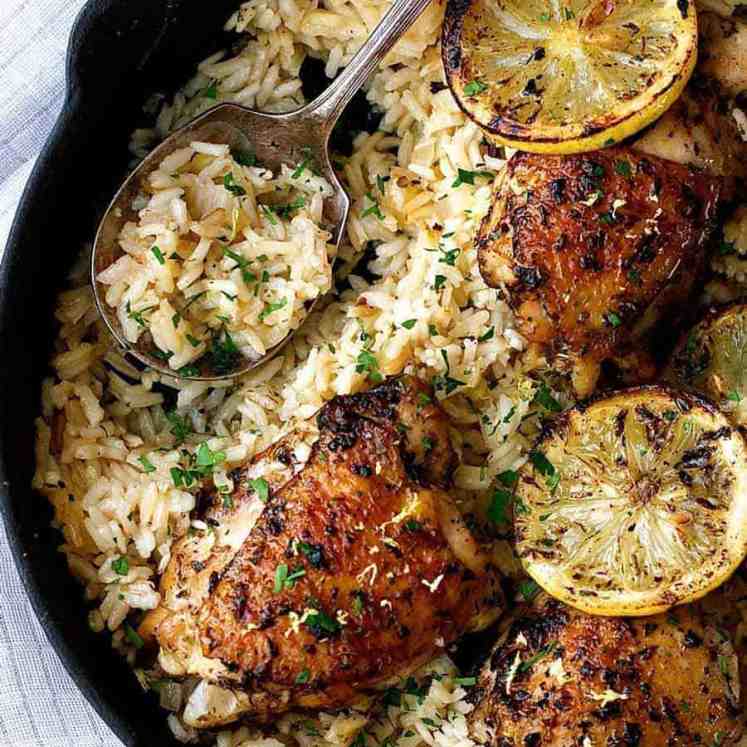
If you want to raise the bar, try it with a side of flavoured rice! Here are some options:
Love to know what you think if you try this chicken dish. And tell me what you served on the side! – Nagi x
Watch how to make it
Hungry for more? Subscribe to my newsletter and follow along on Facebook, Pinterest and Instagram for all of the latest updates.
Sticky Honey Soy Chicken – baked
Ingredients
- 1.2kg / 2.4lb bone-in, skin-on chicken thighs OR drumsticks (5 – 6 pieces) (Note 1)
- 1 red onion , peeled, cut into wedges
Glaze
- 3 cloves garlic , minced
- 3 tbsp honey
- 3 tbsp soy sauce (Note 2)
- 1 tbsp apple cider vinegar or ordinary white vinegar
- 1 tsp sesame oil
- 1/2 tsp black pepper
Garnish (optional)
- Sesame seeds
- Fresh coriander/cilantro leaves (or other green things like green onion, parsley, chives)
Instructions
- Preheat oven to 200°C/390°F (180°C fan).
- Line pan: Line a baking dish with foil then baking paper. The baking tray should fit the chicken comfortably, not too spaced apart (glaze will dry out), not too snug (glaze won't thicken enough). (Note 3)
- Glaze: Mix the Glaze ingredients together.
- Pour glaze over chicken: Place onion and chicken in the baking dish skin side down, then pour the Glaze over.
- Bake 50 – 60 minutes: Bake for 25 minutes, then turn and bake for a further 25 to 35 minutes, until the chicken is browned and the glaze is sticky. If the glaze is not syrupy, remove the chicken to a plate and put the pan back in for a few minutes (it will reduce quickly).
- Squidge/coat chicken – Turn chicken and squidge in the glaze, then also spoon it over.
- Serve! Serve with rice and steamed greens, sprinkled with sesame seeds and fresh cilantro/coriander leaves.
Recipe Notes:
Nutrition Information:
Recipe originally published in 2016. Update was long overdue with the addition of a new recipe video and most importantly, a Life of Dozer section!
More simple baked bone-in chicken thigh recipes
More mix > pour > bake recipes!
Life of Dozer
Excuuuuuse me! Some privacy please!!!






Soo tasty! Sauce didn’t reduce to sticky but I added 1 extra of everything for the glaze then finely sliced chilli and shredded spring onion to the mix pre baking….a massive hit in this house. Will definitely make again..and again!!
Hi, just wondering if you knew that Official Australian tablespoons are (weirdly) 20ml, while the rest of the world uses 15ml, so if you’ve taken this recipe from an Australian cook, the tbsp volumes might be off.
Yum, yum and yum! Loving all your recipes since discovering your site. Nagi, I wish you could convince the major supermarkets to stock parchment lined foil. Every time my husband goes to the UK, he brings me back this stuff and it’s brilliant! So popular there, so convenient, and fantastic for anything sticky and messy.
OMG YES! That’s so clever Georgia! PS Invent it, patent it, make a gazzilion dollars! 😂
Pretty darn yummy! 😁 Had a huge red onion waiting to be put to good use.
This was so good with some brown rice and broccoli.
Will definitely be making this again.
I’m so pleased you enjoyed this Sandra! Thank you for letting me know! N x
This has quickly become a weekly favourite in our house! No “tweaking” required! Thank you thank you thank you
My husband made this last night. Such an easy dinner to throw together and chicken thighs make it nearly fool proof! Thanks to our butcher (sarcasm), I did have to trim a great deal of extra skin from the thighs prior to cooking. Although we enjoyed this recipe and will definitely prepare it again, we found the flavor of the sauce to be quite mild. I don’t want to mess with the balanced flavor of the sauce by doctoring it, so will probably try marinating the chicken next time. REALLY appreciate these recipes!
Love hearing that May! Thanks for letting me know you enjoyed it! N xx
Fantastic recipe – kids loved it and it was a struggle to stop them licking the baking paper!
Will definitely be making this one again.
I’m so pleased to hear you enjoyed this Richard, thanks for letting me know! N x ❤️
My first time and it turned out rather well. Very good guide with the notes included. Definitely looking to try more of your recipes. Thanks!
I’m so pleased to hear you enjoyed this Noobster, thanks for letting me know! N x ❤️
Thanks for the delicious chicken!! This is my favourite recipe and a family favourite too! Xxx
I’m so pleased to hear that Lauren! Thank you for letting me know! N xx ❤️
can u use chicken legs
You sure can!
Your recipes are fantastic.
Do you have teraki chicken recipe?
James Linsey
Hi James! Here is the real deal Japanese way of making Teriyaki on my mother’s website! http://japan.recipetineats.com/teriyaki-chicken/
Made this last night. OMG I it’s soooo good. Thank you. We live in Trenton, Ontario,Canada. Love your blog and always look to see if momma writes or has comments. Have made several of your recipes – all good.
I tried this yesterday, but cooked it stove-top in a big cast iron frying pan. I also tenderized the thighs with my new Jaccard gadget before the marinade. Perfect results! I was a bit surprised by your nutrition facts, though, as the cholesterol content seems on the high side (69%), but there is no skin and minimal fat. Thanks for sharing these recipes with all of us, you bring so much pleasure to our lives.
My nutrition is always on the conservative side, I counted all the skin and it’s what came up 🙂 I love that you tenderised before marinading, fantastic! N xx
Thanks for trying my recipe Sherry! I’m so glad you liked it, thank you for the kind words. 🙂 Have a lovely weekend! N x
Nagi! I just flew in from Winnipeg (-36 C when I was there) & made this for the family. I know you know this but, there is a really great feeling about making a delicious dinner in almost no time, especially after a 5 hour airline delay. Thank you again for being awesome!
You simply ROCK Josie. Seriously, what a wonderful mother / wife you are, and an all round beautiful person. I’m sorry to hear about the airline delay but I’m glad you’re now home and safe (and hopefully WARM!!!) N xx
The flavor of the chicken was great but my sauce didn’t turn out jammy. I don’t think it was the pan that was the culprit: the chicken thighs gave off so much juice that I am pretty sure they were ‘injected with brine’ which some places do when they put the chicken on sale. I didn’t have time to reduce the (almost 2 cups!) liquid from the sauce but next time I will allow a little extra time to reduce the sauce either in the oven or on the stove in case I get the same overly juicy thighs.
BTW – my DH looked at the parchment paper and aluminum foil lining in the pan and asked in an astonished voice where I’d BOUGHT it!
Woah – 2 cups of liquid??!!! Hmm, I think you are right, it sounds like the chicken may have been injected with brine. N x
Can this be done in a slow cooker?
Sorry Carly, it needs to be done in an oven to get the caramelisation 🙂 N x
THIS WAS AMAZING. My fiance and I devoured it after I made it and its now been added to our “short-list” of favorite recipes. We used boneless, skinless chicken thighs, and the glaze wasn’t quite as jammy as I had hoped (probably a pan size issue), but we were able to pour it over the chicken and it soaked into the rice, making that even more delicious. Thank you so much! I can’t wait to explore what other recipes you have.
Thank you Katherine! And YES, I should probably add the recipe that if the sauce doesn’t reduce down as much then it’s FAB to pour over rice!!! 🙂
Let me just say how thrilled I was to find this recipe. It was after a Google search that I discovered it, and my goodness it did not disappoint! Now I will admit that like others, I was unable to achieve the sticky texture desired for the sauce in my initial baking process. However, it was a simple fix at the end to remove the fluid, place it in a small saute pan and reduce for about 5 minutes. I then rolled the cooked chicken in the sauce and voila. It was a major hit. I served it alongside steamed rice, and par steamed bean sprouts and sugar snap peas. NAGI, thank you so much for a beautiful dish that is now destined to become the latest entry into my repertoire of successful, healthy and flavor packed recipes!
Hi Lisa! Thank you so much for your feedback! I’ve added a little tip about the sticky sauce – it’s all about the pan size and ensuring there is enough space around the chicken for it to evaporate 🙂 When I made this at a friends in a smaller baking pan, what I did at the end was take the chicken out and stick the pan back in for 5 minutes which did the trick perfectly while the chicken was resting. Thank you again for your feedback!!! N x
Hi Nagi! Unfortunately my sauce didn’t turn out “jammy”. Broiling the sauce afterwards doesn’t work either.
I was able to reduce the sauce by putting the sauce in a large skillet over high heat and scraping it off the pan with a spatula. 🙂
Hi Lisa! I’m sorry to hear that. I had that problem when I jammed everything into a small baking dish. Did you use a small one??
I have made these before and they come out so delicious and unbelievable but was just wondering if you have tried marinating them overnight and if it makes a difference. I’m serving this for a big dinner and I want most of my prep done the night before.
Hi Maddy! I haven’t tried marinating these but it would need a slight recipe adjustment because juices from the chicken will thin the marinade so it will take longer to thicken and become sticky. 🙂
Can I make this sauce ahead of time and then just pour it on when I cook? How long can I keep the sauce out you think? I’m assuming it will be fine at room temp since all ingredients are room temp but I don’t know if it changes when the garlic gets minced and they are all mixed together. Thanks! It looks amazing though. Cant wait to try it.
Hi Nina! Yes you can make the sauce ahead. Even refrigerate it overnight, though bring it back to room temperature before using. Up to 24 hours should be fine! The only thing is the garlic – you don’t want to keep raw minced garlic for too long, but a day is perfectly fine! N x
Hi,
Another fab recipe. You are my go to for delicious, delicious food. I am spreading the word round all my friends! Can I just ask when you show oven temp in Celsius, is that fan oven or conventional please
Aww Jenny, you made MY DAY!!! I use a fan forced oven, I will update the recipe to make note of that. Thanks for the question! N x